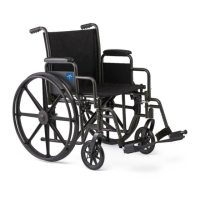
GPI109
Revision: 12/16/14
GPI109
Revision: 12/16/14
10 11
OPENING AND FOLDING THE WHEELCHAIR
TO OPEN THE CHAIR
1. Hold onto one armrest and push the opposite side to open the chair.
2. With your ngers and thumbs pointed towards the inside of the wheelchair, push downward on the seat to ensure the wheelchair is fully open.
Make sure the seat tubing rests completely inside the seat cradles (if equipped).
CAUTION: Pinch points exist. Keep hands and ngers away from any moving parts.
ALTERNATIVE METHOD TO OPEN THE CHAIR:
1. Tilt the chair to one side by grasping the hand grip or arm nearest to you.
2. With ngers pointed away from the seat rail, push down on one side of the seat frame / rail
until the wheelchair is fully open. Keep hands and ngers away from any moving parts.
RECLINER MODELS ONLY:
3. Secure the stabilizer bar (Fig 9). The bar should already be attached on the left side of the
chair. Push the notched part of the stabilizer bar ush with the stabilizer bar connection
on the right back cane and hand tighten the triangular thumb screw.
4. Keep push canes even at all times.
TO CLOSE / FOLD THE CHAIR
(Recliner Models Only) First, loosen the thumb screw on the right side of the stabilizing bar.
Swing the stabilizing bar down and to the left side.
1. Ensure the swing-away leg or footrests are in the forward and locked position.
2. Fold the footplates up to the vertical position.
3. Using both hands, grasp the center of the seat upholstery at the front and back edge and lift
the seat up.
ALTERNATIVE METHOD TO CLOSE THE CHAIR:
1. Ensure the swing-away leg or footrests are in the forward and locked position.
2. Fold the footplates up to the vertical position.
3. Grasp the handles/straps on each side of the seat.
4. Pull up until the chair is fully closed.
WHEEL LOCKS
Push forward toward front of chair to lock.
WHEEL LOCK WARNINGS
Check the wheel locks to ensure proper function before using the chair. Wheel locks should embed into the wheel at least
1/8”/3.2 mm when engaged.
Engage the wheel locks on both wheels before entering the chair, leaving the chair, leaning forward in the chair or while being
transported in an elevator or a wheelchair lift.
Check to make sure that the legrests do not unlock the wheel locks when they are swung back.
DO NOT use the wheel locks to stop the wheelchair from moving. Wheel locks are not brakes. DO NOT use the wheel locks to
slow your descent down an incline.
ADJUSTING SEAT HEIGHT TO HEMI-
HEIGHT
For models equipped with a dual axle position, the seat height can be
lowered.
1. Remove the nut which secures the wheel axle to the frame
(Fig 11). Turn the nut on the outside of the wheel
counterclockwise in order to unscrew the axle from the frame.
2. Reinsert the axle into the hemi-height hole of the frame (Fig.
10). Turn axle and wheel clockwise to secure axle to the frame.
3. Replace nut onto axle and secure tightly.
4. Adjust front casters into top mounting holes to accommodate the
new wheelchair height. Ensure that the wheelchair is level and
rolls smoothly.
ADJUSTING LEG OR FOOTREST LENGTH
AND POSITION
TO ADJUST THE LENGTH:
WARNING: The footrest should not be closer than 2.5”/6.3cm from the ground to ensure proper clearance.
1. Loosen the plunger by pulling out (Fig 12).
Fig.9
Stabalizer
Bar
Fig.10
Hemi Height
Standard
Height
Fig.11
2. Adjust the length of the leg or footrest assembly by pushing the push button and adjusting it properly.
The front rigging should not be lowered to the point that it causes pressure on the thighs at the front of the
seat upholstery.
3. Let go of the push button and engage the plunger by pushing down.
ADJUSTING THE POSITION OF THE LEGREST PAD
(FOR MODELS EQUIPPED WITH ELEVATING LEGRESTS)
TO EASILY ADJUST THE LEGREST PAD:
1. Swing the pad up to a vertical position.
2. Slide the pad up or down into the most comfortable slot. There are three positions to choose from (Fig 13).
3. If this is not sufcient, continue with the following to move the location of the legrest pad on the legrest
support assembly.
4. Loosen the bolt on the clamp around the pad assembly (Fig 14).
5. Raise or lower the legrest pad assembly as needed to provide maximum support of the thighs on the seat upholstery
INSTALLING / REMOVING THE SWING-AWAY LEGREST / FOOTREST RIGGINGS
TO INSTALL THE RIGGINGS:
1. Hold the legrest rigging to the side of the wheelchair.
2. Install the legrest assembly hinge plates onto the hinge pins of the frame (Fig 15/16).
3. Push the legrest rigging to the front until it locks securely into place. (Fig 17).
TO SWING-AWAY / REMOVE THE LEGREST ASSEMBLY:
1. Fold the footplate up to the vertical position.
2. Release the legrest lock by pushing on the legrest lever (Fig. 18/19).
3. Swing the legrest outward and to the side (Fig. 20).
4.
To remove the legrest, lift up on the assembly to remove the legrest off the hinge pins.
ELEVATING THE LEGREST (for models equipped with legrest)
1. To elevate the legrest assembly, simply lift up on the legrest assembly by the footplate to the desired height or position.
2. Release the legrest and it will automatically lock in place due to the ratchet rod.
3. To lower the legrest assembly, hold onto it by the footplate and push out on the legrest lever.
4. Slowly lower the legrest until the desired position is reached.
RECLINER OPERATION (EXCEL RECLINER MODELS ONLY)
WARNINGS:
• ALWAYS make sure the wheelchair is stable BEFORE using the recliner.
• Anti-tippers MUST be attached at all times. Ensure both anti-tippers are adjusted to the same height.
• Ensure the stabilizer bar is attached and secured BEFORE using the Excel Recliner.
• Use good body mechanics! Be prepared to support the weight of the occupant when assisting with reclining / inclining the back.
• The occupant must never be left unattended while the wheelchair is reclined.
Fig.12
Plunger, Push
Button
Fig.13
3 slots
for simple
adjustment
Fig.14
Legrest pad bolt and clamp
Fig.15
Fig.16
Fig.17
Hinge
Pins
Fig.18 Fig.19 Fig.20

 Loading...
