SD-6029, Rev 2
WARNING – This information contains technical data
subject to the EAR: ECCN: EAR99
Page 5 of 50
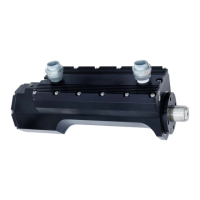
1 Installing the ACT1000/ACT1000HF
1.1 Before beginning
Inspection
The ACT1000/ACT1000HF should be inspected immediately after unpacking. Check for dings
or dents or any other obvious signs of damage. Check for any damage to the threads of the
conduit unions and that the power and signal wires are in good condition.
In the event that any damage is detected, contact PECC for instructions about how to
proceed.
Note: Retain the actuator’s original shipping container. In the event of future transportation
requirements, this container will minimize any potential damage during shipment.
Device identification nameplate
Figures 1-1 and 1-2 are representations of the identification nameplates affixed to the
ACT1000/ACT1000HF devices. The nameplate is attached to the electronics assembly
heatsink via six (6) stainless steel pan head screws. The screws are held in place via
appropriate installation torque and thread locking compound.
Applicable certification markings and certificate numbers are listed along with warning
information regarding exposure of live circuits to potentially explosive atmospheres. A table of
available wire connections is also provided to aid in product installation.
In addition, device specific information includes the following:
• Customer part number
• Manufacturer part number and revision
• Serial number
• Manufacture date
• Model number
• Applicable refurbishment history
 Loading...