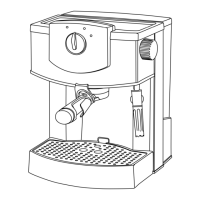
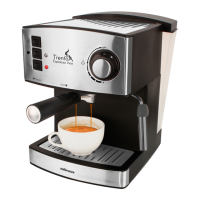
Fig. 1 Milk frother assembly
1.1 Frothing grip
1.2 Frothing wand
1.3 Removable frothing sleeve
INSTRUCTIONS FOR USE
BEFORE USE:
- Make sure that all the product’s packaging has
been removed.
- Before using this product for the rst time, it is
advisable to test it only with water.
- Before using the product for the rst time, clean
the parts that will come into contact with food in
the manner described in the cleaning section.
- Before connecting the machine, check that ON/
OFF button (F) is not pressed, and Espresso/
Steam Control Knob (D) is in central position 0
BEFORE FIRST USE (PRIMING THE
CIRCUIT):
- This simple operation ensures optimum dis-
pensing and must be carried out:
- When rst starting.
- When the machine has been out of use for a
long time (1 or 2 weeks).
- When the tank has run out of water.
- Fill the receptacle taking care to observe the
MAX level.
- Connect the appliance to the mains.
- Press the on/off switch (F) to ON position. The
(E) pilot lights will come ashing on in red and
blue colour by turns.
- Without tting the lter holder (H) (or with the
lter holder tted, but without coffee), place a
recipient under the position of the coffee cup.
- Select the coffee position by rotating the (D)
control to this position.
- Press any buttons (E) to pump a small amount
of water.
- Water will exit through the lterholder position.
Wait until the water stops exiting automatically.
- The pilots of buttons (E) will be illuminated in
blue when preheating nished.
- To nish serving, rotate the selection control
(D) to the central position 0.
- This will complete the priming operation.
FILLING WITH WATER:
- The tank must be lled with water before turn-
ing the appliance on.
- Remove the tank from the appliance, with a
slight backward rotation
- Fill the tank taking care to observe the MAX
level. Do not leave the water beneath MIN
level.
- Replace the tank in its housing, ensuring that
it is well tted by the water tank buckle on the
back of the unit.
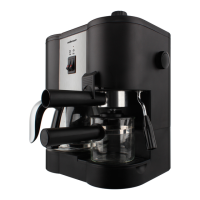
FILLING COFFEE:
- Remove the lter holder (H)
- Position the selected ground coffee lter (J or
K) in the lter holder
- Attention
- Filter extraction
- The lterholder includes a spring inside, whose
function is to avoid the fall of the sieve when
throwing the used coffee. That spring produces
a lateral tightening on the lter
- Due to this tightening, to remove the lter for
exchange or cleaning, it may be necessary to
use a tool.
- We recommend using the edge of the small
lter to pop out the double cup lter, a round-
tipped knife or a tip of a teaspoon, so that it
can be placed between the upper edge of the
lterholder and the bottom of the sieve wing
and make a little twist.
- Insert the desired ground coffee lter (J or K)
into the lter holder.
- We recommend using natural toast coffee,
as using some roasted coffee may affect the
operation of the machine.
- Fill the chosen removable lter (1 or 2 cups)
with ground coffee (6-7 gr per cup to be pre-
pared).
- Using measuring spoon (I): for 1 coffee, put
1 spoonful and for 2 coffees, put in 2 spoonfuls.
- Next lightly press down the ground coffee with
the back of the spoon.
- Before tting the lter holder in the coffee-mak-
er assembly, turn the ladle-holder (O) back-
wards.
- Fit the lter holder in the appliance once more.
- Position the lter holder in the coffee assem-
bly by inserting the assembly downwards and
aligning the handle with the position “open