11
SETTING THE CLOCK
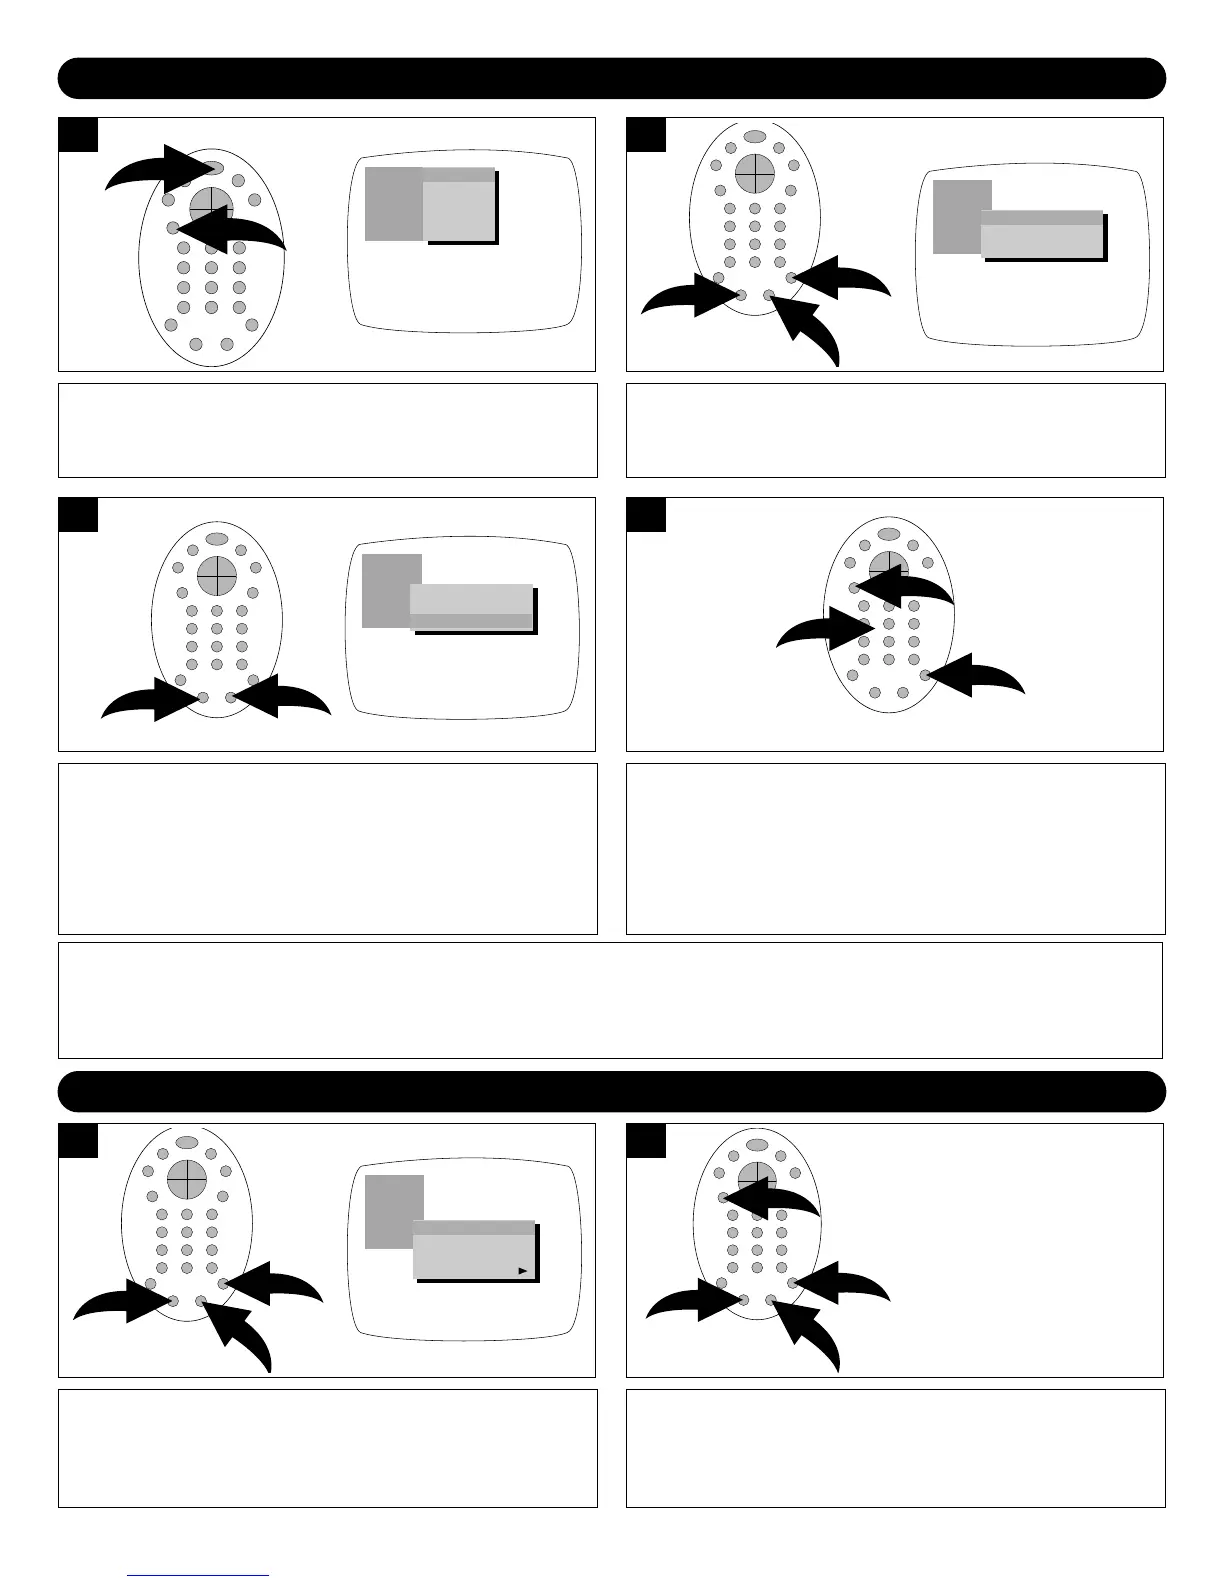
Press the Power button ❶ to turn on the TV. Press the
MENU button ❷; the MENU screen will appear.
PICTURE
P. LOCK
TIMER
PRESET
EXTRA
CONTRAST
BRIGHT
COLOR
TINT
SHARPNESS
Press the Navigation ()/(◗) buttons ❶ to select TIMER,
and then the Navigation (❖) button ❷ to confirm.
PICTURE
P. LOCK
TIMER
PRESET
EXTRA
ON TIMER - - : - - AM
ON CH C11
CLOCK 9:58AM
Press the Navigation ()/(◗) buttons to select CLOCK.
NOTE: If the time has not been set, it will only allow you to
select CLOCK.
PICTURE
P. LOCK
TIMER
PRESET
EXTRA
ON TIMER - - : - - AM
ON CH C11
CLOCK 9:58AM
3
Press the Navigation (❖) buttons ❶ to set the AM/PM
option. Press the Direct Channel Selection buttons ❷ to
set the actual time (four digits must be pressed). For
example, to set the time to 9:48, press “0”, “9”, “4”, “8”.
Press the MENU button twice ❸ to exit the menu.
1
3
2
4
FAQ:
I set the clock previously, but now it is not set, why?
If there is a power outage, or if your unit was unplugged, you may have to reset the time. Simply repeat the steps above.
SETTING THE AIR/CABLE MENU OPTION
Access the Menu screen as described in step 1 above.
Press the Navigation ()/(◗) buttons ❶ to select the
PRESET icon, and then the Navigation (❖) button ❷ to
confirm.
PICTURE
P. LOCK
TIMER
PRESET
EXTRA
CH NO. C8
CH ADDED
ANTENNA CABLE
AUTO PROGRAM
Press the Navigation ()/(◗) buttons ❶ to select
ANTENNA and then the Navigation (❖) button ❷ to set AIR
or CABLE. Press the MENU button ❸ twice to exit the
menu.
2
OPTIONS
AIR: If using a
VHF/UHF
antenna.
CABLE: If using Cable
TV.
 Loading...