85-03-01136 ML39 Page 54
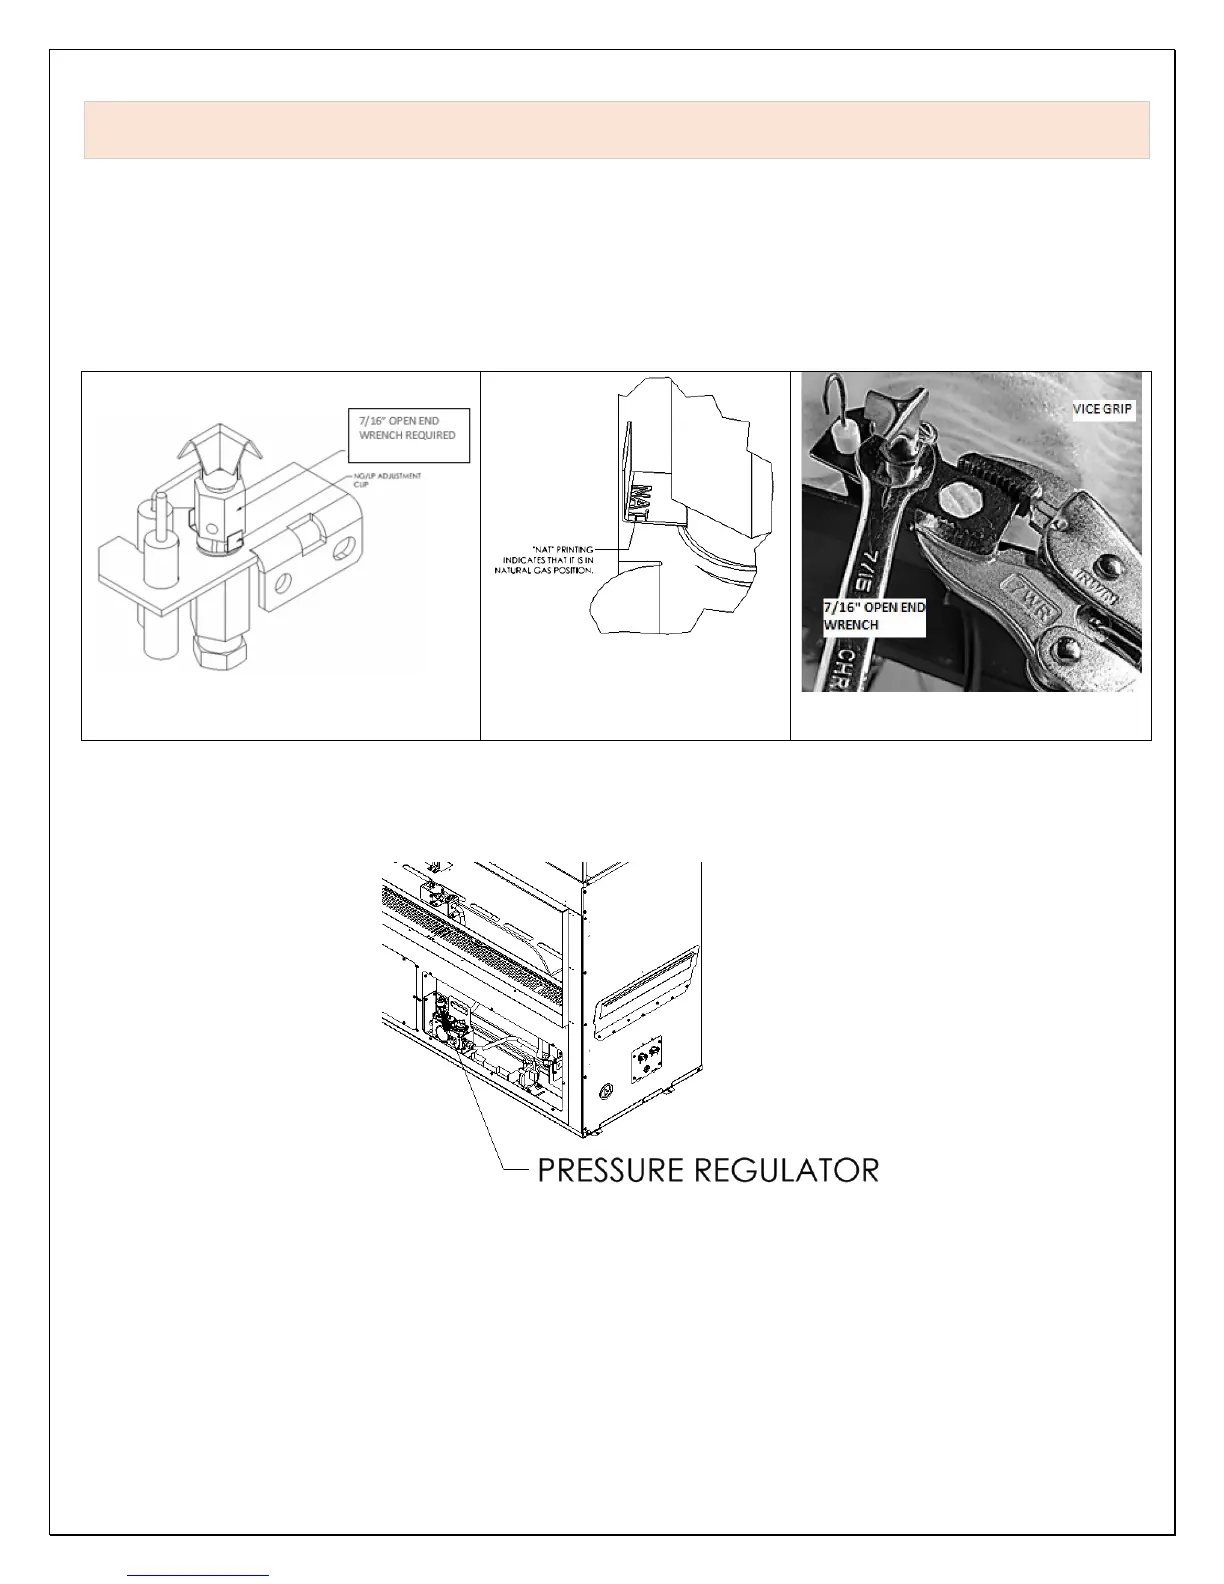
CAUTION: Always use one 7/16” open end wrench and one large pliers or vice grips tool to hold, loosen and
tighten pilot hood base to prevent damage to pilot mount bracket.
7. While holding the pilot base body with large vice grips tightly, loosen the pilot’s hex-shaped base using a 7/16” open end
wrench. Rotate counter clock-wise ¼ turn to loosen.
8. Pilot arrives from the factory set for natural gas. Push natural gas/LP adjustment clip inward all the way to set it for LP. See
detail view, below. If you see “NAT” printing on the adjustment clip, this indicates that the pilot is set to burn natural gas. Push
the clip in so that “NAT” is not visible.
9. Tighten down hex-shaped base of pilot using a 7/16” open end wrench.
10. After the pilot is converted reinstall the burner and floorplate. Remember to be careful when placing the floor plate around the
pilot to avoid damaging the pilot.
11. Next, the pressure regulator will be changed. Access the pressure regulator through the right-side, front access panel that was
removed. If needed the heat shield that sits above the gas valve can be removed. The heat shield is held on with one screw on
the left side of the opening.
12. Shut off the gas supply to the valve and shut down the electric supply.
Note: Be careful when removing or tightening the screw on the back of the pressure regulator. The screw location is difficult
to access, and care must be taken to ensure a proper seal when tightened.