Fitting the Side Panel and Obscuring
Trims
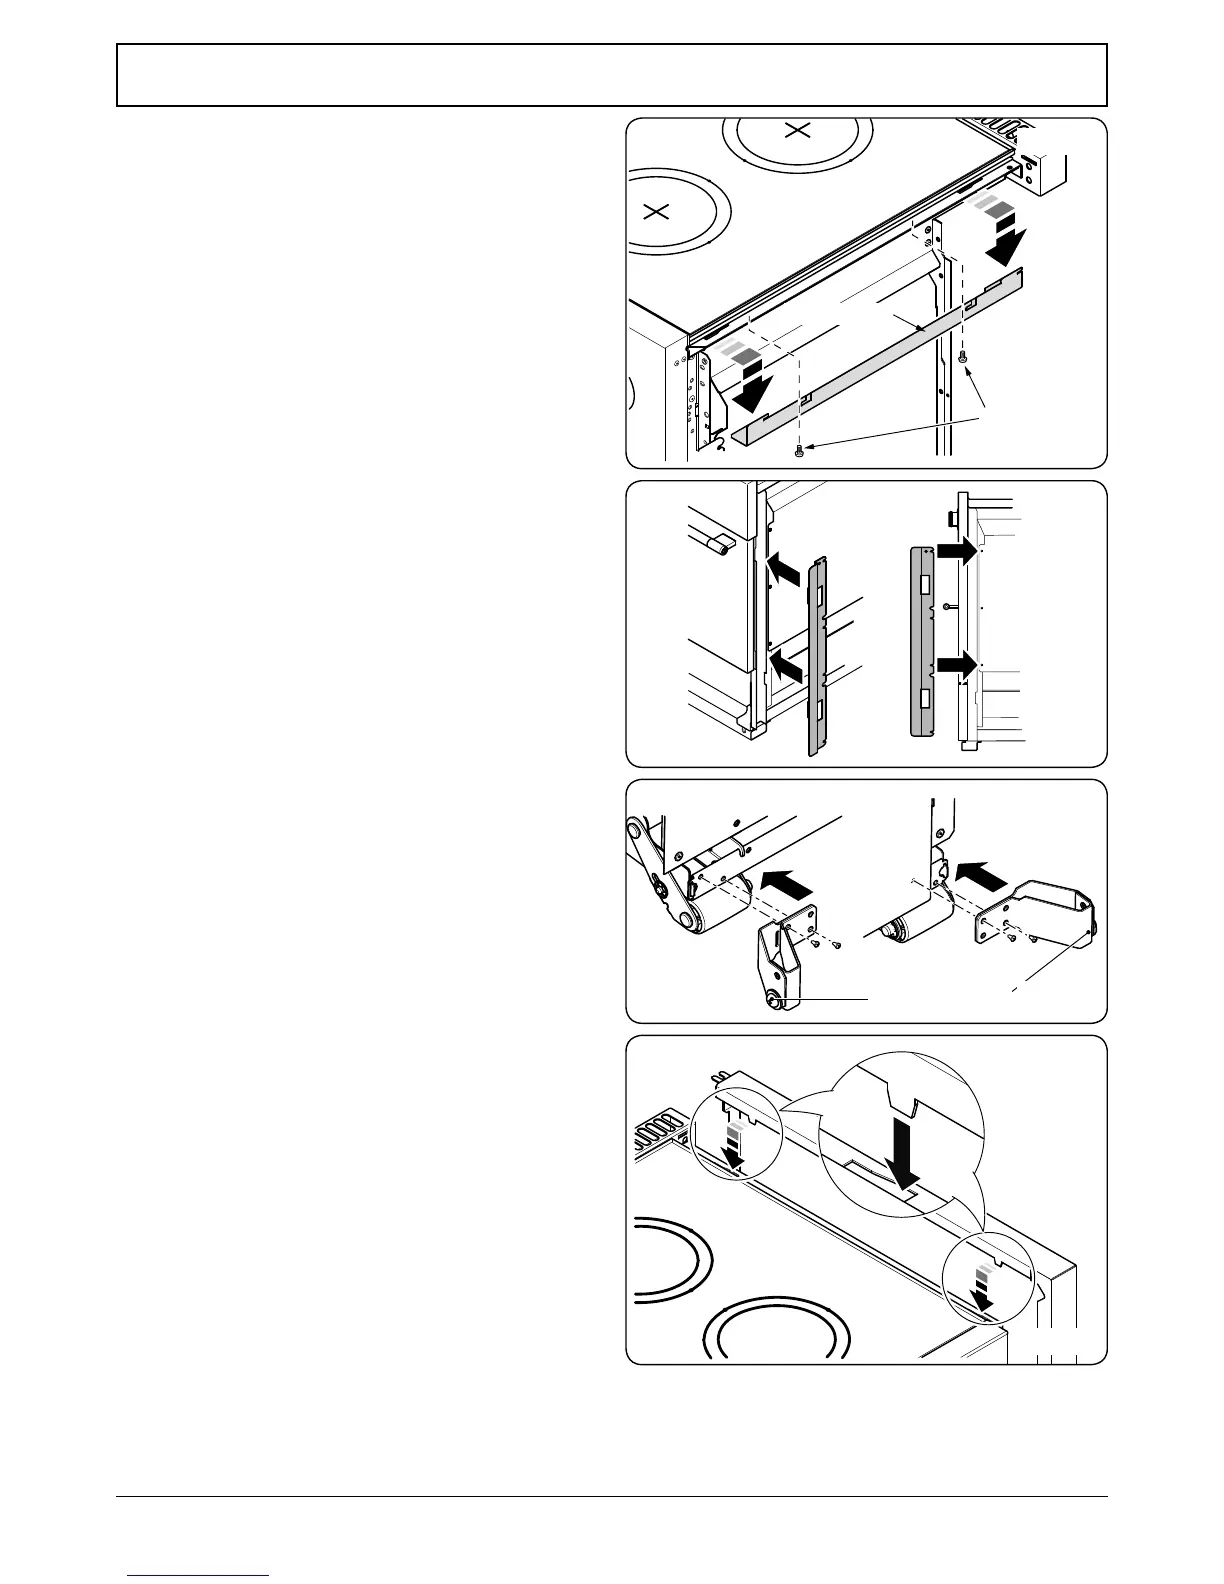
IMPORTANT: Before tting the side panels you must rst
remove the transit brackets. Loosen the two screws in the
underside of the transit bracket (Fig.7-9). Slide the bracket
forwards and remove.
Fitting the Obscuring Trims
Located near the front on each side of the cooker there are
three screws – loosen the top and bottom screws (Fig.7-10).
Slide the trim onto the screws and tighten to secure.
Fitting the Side Panels
Fit the two side panel retaining brackets onto the rear of the
cooker (Fig.7-11) and secure.
Inside the top of the side panel top are two tabs. Locate these
tabs into the cut-outs in the top edge of the cooker
(Fig.7-12).
Slide the side panel back so that the slot in the base locates
onto the washer on the rear retaining bracket (Fig.7-13), and
the slotted tab at the top rear locates onto the screw in the
ue vent.
Push back the side panel so that it touches the rear ue.
Tighten the screw in the vent to secure the side panel in
position (Fig.7-14).
Fig.7-11
 Loading...