Upgraded Gearcase Offering - Verado L6 Models
THE INFORMATION IN THIS DOCUMENT IS CONFIDENTIAL AND PROTECTED BY COPYRIGHT AND IS THE PROPERTY OF MERCURY MARINE.
This d
ocument is provided for the sole and exclusive use of the original recipient as prescribed by Mercury Marine and may not be distributed or copied, digitally or otherwise,
w
i
thout the prior written consent of Mercury Marine.
2011-01 APRIL 2011 © 2011 Mercury Marine Page 3 / 5
Shift Shaft Alignment for 5.44 Inch Verado Gearcase Installation
IMPORTANT: The 5.44 inch Verado gearcase is not equipped with a neutral detent. Use this information to supplement the
current Verado service manual for gearcase installation.
1. While rotating the propeller shaft in either direction, turn the shift shaft counterclockwise to engage the sliding clutch fully into
the gear. Note the position of the shift shaft.
2. Turn the shift shaft clockwise to allow the propeller shaft to turn freely. While rotating the propeller shaft, turn the shift shaft
clockwise fully into gear. Note the position of the shift shaft.
3. Rotate the shift shaft counterclockwise to the center location of the noted gear engagements. This is the neutral position.
4. Rotate the propeller shaft to verify the neutral position. The propeller shaft will rotate freely in either direction.
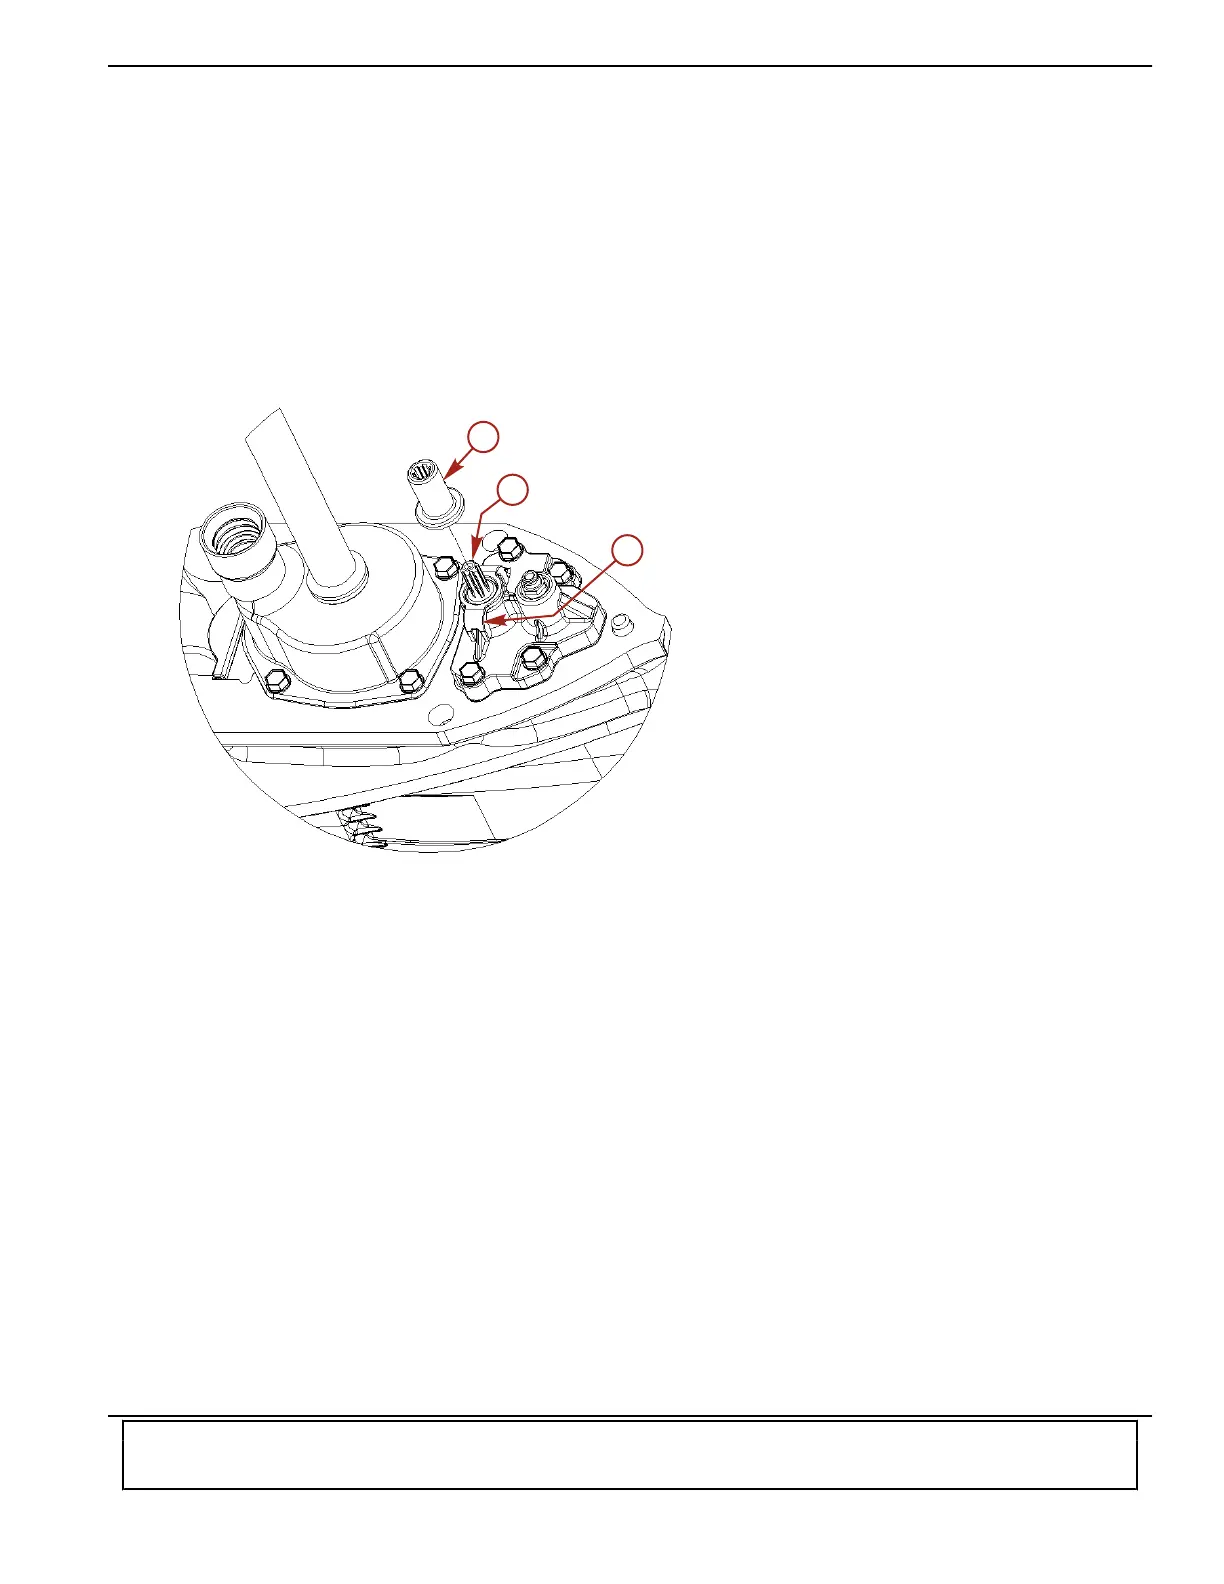
5. Install the shift shaft retainer assembly.
6. Install the coupling onto the shift shaft.
a - Shift shaft
b - Retainer assembly
c - Coupling
provided by http://www.crowleymarine.com