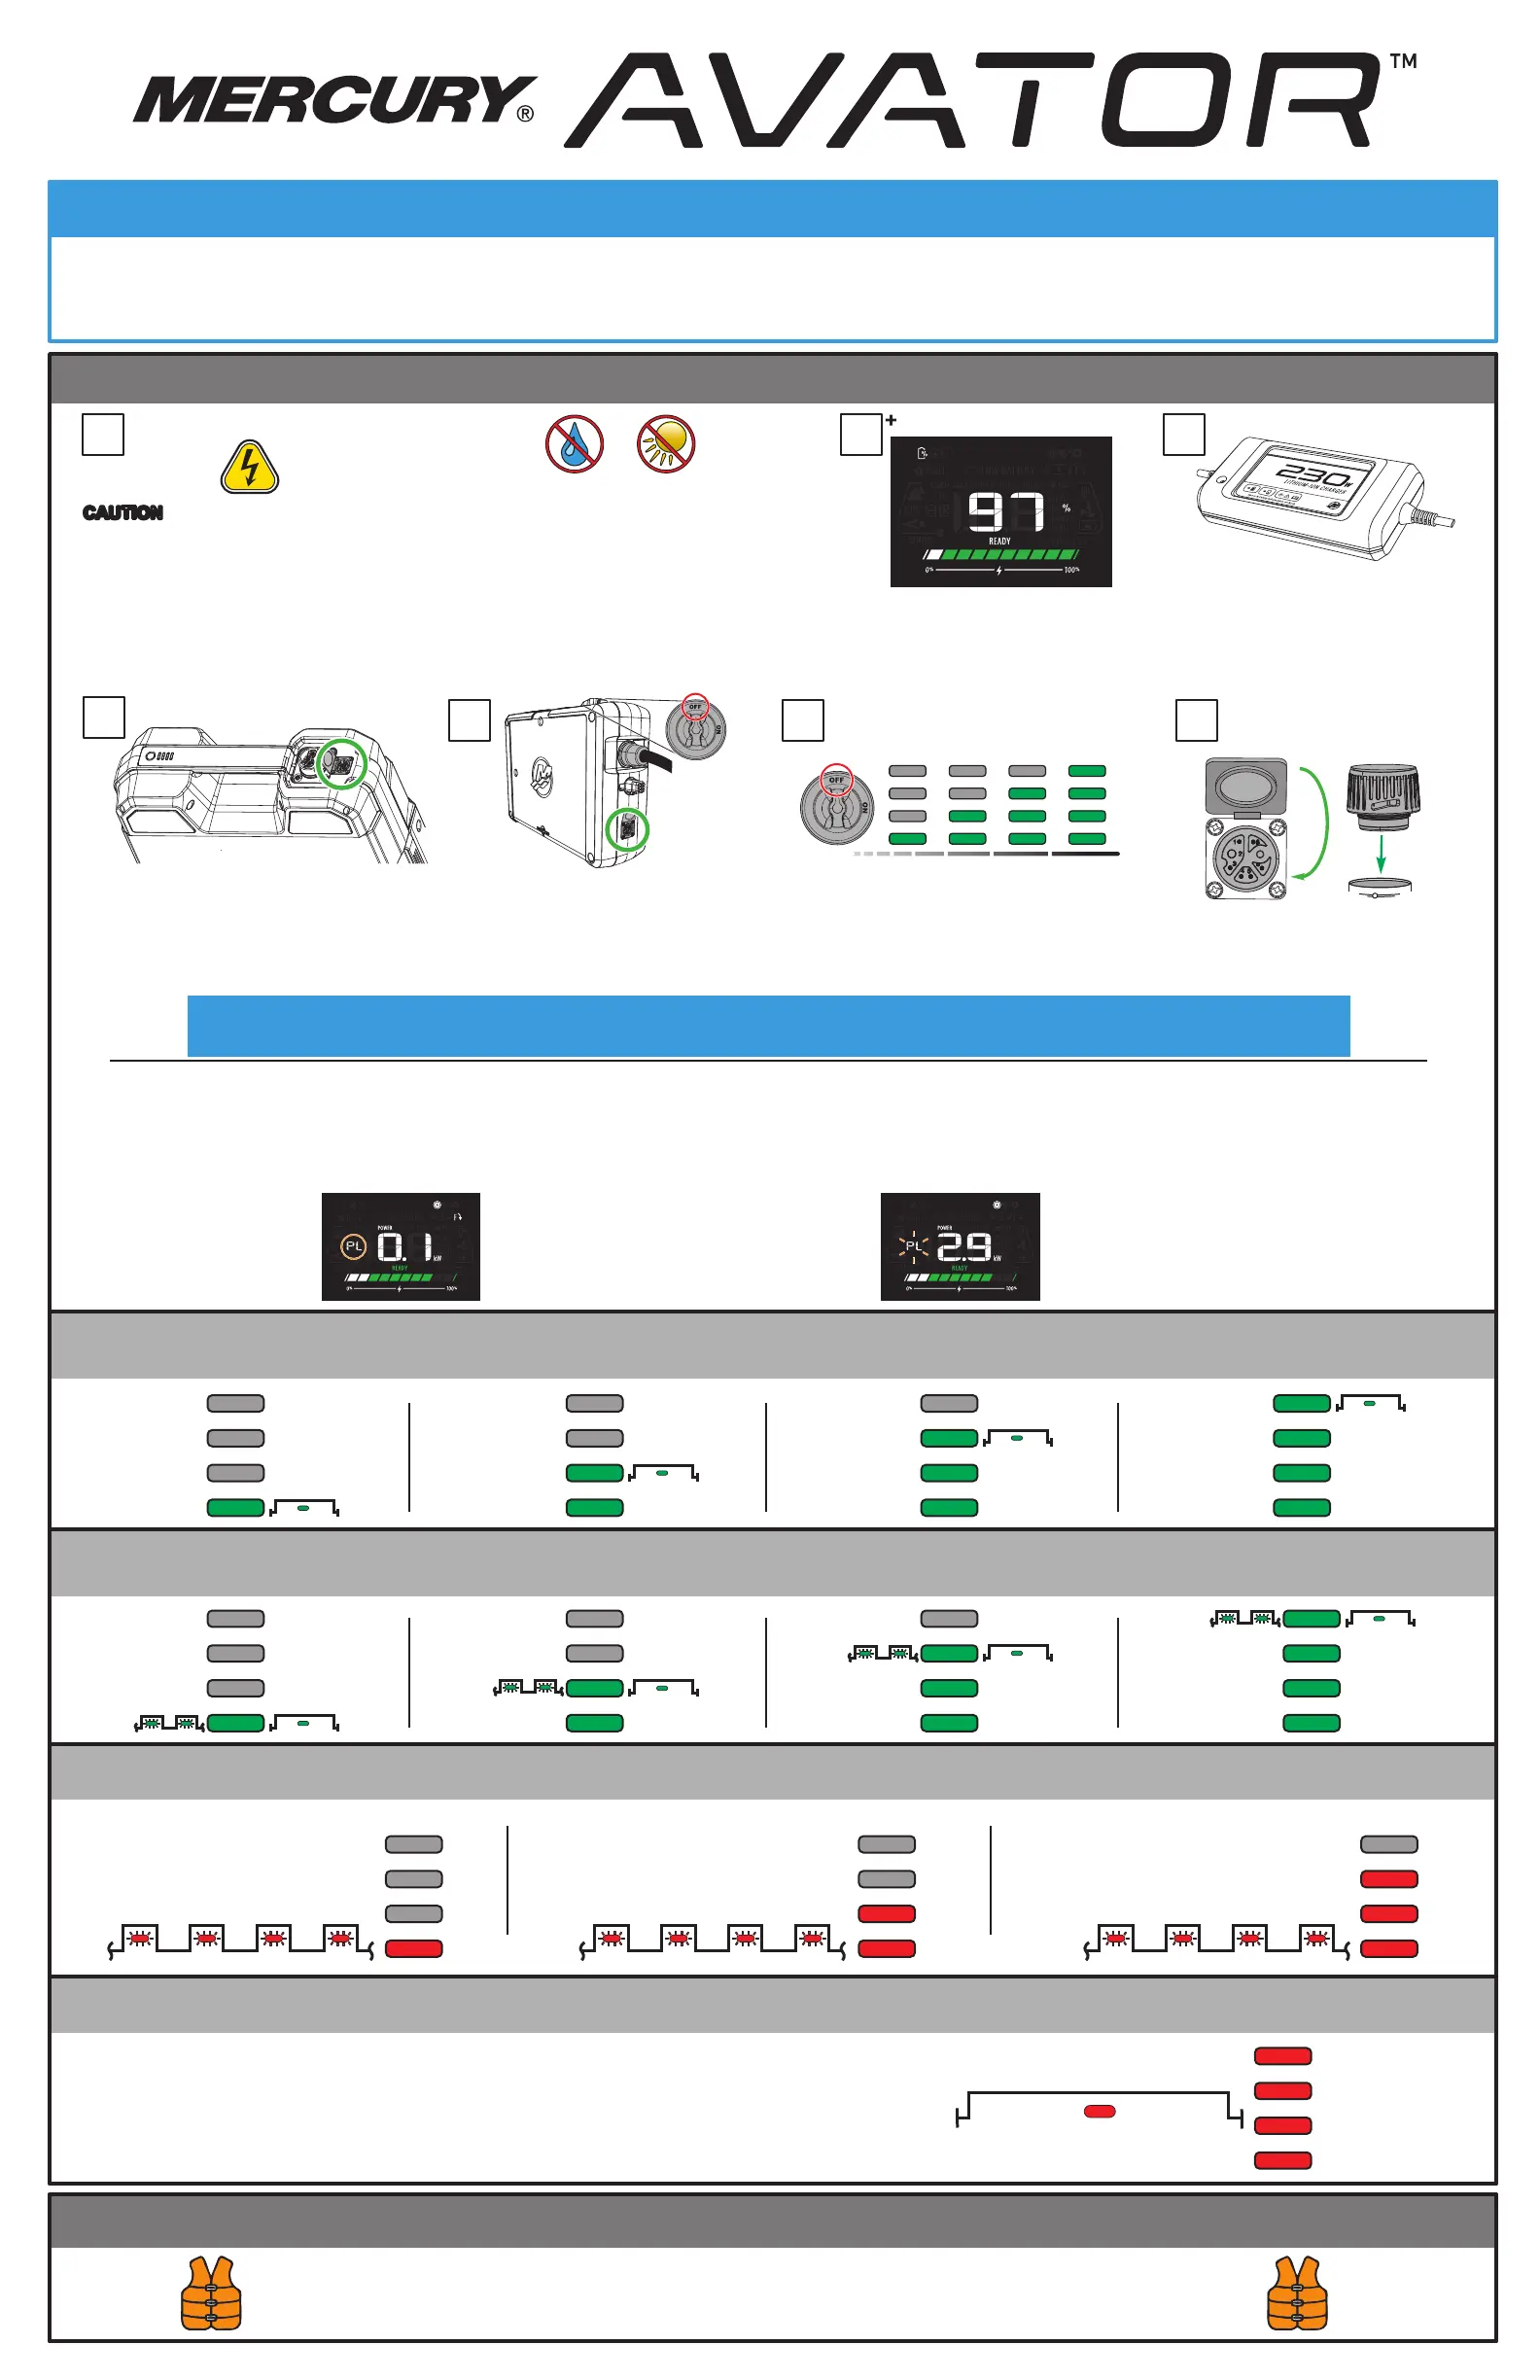
IMPORTANT
20e/35e Battery Charging and Status Lights
+
Operating with Different Levels of Battery State of Charge (SOC)
1 3
4a
4b
25%
50%
75%
100%
Battery State of Charge (SOC)
Battery Fault Light Conditions
0% Charge.
Charge the Battery.
Move the battery to
-15-45 °C (5-113 °F).
Make sure the battery is
connected in a Mercury
approved manner.
IMPORTANT
Battery Failure. Bring the boat or battery to an
authorized Mercury Marine Dealer.
Boat Safe
< 25%
25%
< 50%
50%
< 75%
75%
< 100%
100%
Battery State of Charge (SOC) While Charging
This guide is intended to cover the basic instructions for connection of the batteries, the powering ON and OFF of the
Avator 20e/35e outboards, directional thrust control, and the battery LED status light communication.
For additional information, please reference the complete Operation, Installation, and Maintenance Manual included with this product.
The combined state of charge (SOC) of
the Avator outboard battery/batteries
is shown on the display screen.
0 - 100%.
CAUTION
CAUTION: Exposure to hazardous voltage
can cause electrical shock or injury. Avoid
contact with exposed, damaged, or bare
electrical connections. Do not make improper
connections, or short-circuit the components.
IMPORTANT: Do not charge the batteries
while the boat is in the water. Remove the
boat from the water and select a dry, covered
area before connecting the battery charger.
Protection from rain and direct sunlight
ensures a more safe and efficient charging.
The 230 watt battery charger is
the primary charger for the
2.3 kWh Avator batteries.
For shorter charge times,
use the 520 watt charger.
Charging a single 2.3 kWh
battery is done through the
charging port on the top
of the battery.
For charging multiple batteries
through the Power Center, turn
the power switch to the OFF position.
Connect the charger to the charging
port on the side of the Power Center.
5 6
Verify each battery is connected to the
battery charger by monitoring the state
of each battery's LED status lights.
See: Battery State of Charge (SOC) While Charging.
To protect the connections on
the batteries, cables, and outboard,
use the supplied weather-caps.
Always wear a personal flotation device when on the water.
20e and 35e Avator outboards use a battery protection feature when multiple batteries are connected that have moderate differences in the state of charge (SOC) of each battery.
This operational state is called Power Limit (PL). During this state, the outboard's power output is temporarily limited to protect the batteries from damage.
Once the battery SOCs are equalized and the control has been placed into neutral, the PL indications on the display will cease and the outboard will return to full power.
For more information, refer to the Operation, Installation, and Maintenance Manual.
When the tiller or remote
control are in neutral, ‘PL’
will be shown on the left
side of the display.
When the throttle is advanced
to approximately 65% or above,
the ‘PL’ LED will flash in
1-second intervals.
2
Push the LED status button to see SOC indications for each individual battery.
The LED segments will display continuously while the battery is actively charging.
Important: Read the Operation, Installation, and Maintenance manual in its entirety before operating or installing this product.
In the event that service is needed, contact a local Mercury Authorized Dealer.
 Loading...