20 Epiphone Valve Jr.•Mercury Upgrade Kit
ThisprojectanditsdocumentationistheresultoftechnicalinvestigationsmadebytheengineeringstaffofMercury Magnetics.Thedisclosureoftheinformationhereinmaypertaintoproprietaryrightsand
thefurnishingofthesedocumentsdoesnotconstituteanexpresedorimpliedlicensetousesuchmaterials.
T7 T8 T9
T3
V2
V1
T10 T11
T12
GND
C6
C9
C7
C8
T1
T2
D3
T4
T5
R10
R11
T6
B1
C12
D4
D1 D2
IN
G
IN S10 G
VALVE JUNIOR
VER051122
HBO1570
9
8
7
6
5
4
3
2
1
1
9
8
7
6
5
4
3
2
1
1
R12
R14
C3
C5
JP3
C4
R2
R15
R5
R4
R3
C1
R13
R1
R8
JP1
JP2
R9
R6
R7
C2
C11
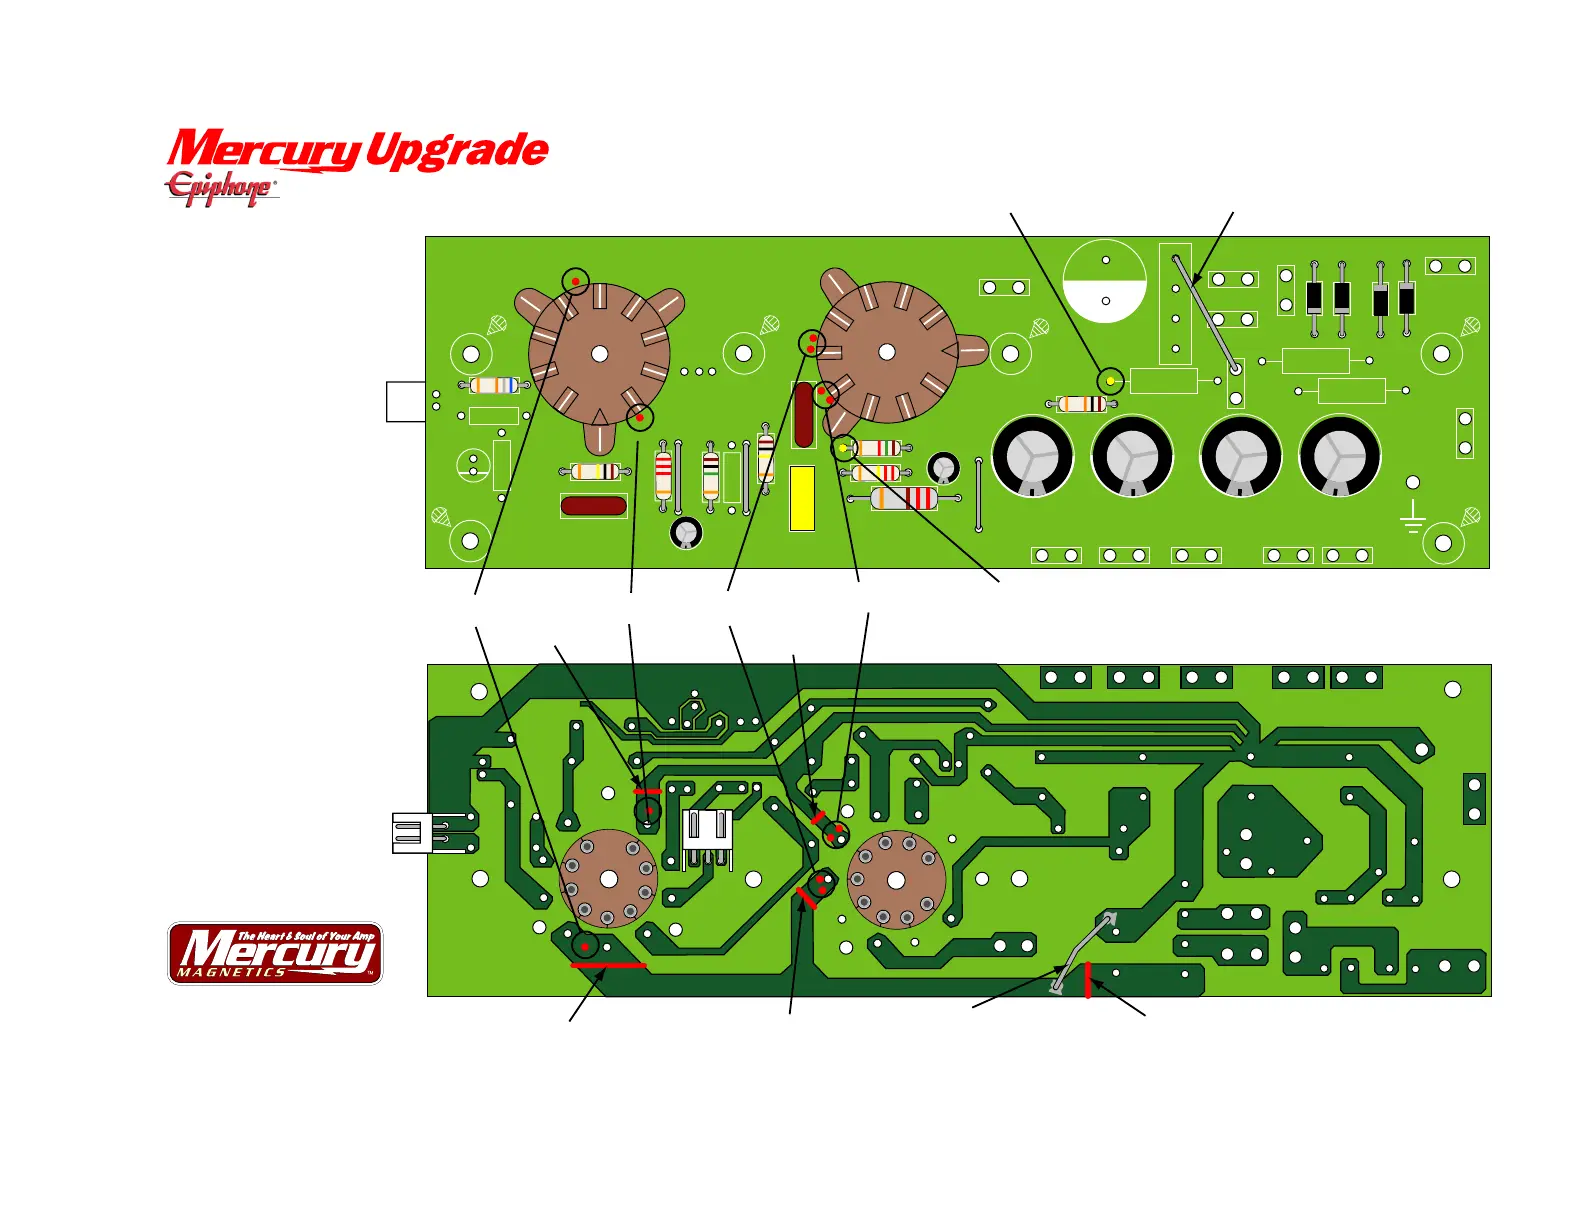
MAIN PCB PREP SEQUENCE:
1. Remove clips (T1, 2, 3, 4, 5,
6, 7, 8, 9, 10, 11 & 12).
2. Remove rectifier (B1).
3. Remove capacitors (C4 & 12).
4. Remove resistors (R1*, 7, 8*,
9**, 10, 11 & 12).
*Remove for Version 2 PCBs.
Do not remove for Version 3 PCBs.
**Remove for Version 3 PCBs.
Do not remove for Version 2 PCBs.
5. Make 5 trace cuts as indicated.
6. Drill new 5/64” holes as
indicated (holes 1 to 6).
7. If you will be installing the
6V6 Mod then enlarge holes
7 & 8 with 1/16” bit.
8. Add 2 buss wire jumpers
as indicated.
Hole 1
Hole 2
Holes 3 & 4
Jumper 1
Enlarge hole 7
Jumper 2
(before soldering, remove
lacquer to reveal copper trace)
Trace cut 1
Trace cut 2
Trace cut 3
Trace cut 4
Trace cut 5
Holes 5 & 6
Enlarge hole 8
VERSION: 05-09-06 (original)
6V6 REV. 04-09-10 (updated)
www.MercuryMagnetics.com
www.Amp-Exchange.com
Copyright © 2008 by Mercury Magnetics. All Rights Reserved. Mercury Magnetics, 6V6 Mod and Mercury Upgrade are trademarks of Mercury Magnetics. Epiphone is a registered trademark of Gibson Guitar Corp. or its subsidiaries. Mercury Magnetics is not affiliated with Gibson Guitar Corp.
Valve Jr.
VERSION 2 & 3 MAIN PCBs

 Loading...