Epiphone Valve Jr.•Mercury Upgrade Kit 21
ThisprojectanditsdocumentationistheresultoftechnicalinvestigationsmadebytheengineeringstaffofMercury Magnetics.Thedisclosureoftheinformationhereinmaypertaintoproprietaryrightsand
thefurnishingofthesedocumentsdoesnotconstituteanexpresedorimpliedlicensetousesuchmaterials.
T7 T8 T9
T3
V2
V1
T10 T11
T12
GND
C6
C9
C7
C8
T1
T2
D3
T4
T5
R10
R11
T6
B1
C12
D4
D1 D2
IN
G
IN S10 G
VALVE JUNIOR
VER051122
HBO1570
9
8
7
6
5
4
3
2
1
1
9
8
7
6
5
4
3
2
1
1
R12
R14
C3
C5
JP3
C4
R2
R15
R5
R4
R3
C1
R13
R1
R8
JP1
JP2
R9
R6
R7
C2
C11
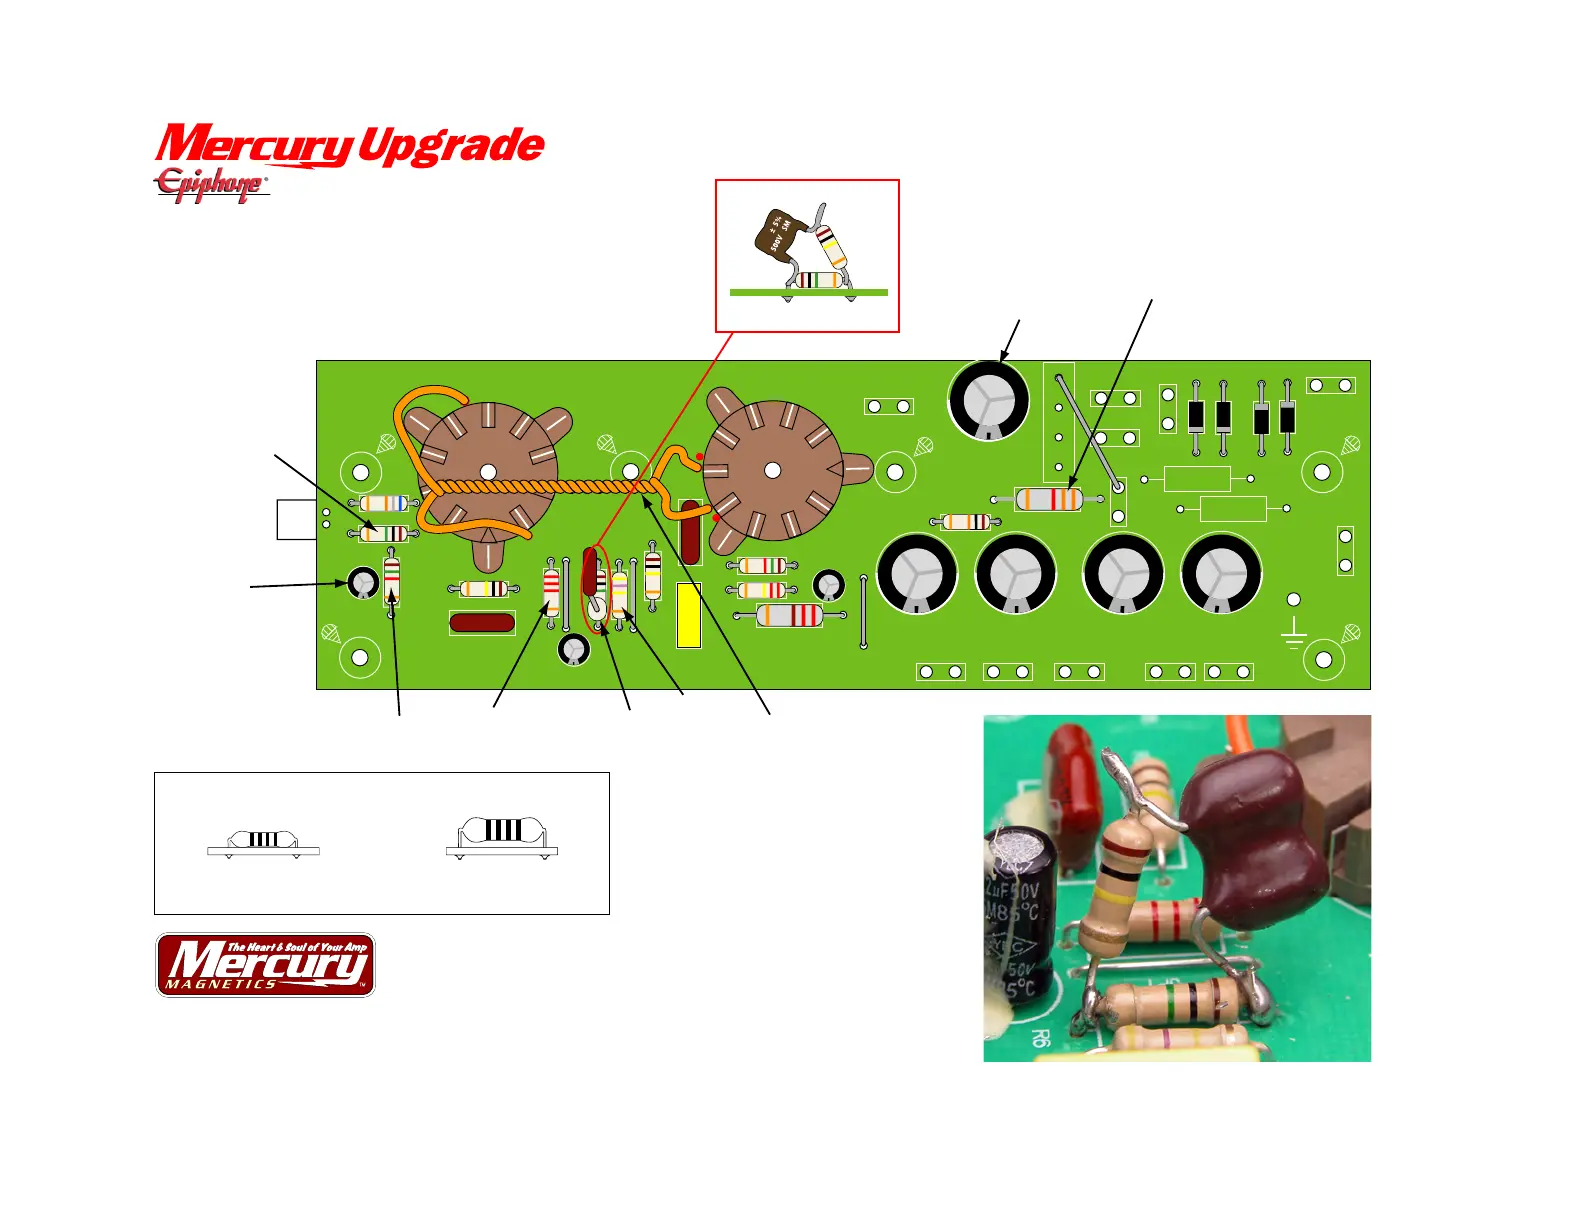
MAIN PCB UPGRADE SEQUENCE:
1. If necessary, swap R1 with 1MΩ resistor.
2. If necessary swap R8 with 1.5KΩ resistor.
3. If necessary, swap R9 with 2.2KΩ resistor.
4. Replace R7 with 470KΩ resistor.
5. Replace R12 with 3.3KΩ resistor.
6. Replace C4 with 10µF capacitor.
7. Replace C12 with 22µF capacitor.
8. Build RC Network as indicated and solder
into R6.
9. Build Filament Supply Leads as indicated
and solder into position (use holes made
in previous sequence).
1.5KΩ
resistor
2.2KΩ
resistor
1MΩ
resistor
100KΩ
resistor
470KΩ
resistor
1MΩ
resistor
10µF
capacitor
(note polarity!)
22µF
capacitor
(note polarity!)
RC network at R6
RC network (R6)
RC network
Filament supply leads
680ρF
capacitor
680
3.3KΩ
resistor
VERSION: 05-09-06 (original)
6V6 REV. 12-30-08 (updated)
www.MercuryMagnetics.com
www.Amp-Exchange.com
Copyright © 2008 by Mercury Magnetics. All Rights Reserved. Mercury Magnetics, 6V6 Mod and Mercury Upgrade are trademarks of Mercury Magnetics. Epiphone is a registered trademark of Gibson Guitar Corp. or its subsidiaries. Mercury Magnetics is not affiliated with Gibson Guitar Corp.
Valve Jr.
VERSION 2 & 3 MAIN PCBs
Tip: How to install resistors
Non-flame-proof resistors should
be mounted flush to the PCB.
Flame-proof resistors should
be mounted 2~3mm off the PCB.

 Loading...