POWER TRIM
Page 5B-42 90-855347R1 JANUARY 1999
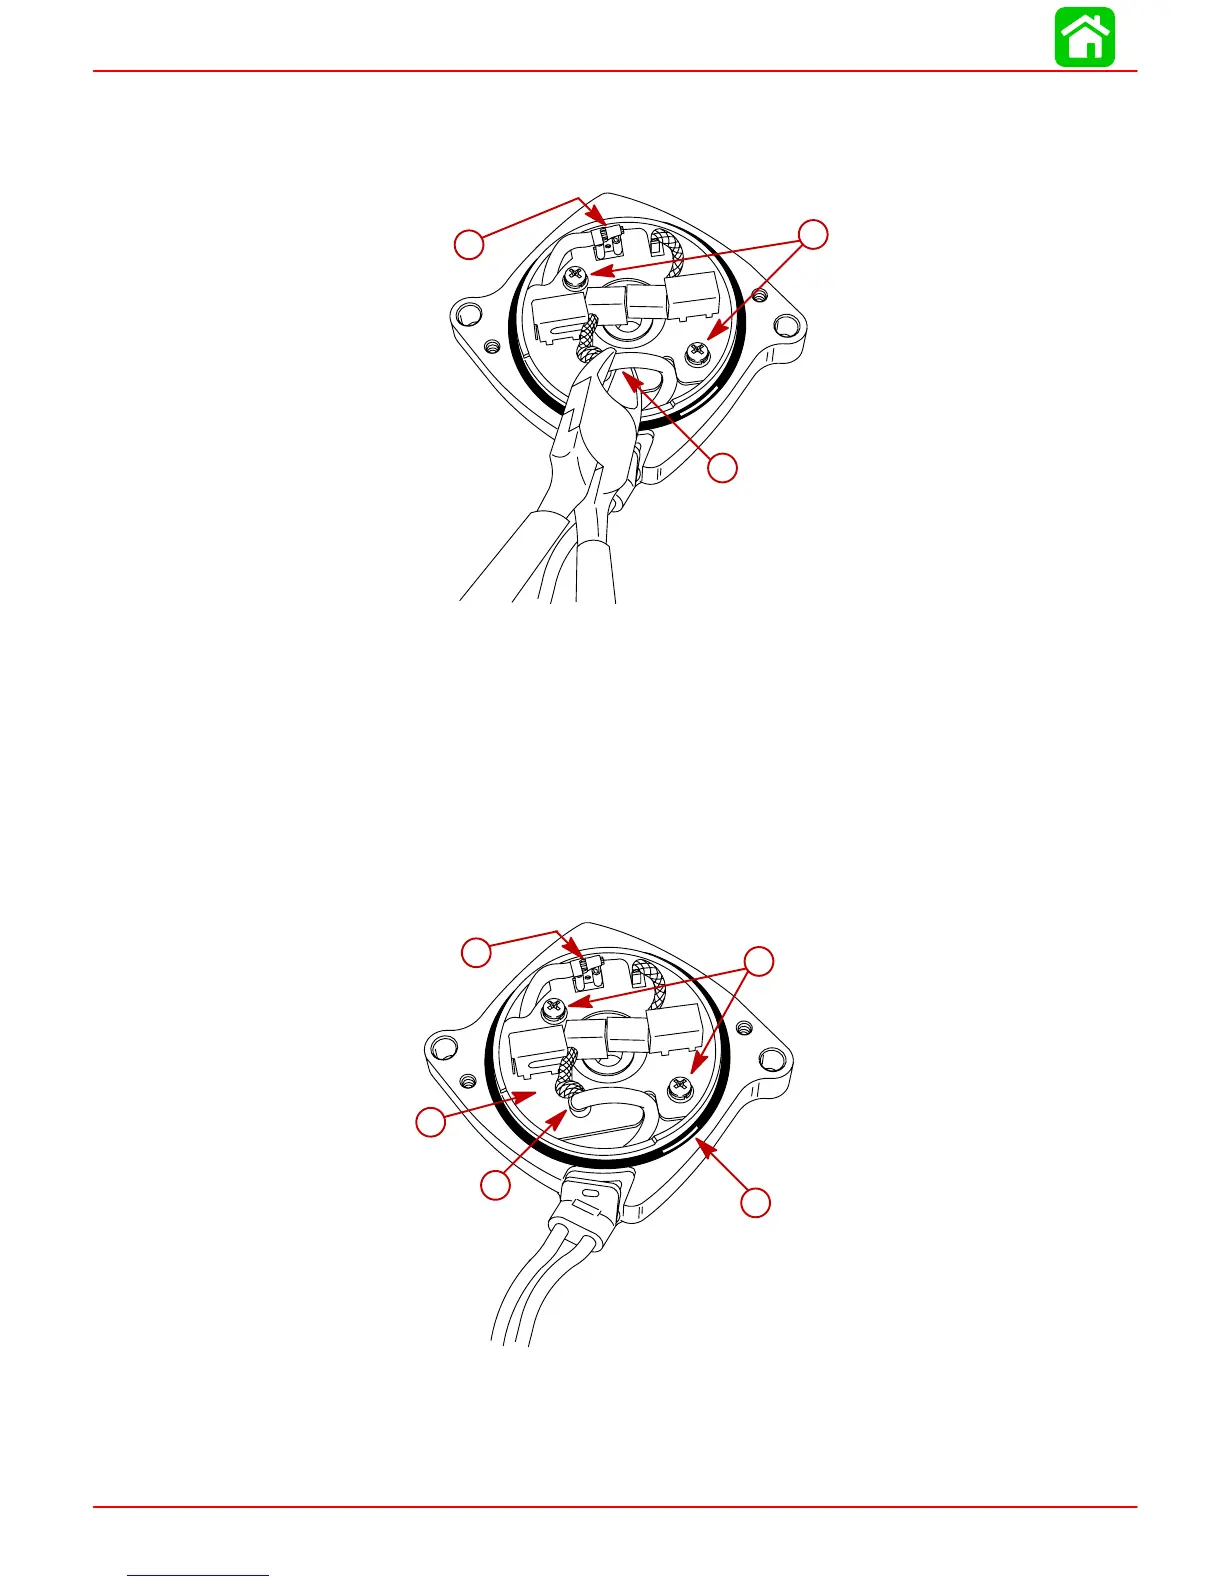
2. To replace brush card, disconnect spade terminal.
3. Cut crimped brush lead.
4. Remove 2 screws securing brush card to end cap.
a
b
c
a-Spade Terminal
b-Crimped Brush Lead
c-Screws
5. Install new brush card (BRUSH and SEAL KIT 828714A1).
6. Crimp metal connector onto motor lead and new brush lead.
7. Connect spade connector motor lead to brush card connector.
8. Secure brush card to end cap with 2 screws and lockwashers.
9. Inspect O-ring for cuts and abrasions. Replace O-ring as required (BRUSH and SEAL
KIT 828714A1).
53778
a
b
c
d
e
a-Brush Card
b-Metal Connector
c-Spade Connector
d-Screws and Lockwashers
e-O-ring

 Loading...


