LEFT HAND NON-RATCHETING
90-855347R1 JANUARY 1999 Page 6B-43
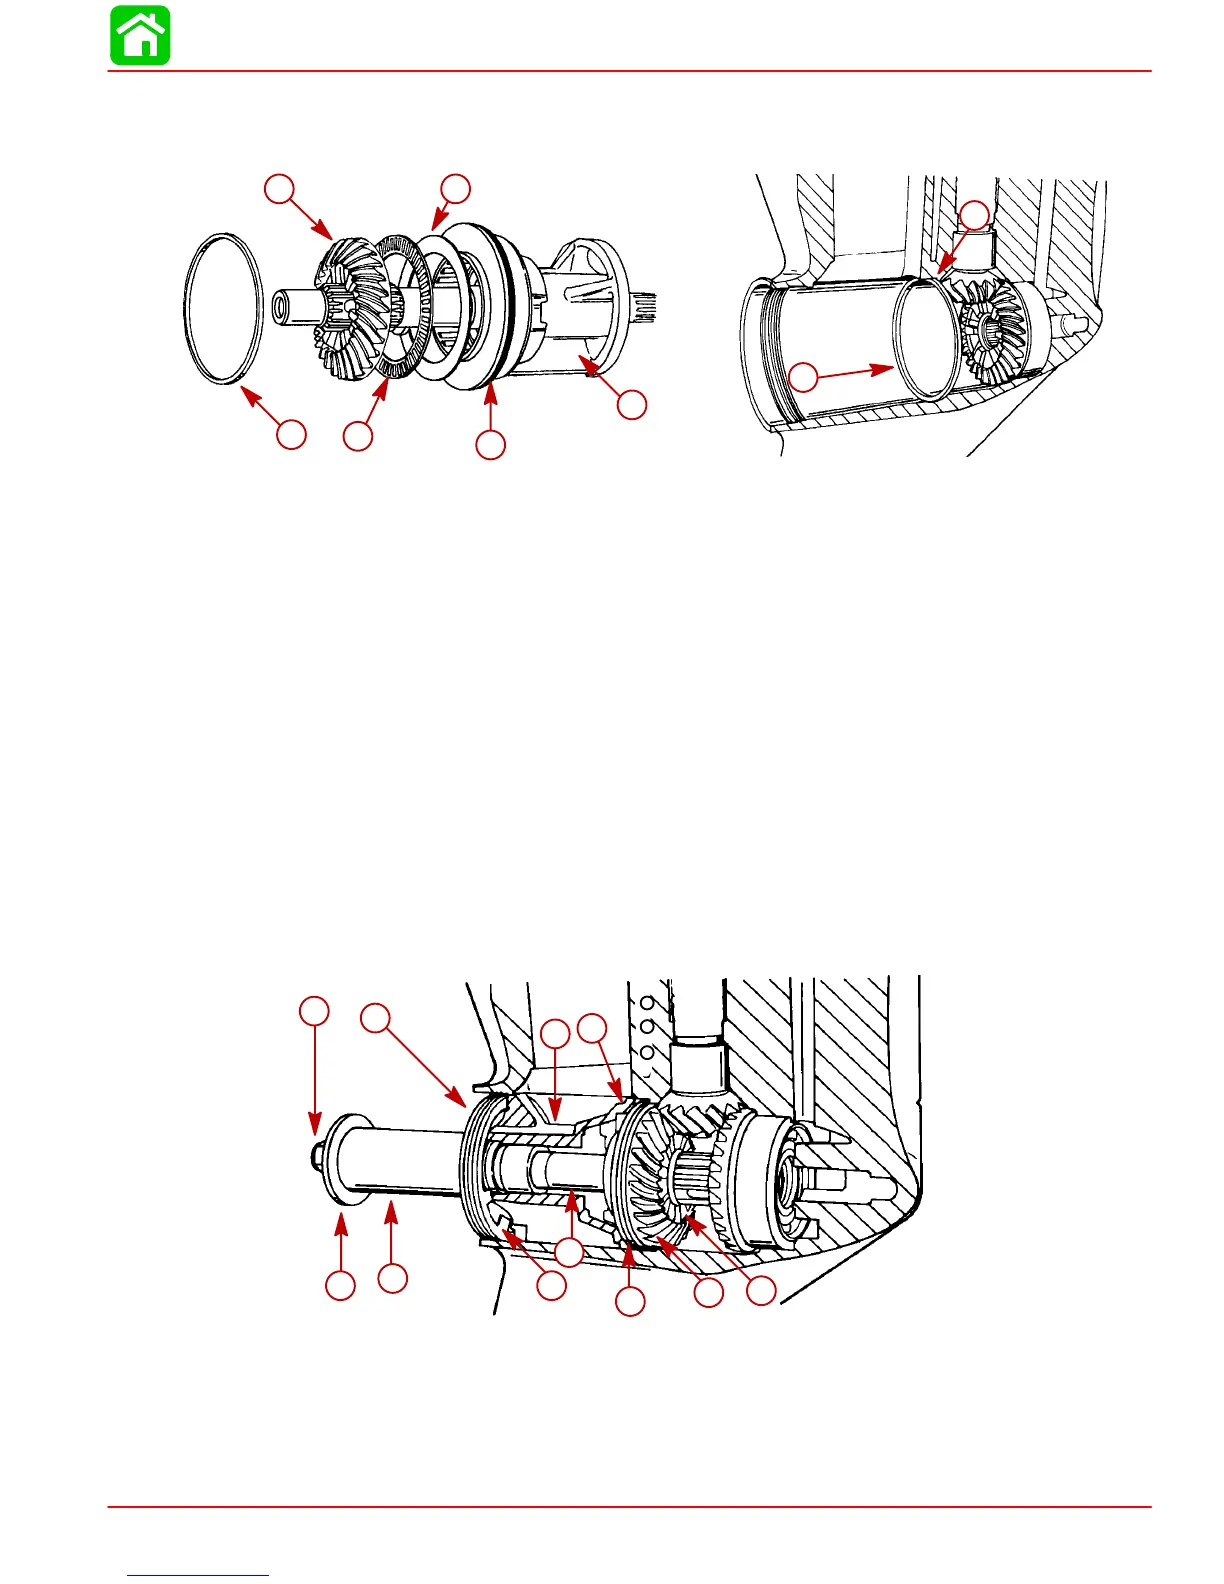
2. Assemble BEARING CARRIER, BEARING ADAPTOR, THRUST WASHER,
THRUST BEARING, and FORWARD GEAR onto propeller shaft.
3. Position shim against shoulder in gear case.
55104
g
h
55103
a
b
c
d
e
f
a-Bearing Carrier
b-Bearing Adaptor
c-Thrust Washer
d-Thrust Bearing
e-Forward Gear
f-Shim (PLACE IN GEARCASE FIRST)
g-Shoulder
h-Shim
4. Insert entire propeller assembly into gear case.
5. Install tab washer and cover nut. Torque cover nut to 100 Ib. ft. (135.5 N m) to seat
forward gear assembly in gear case.
NOTE: Drill a 3/8 in. (22.2 mm) diameter hole through the side (PROPELLER NUT END)
of a 5
in. x 2
in. (127 mm x 50.8 mm) long piece of PVC pipe. A screwdriver may be inserted
thru pipe into propeller shaft splines to prevent PVC pipe from turning while tightening re-
taining nut.
6. Install a 5 in. x 2 in. (127 mm x 50.8 mm) long piece of PVC pipe (obtain locally) over
propeller shaft and secure it against the bearing carrier with a flat washer and nut.
51882
a
b
c
d
e
f
g
h
i
j
k
a-Prop Nut
b-Flat Washer
c-PVC Pipe [5 in. x 2 in.
(127 mm x 50.8 mm)]
d-Cover Nut
e-Tab Washer
f-Bearing Carrier
g-Prop Shaft
h-Bearing Adaptor
i-Shim
j-Forward Gear
k-Load Washer
 Loading...


