26
CAL 2 CALIBRATION
Tank 2 Calibration
Select whether you want to cali-
brate tank 2.
NOTE: Tank 2 does not have to
be a fuel tank. It could represent
an oil tank for example.
NOTE: The gauge will not let you
calibrate the tank until the capac-
ity had been entered).
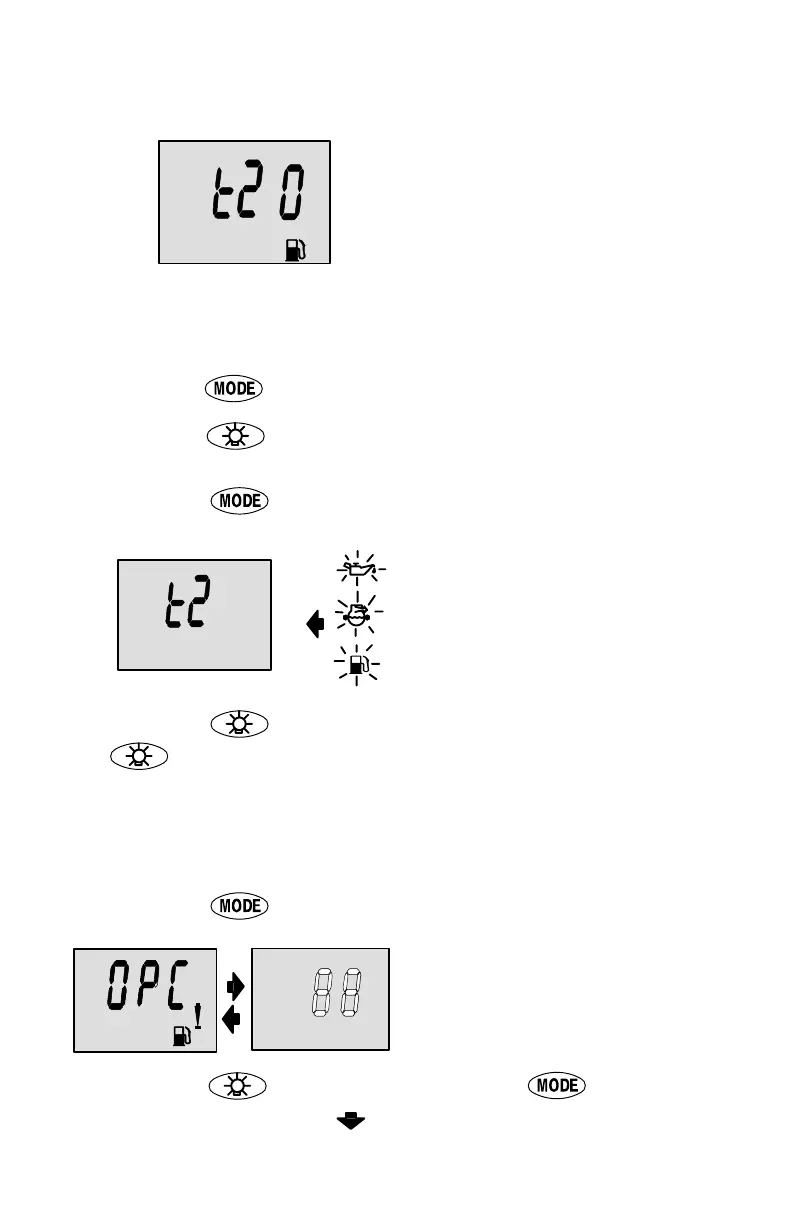
1. Press the
button until “t2” is displayed. “t2” = tank 2.
2. Press the
button to select 1= on, 0 = off. Selecting “1” will
continue tank 2 calibration.
3. Press the
button to continue.
Tank 2 Calibration Icon
Selection
Select one of three icons for
tank 2 display screen. (oil, wa-
ter/waste, fuel).
1. Press the
button, you will see a blinking icon. Using the
button, select which icon you want tank 2 to be, (oil, fuel,
or water/waste).
NOTE:If you choose oil or water/waste icon, no further tank 2 cal-
ibration will be needed. If tank 2 will be for fuel, continue tank 2 pro-
cedure.
2. Press the
button to continue.
Gal
Tank 2 Calibration 0%
Setting
Have the fuel tank level at
empty.
3. Press the
button to save. Press the button to ad-
vance to 25% setting.
 Loading...