8
INTRODUCTION
IMPORTANT
PRECAUTIONS
ASSEMBLY
BEFORE
YOU BEGIN
TREADMILL
OPERATION
LIMITED
WARRANTY
TROUBLESHOOTING
& MAINTENANCE
CONDITIONING
GUIDELINES
NOTE: During each assembly step, ensure that ALL nuts and bolts are in place and partially threaded in before
completely tightening any ONE bolt. NOTE: A light application of grease may aid in the installation of hardware.
Any grease, such as lithium bike grease is recommended.
PRE-ASSEMBLY
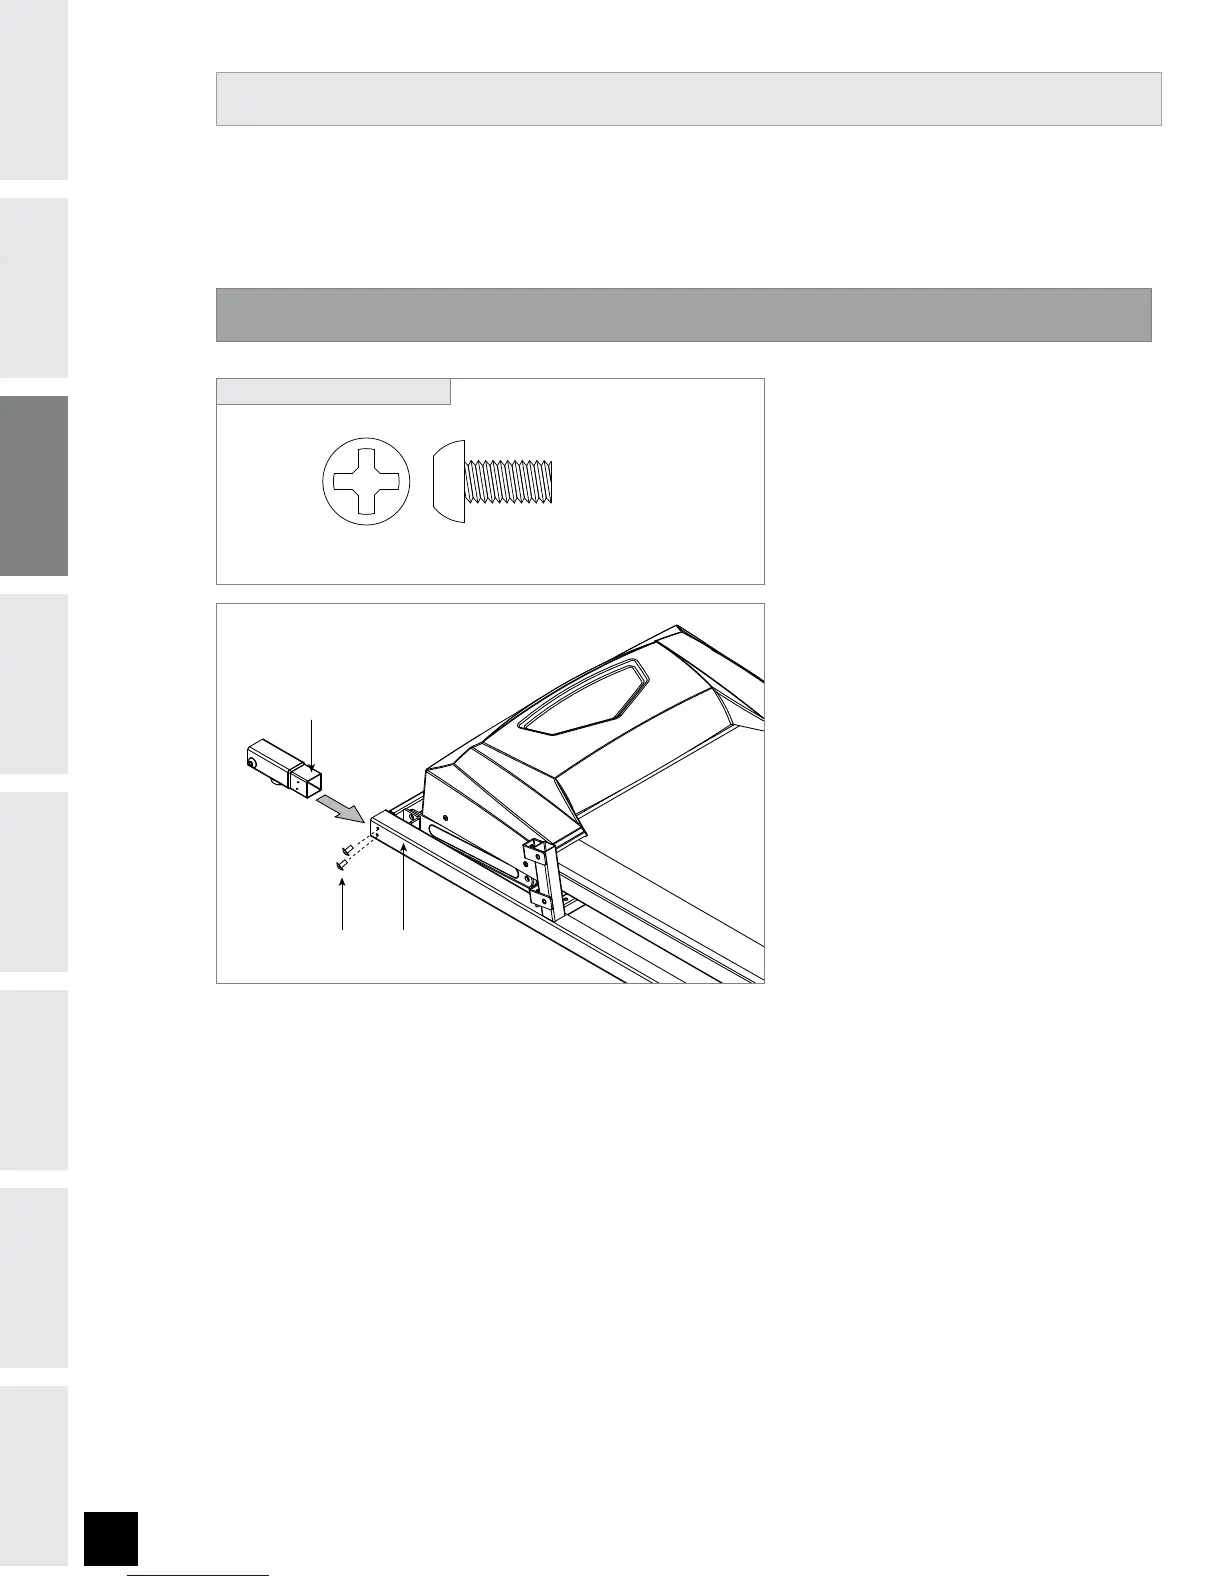
ASSEMBLY STEP 1
Open HARDWARE BAG 1.
Slide the LEFT FRAME
ExTENSION TUBE onto the BASE
FRAME. Bolt in place using 2
BOLTS (A) on the side.
Repeat on the other side.
NOTE: The treadmill must be
lifted up slightly while sliding
the FRAME ExTENSION TUBE
into position. This can be done
with the assistance of another
person or by sliding something
sturdy under the BASE FRAME.
A
B
C
HARDWARE BAG 1 CONTENTS :
FRAME EXTENSION TUBE
BOLTS (A) BASE FRAME