12
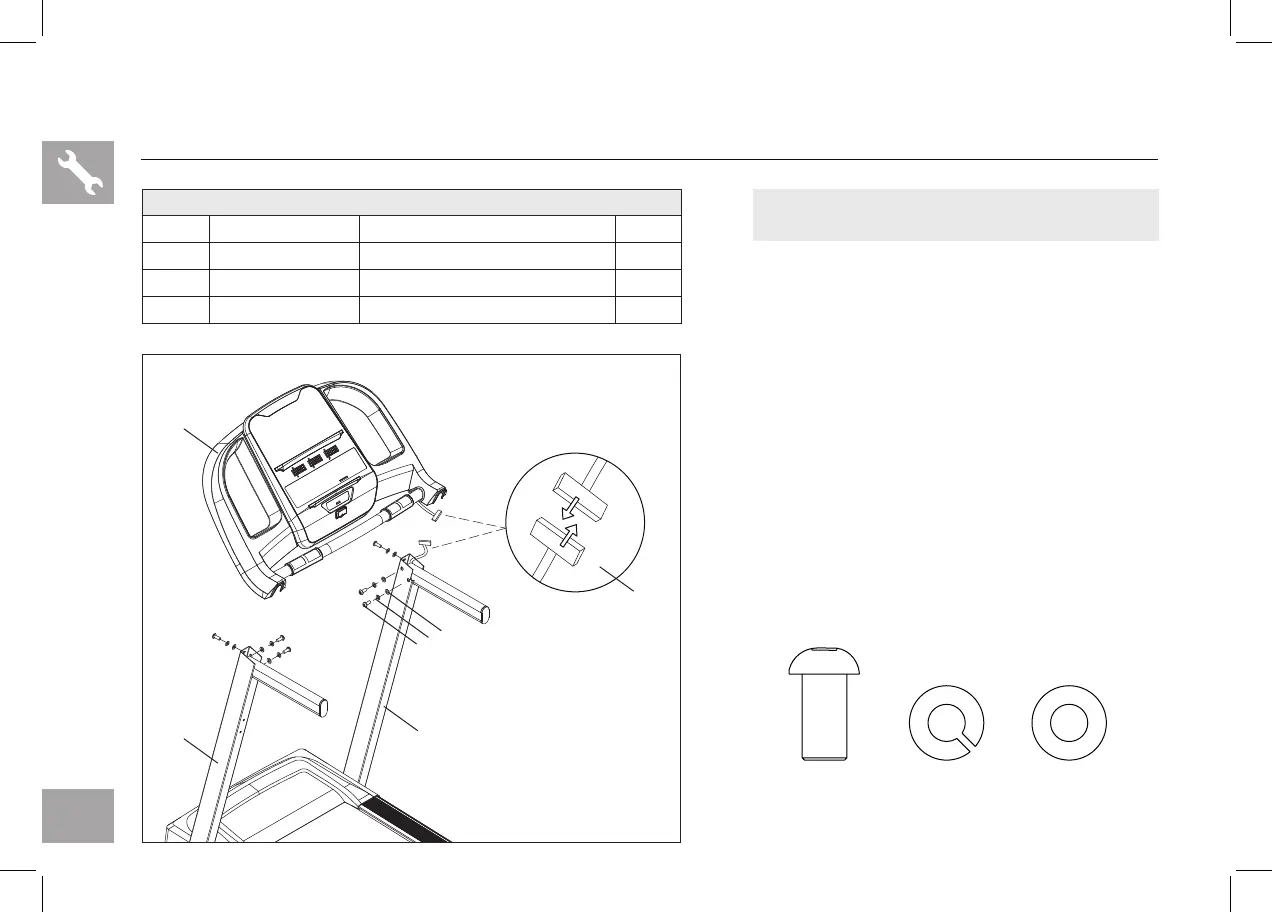
ASSEMBLY STEP 3
A Open HARDWARE FOR STEP 3.
B Gently place the CONSOLE (5) on top of the
CONSOLE MASTS (1&2). Attach the LEFT SIDE
first using 3 BOLTS (A), 3 SPRING WASHERS (B)
and 3 FLAT WASHERS (C).
C The CONSOLE CABLES (4) are tucked into
the CONSOLE MAST (2). Using the lead wire
carefully pull the CONSOLE CABLE (4) out of
the CONSOLE MAST (2). Detach and discard the
LEAD WIRE. Connect the CONSOLE CABLES
(4) and carefully tuck wires in the mast to avoid
damage.
D Attach the RIGHT SIDE of the CONSOLE (5)
using 3 BOLTS (A), 3 SPRING WASHERS (B) and
3 FLAT WASHERS (C).
NOTE: Be careful not to pinch any wires
while assembling the console.
HARDWARE FOR STEP 3
PART TYPE DESCRIPTION QTY
M8X1.25PX20L 6A BOLT
8.4X15.5X1.6T
6B SPRING WASHER
8.2X15.4X2T
6C FLAT WASHER
A
B
C
2
4
1
5
A
B
C