- 7 -
REVERB: This control determines the mix between the "dry" (non-effected) and "wet" (reverb)
signal. At zero, only the dry signal is heard. As the control is turned up the wet signal is mixed with
the dry signal. The result is reverb. The Quad has unique reverb as compared with other guitar
amps or pre-amps. We've combined two reverb tanks of different size and decay times to produce
the richest reverb ever found in a guitar amp. No "springy" or "boingy" characteristics can be
heard. No "distortion" or reverb "clipping" occurs. An ultimately smooth decay that we consider to
be "perfect" in length for any style.
The reverb "level" in the two channels of the Quad is slightly different. Channel 1 would be
considered the more "normal", having lots of reverb for a given Reverb control setting. Channel 2
has a slightly lower reverb level because it is most often set for high gain sounds and set
"physically" higher. Higher Volume/Master settings increase reverb, yet for most "crunch" or
"metal" rhythm playing very little or no reverb is usually preferable. Lead 2 is capable of such
incredible sustain that the slightly diminished reverb level is almost inaudible and possibly
desirable. This can all be compensated for, should you wish, by using another of the Quad's
valuable features.
Reverb "Cancel" and reverb "Boost" functions have been incorporated into the reverb system of
the Quad. These functions are accessed by inserting a standard "grounding" type footswitch or a
midi switching system, i.e. (Mesa Midi Matrix) into the ¼” jacks located in the "External/Midi
Switching" section of the rear panel. This can increase or cancel the reverb mix at any setting of
the pre-amp.
We think you'll find the Quad stands up to the digitals with its incredibly "natural" reverb sound. No
"high end trash" or "digital sickness" here. Just good old fashioned spring reverb taken to the
pinnacle of sophistication. A truly gorgeous reverb sound we hope you'll get as much enjoyment
from as we have.
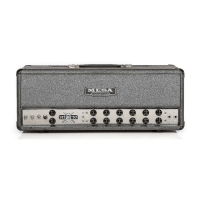
OUTPUT: These controls, “A” and “B” are responsible for the final output level of the pre-amp.
Adjustments here determine the amount of signal fed to the power amps. Setting them is a matter
of preference. However, by following the method mentioned here, the best signal to noise ratio is
achieved.
Start by setting both output controls to zero. Next, set both Master Controls at “5”. Then set
Channel 1 Lead Master to “4” Channel 2 Lead Master to “5”. With the Masters set at these
numbers and the Volume and Lead Drive controls set at, or close to the recommended settings
the volume level relationship between the modes should be equal. With this accomplished we are
ready to bring up the outputs.
With the standby switch on the Quad and the power amp in the "On" position slowly increase the
“A” output control to the desired listening level. Depending on the power amp used, the number
setting will most likely be very low, probably between “2” and “4”. Next, increase the "B" output
until an equal volume level is attained. Don't be alarmed if the number settings on the two outputs
are different for an equal volume level. The value of these two pots can vary slightly as well as
being affected by the settings of the pre-amp. This is normal and should not be a concern. If
effects are in use with the effects loop and input levels are not optimum, try adjusting their
"Input/Headroom" control first. If this does not satisfy the input levels, adjust the "Master/Lead
Masters" until the proper level is achieved and compensate with the outputs accordingly.
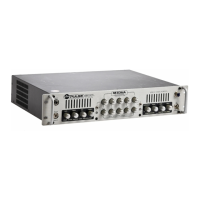
POWER SWITCH AND PILOT LIGHT: This is the AC On/Off switch for the Quad. The pilot light is
located on the upper right hand corner of the pre-amp next to the power switch. When lit this
indicates the AC voltage to the pre-amp is on.