Page 5 Page 2
Maintenance Installation
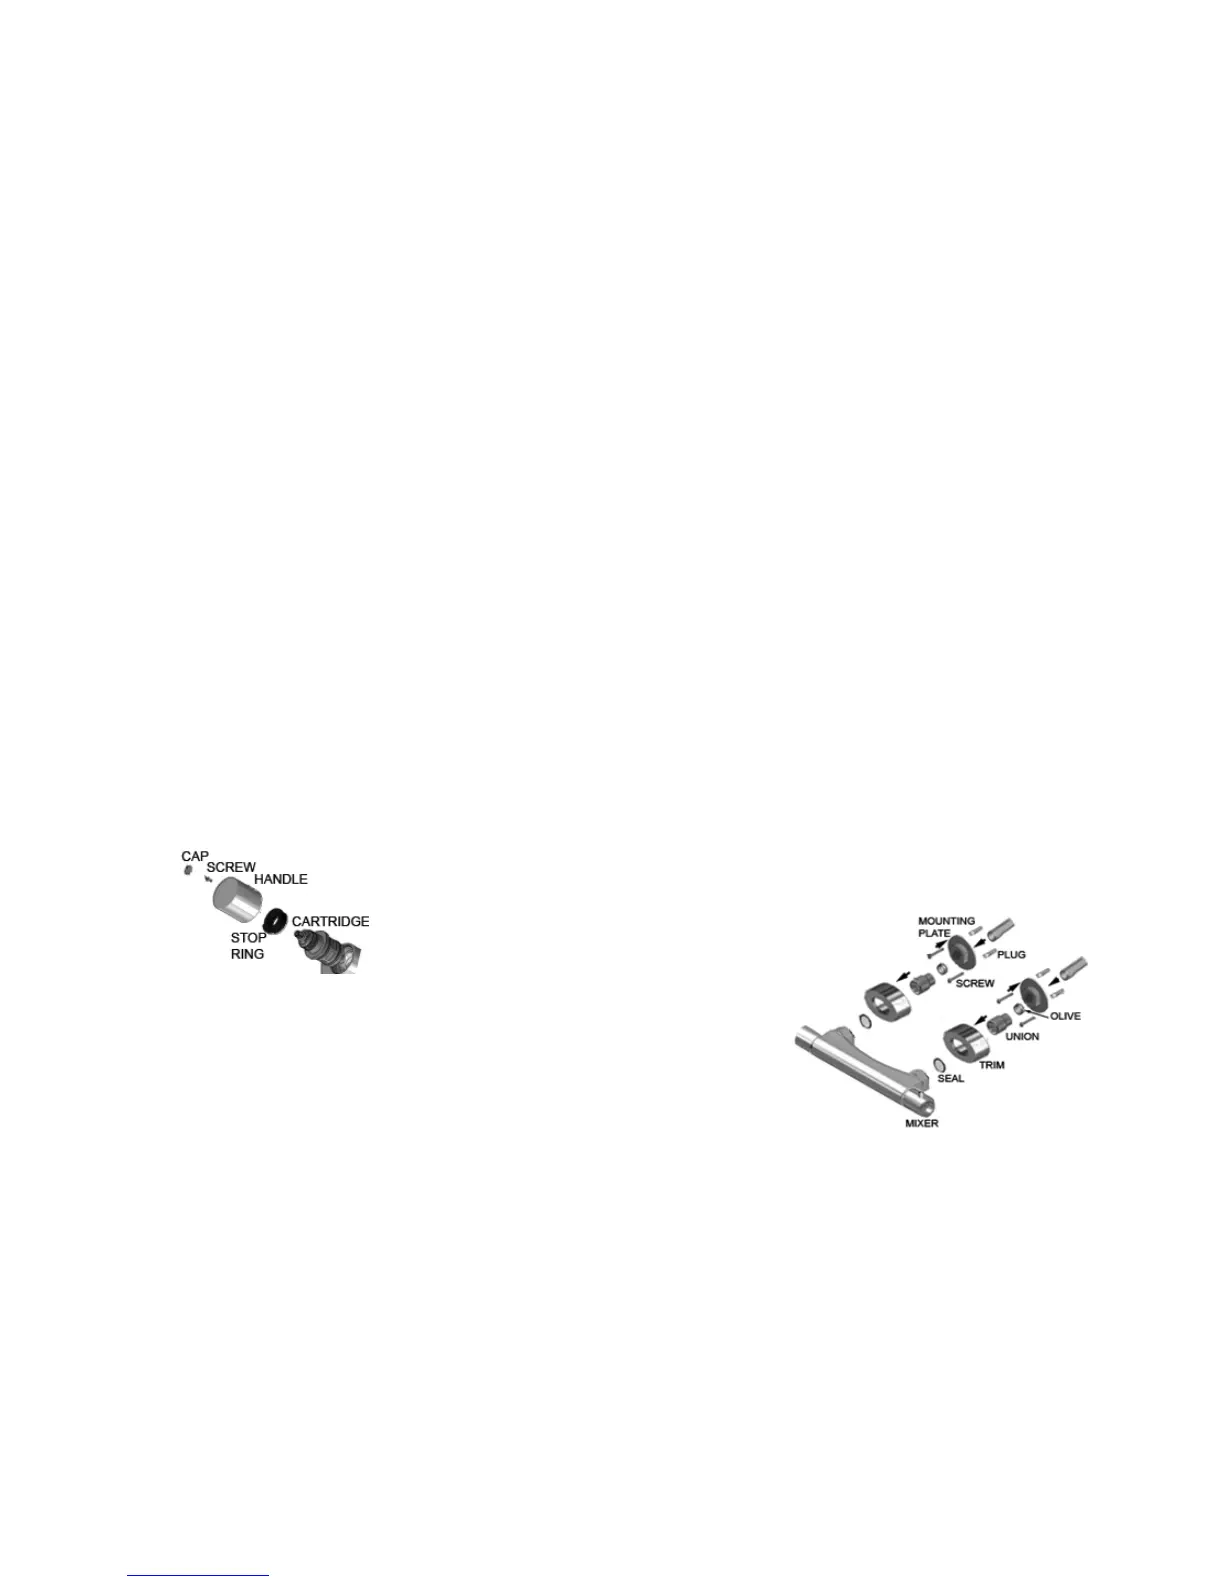
To replace the thermostatic cartridge; (See diagram)
Turn off water supply
Remove the handle cap , followed by the screw
Inside the handle, remove the screw Prepare the supply pipes at 150mm centres, allowing approx 22mm of pipe to exposed
Pull handle from mixer from the finished wall.
Take note of the stop ring position for re-assembly after maintenance The pipework must be flushed prior to installation.
Remove the cartridge from the mixer body. After flushing the pipework, install the mixer as a standard exposed fitting, with the outlet
Clean or replace the cartridge as necessary, then replace, ensuring components are located facing downwards.
correctly to give correct maximum set temprature. The hot supply pipe must be connected to the hot inlet of the mixer, indicated by the red dot.
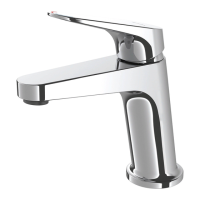
If re-calibration is required follow instruction in "operation and setting" Place the mounting plate over the pipe end and mark drill holes, ensuring no pipes or
Once water supply is turned on check for leaks. wires are affected.
Once holes are marked remove and drill holes, then fit wall plugs,
Next place the mounting plate over pipe end and locate over drill holes, secure using
screws provided.
Place olive over pipe end and then fit threaded union, tighten using a two spanners one
on the flats of the union the other on the flat of the mounting plate.
Tighten until fully secured, to create a compression fitting seal.
Once secured, screw the trim onto the threaded union and screw up to finished wall
(if required sealant can be used)
Place seals into mixer inlets and connect
mixer to union and secure using a spanner
(take care not to damage product finish)
Once all connections
have been made
turn on water supply to
check for leaks,
ensuring the valve is
in the OFF position
DTCINST274a‐25.09.14