3
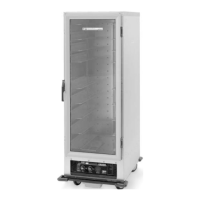
B. FEATURES — ALL MODELS
In order to utilize your new cabinet to its full potential,
take a minute to identify the following features which
have been provided for your convenience.
• The module has been placed at the base of the
cabinet for easy accessibility and efficient operation.
• Clearly-marked control panel angled for easy
viewing and allowing climate adjustments without
opening the door.
• Removable water pan.
• Cabinet designed with drip trough and catch pan to
contain condensation drippage.
• Field reversible full-view gasketed door.
• Easy pull adjustable magnetic door latch.
• Rear pan stop.
• Cord keeper at rear of cabinet which folds flat to
prevent damage to surrounding walls.
• All components — door, module, chimney,
slide racks — removable to permit thorough,
obstruction-free cleaning.
II. OPERATING INSTRUCTIONS
A. REVERSIBLE DOOR
The door on your cabinet can be reversed to
accommodate a right- or left-hand opening. The
cabinet has been shipped with the hinges
mounted on the right-hand side. To reverse, follow
the instructions listed below:
1. With the door in the closed position remove
the hinge pin by driving it out using a hammer
and a drive pin or small diameter screwdriver.
2. Once the pins are removed grasp the door
firmly and pull the latch lever, this will release
the door. Set the door aside being careful not
to damage the gasket.
3. Remove the screws from the left side of the
cabinet and set aside. Then remove the
cabinet mounted part of the hinge and remount
to the left side of the cabinet. Put the screws
removed from the left side of the cabinet, into
the remaining holes on the right side of the
cabinet. Tighten all screws before proceeding.
4. Relocate the latch plate(s) from the left side to
the right by removing the two mounting
screws. Tighten all screws before proceeding.
5. Rotate the door 180 degrees and align the
door mounted hinge part with the cabinet
mounted hinge part and tap the hinge pin
into place so top of pin is flush with top of
the cabinet mounted hinge part. Invert the
door latch by removing black plastic screw
covers and remove the screws holding the
latch in place.
6. Relocate the label on the door. Be sure that
there are no open screw holes on the front of
the cabinet.
B. SLIDE RACK ASSEMBLIES
All three models of slide racks, C4SC, C8SN,
and CVSN are removable for thorough
cleaning.
On the inside of each cabinet are a series of
rack hangers. These hangers have two slots for
either an inboard or outboard rack position. To
remove the slide rack, grasp and move upward
until pins are free of hanger slots. To install
racks, locate pins over hangers and lower until
locked into the slots.
NOTE: For an inboard rack position, use the
slots farthest away from the inside wall of the
cabinet. For an outboard rack position, use the
slots closest to the inside wall of the cabinet.
C4SC — Model 4 (3" Slide Spacing-fixed)
The Model 4 Slide Rack consists of two sets of
slides. Both sets can be installed either in an
inboard or an outboard position. Also, one set
of racks can be placed in the inboard position
while the second set can be installed in the
outboard position. All pans are to be bottom
loaded regardless of rack positioning. The
following pans may be used:
Inboard Hanger Position
(18" width)
17 pans — 18"x26"x2
5
/8"*
17 pans — 14"x18"x2
5
/8"*
Max. pan size: 18"x27"x2
5
/8"*
Min. pan size: 17"
Outboard Hanger Position
(20" width)
17 pans — 20"x24"x2
1
/4"*
14 pans — 20"x24"x2
5
/8"*
34 pans — 12"x20"x2
1
/4"*
28 pans — 12"x20"x2
5
/8"*
Max. pan size: 20"x27"x2
5
/8"*
Min. pan size: 19"
*The top rack level is usable if the pan and product do not
exceed 2" in height.
If this condition exists, an extra pan can be held.
 Loading...