MAINTENANCE, LUBRICATION & ADJUSTMENTS
WARNING
DISCONNECT PTO DRIVE SHAFT AND HYDRAULIC HOSES BEFORE CLEANING, ADJUSTING OR SERVICING
THIS MACHINE. FAILURE TO HEED MAY RESULT IN SERIOUS PERSONAL INJURY OR DEATH.
DANGER
IT IS NOT SAFE TO CLEAN OR SERVICE THE
SPREADER WITH POWER OPERATING. PULLING
ON THE BEATER CLUTCH ROPE DOES NOT SHUT
OFF POWER TO THE SPREADER.
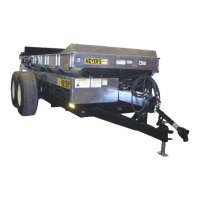
WHEELS:
Check periodically. The wheel studs should
be torqued to 170 foot pounds, in a crisscross manner.
TIRE PRESSURE:
22.5x8.25, recommended pressure 45-60 psi max.
W14Cx16.1, recommended pressure 36 psi max.
WARNING
NEVER INFLATE BEYOND RIM OR TIRE MANU-
FACTURERS APPROVED PSI RATING. WHILE IN-
FLATING, STAY OUT OF THE TRAJECTORY &
STAND CLEAR OF TIRE/WHEEL ASSEMBLY. A
TIRE BLOW OUT OR RIM/WHEEL FAILURE CAN
CAUSE SERIOUS INJURY OR DEATH.
CLEANING AND STORAGE
Before storing this spreader for an extended period of
time, perform the following:
1. Allow the spreader to completely clean out the last
load.
2. Hose off all manure from the spreader, particu-
larly getting the end gate and spread pan mech-
anisms clean. The water can be drained into
your manure storage pit or if the optional gate is
left closed, the water can be taken to the field
and spread.
If pressure washing spreader, be careful not to wash
directly on or close to bearing seals. The high pres -
sure can destroy the seal and force water into the
bearing causing it to rust and fail. Avoid pressure
washing painted areas of the spreader too close
with washer as the pressure can strip paint on
scratched areas caused from scraping clean.
Manure i s acidic and should not be left on painted
areas for a long time because it will lift paint from
metal. Unpainted metal will corrode causing holes
to rust through metal guards or even fall off the
machine. If this should happen, guards must be
replaced immediately.
WARNING
DO NOT OPERATE SPREADER WITH ANY
GUARD OPEN OR MISSING. ROTATING PARTS
CAN DISMEMBER OR KILL.
3. After cleaning, lube the spreader to exclude mois-
ture from bearings and prevent condensation from
forming during storage. Apply oil to roller chain
drives.
4. This is a good time to inspect all adjustments and
check for parts that need repair or replacement.
Performing these tasks now will guarantee that the
spreader is ready for use at the beginning of the
next season.
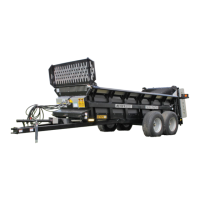
SHEAR PIN HUBS
The spreader drive train is protected with a shear pin
hub at the front end of the side drive shaft. The apron
drive is also shear bolt protected. If the shear bolts
shear, determine cause of overload and correct.
Realign holes in sprocket and shear pin hub and re-
place bolts. Snug lock nuts only enough to remove all
slack. Do Not Tighten completely.
Use 5/16x1-1/4 Grade 2 bolts and 5/16 lock nuts only.
Use 7/16 Gr. 2 bolts and 7/16 lock nuts only.
ADJUSTMENT
APRON CHAIN
The apron chain is adjusted by (2) adjuster screws
located on the front of the box frame. Adjust the
screws so there is no chain sag on the return side or
chain is never closer than 5" to the spreader axle.
When there is no more adjustment left on the adjuster
screws, loosen the nuts on the screws and push the
screws in as far as they will go. Then remove a link
from each chain and readjust the apron chain.
Page 15
M1
A1