Electrical
Stop.
tail
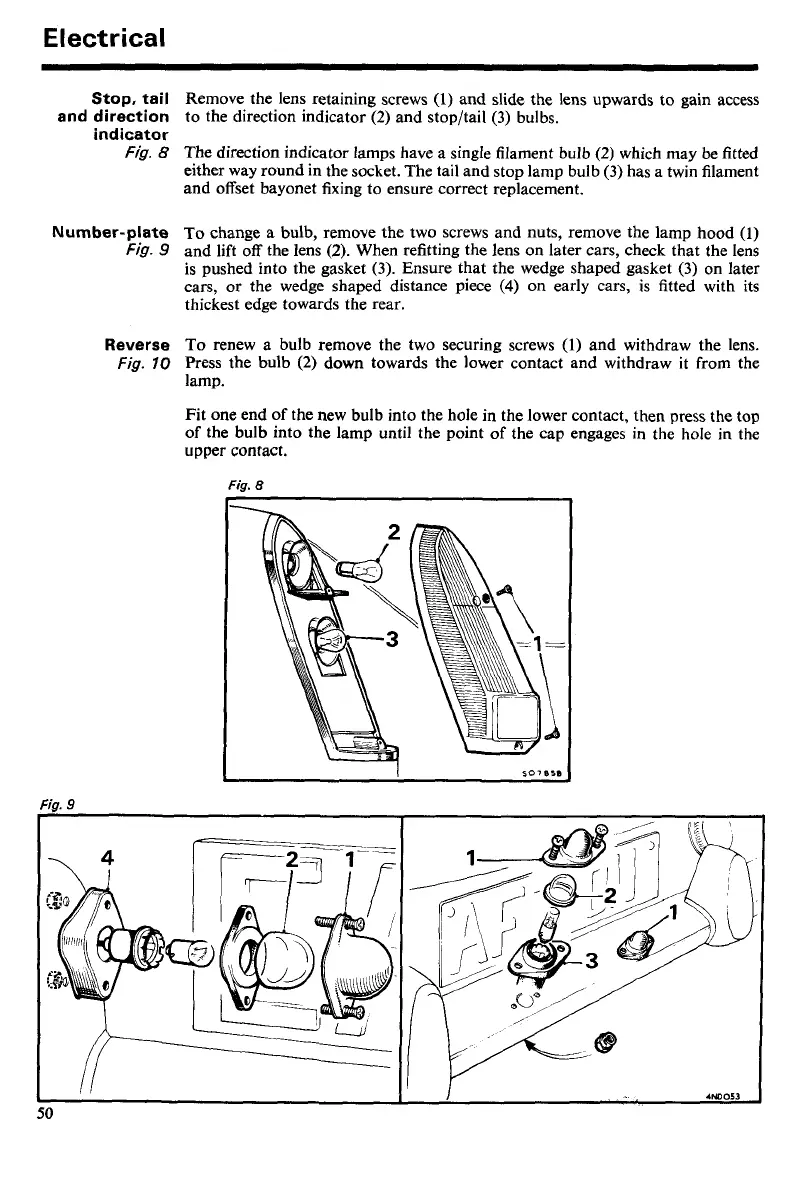
Remove the lens retaining screws
(1)
and slide the lens upwards to gain access
and direction
to the direction indicator
(2)
and stop/tail (3) bulbs.
indicator
Fig.
8
The direction indicator lamps have a single filament bulb
(2)
which may be fitted
either way round in the socket. The tail and stop lamp bulb
(3)
has a twin filament
and offset bayonet fixing to ensure correct replacement.
Number-plate
To change a bulb, remove the two screws and nuts, remove the lamp hood
(1)
Fig.
9
and lift off the lens
(2).
When refitting the lens on later cars, check that the lens
is pushed into the gasket (3). Ensure that the wedge shaped gasket (3) on later
cars, or the wedge shaped distance piece
(4)
on early cars, is fitted with its
thickest edge towards the rear.
Reverse
To renew a bulb remove the two securing screws
(1)
and withdraw the lens.
Fig.
10
Press the bulb
(2)
down towards the lower contact and withdraw it from the
lamp.
Fit one end of the new bulb into the hole in the lower contact, then press the top
of the bulb into the
lamp until the point of the cap engages in the hole in the
upper contact.
Fig.
8
 Loading...


