www.mhpgrills.com
3
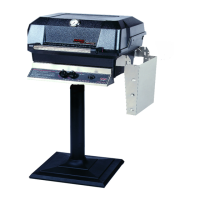
Remove the Burner
• Remove the grill burner by taking out
the two small cotter pins located on the
underside of the bottom grill casting (fig. a)
• Pull the burner up and out of the
grill head (fig. b).
ASSEMBLY PREPARATION
Choose a Location where you are going to set up your grill. Make sure
there is enough room and you have a flat surface. Improper assembly
may be dangerous. Please carefully follow the assembly instructions in
this manual.
• Place the box facing up
• Remove the packaging material followed by the grill head components
• Set the components on a flat surface
• Check to see if all components are included and that you
have the appropriate tools to begin the assembly. Remove all
components and discard the box.
At this point you should already have your bottom casting attached to your
mounting (See your mounting assembly manual for these steps).
Make sure your base is assembled before continuing. The base assembly
instructions should be included with your base.
Visit our website mhpgrills.com/info/owners-manuals/ for a complete list of
assembly videos & manuals
s
CONTINUED
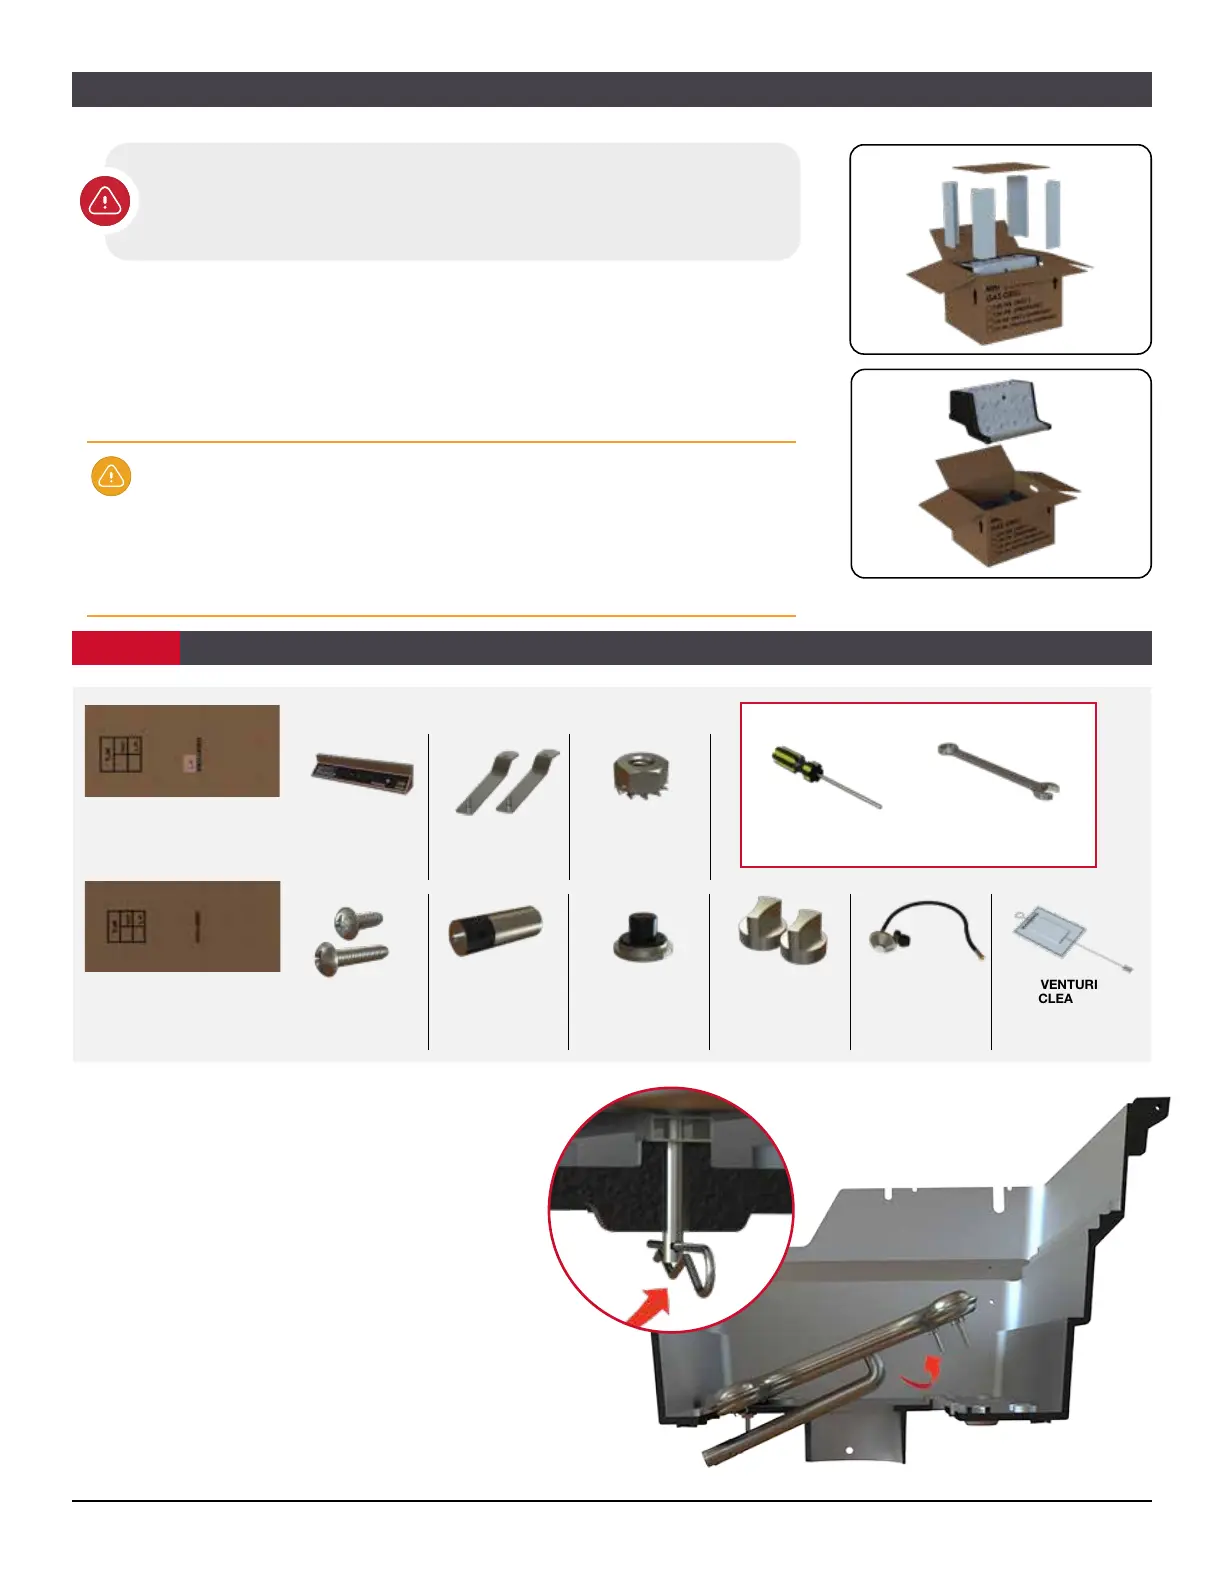
CONTROL PANEL
ASSEMBLY
KEP NUTS (6)
BRACKETS (2)
TJK-LP
Control Panel for LP Gas Grill
(includes hose and regulator)
TJK-NAT
Control Panel for Natural
Gas Grill
PARTS INCLUDED IN BOX:
PUSH BUTTONPHILLIPS HEAD
BOLTS
(2)
(2)
BATTERY
VENTURI
CLEANER
KNOBS (2) LP GAS HOSE &
REGULATOR
Included with
LP Gas Grills only
(pre-attached)
INSTALLING THE CONTROL PANEL
STEP 1
PHILLIPS
SCREWDRIVER
7/16" COMBINATION
WRENCH
TOOLS NEEDED:
fig. a
fig. b