4
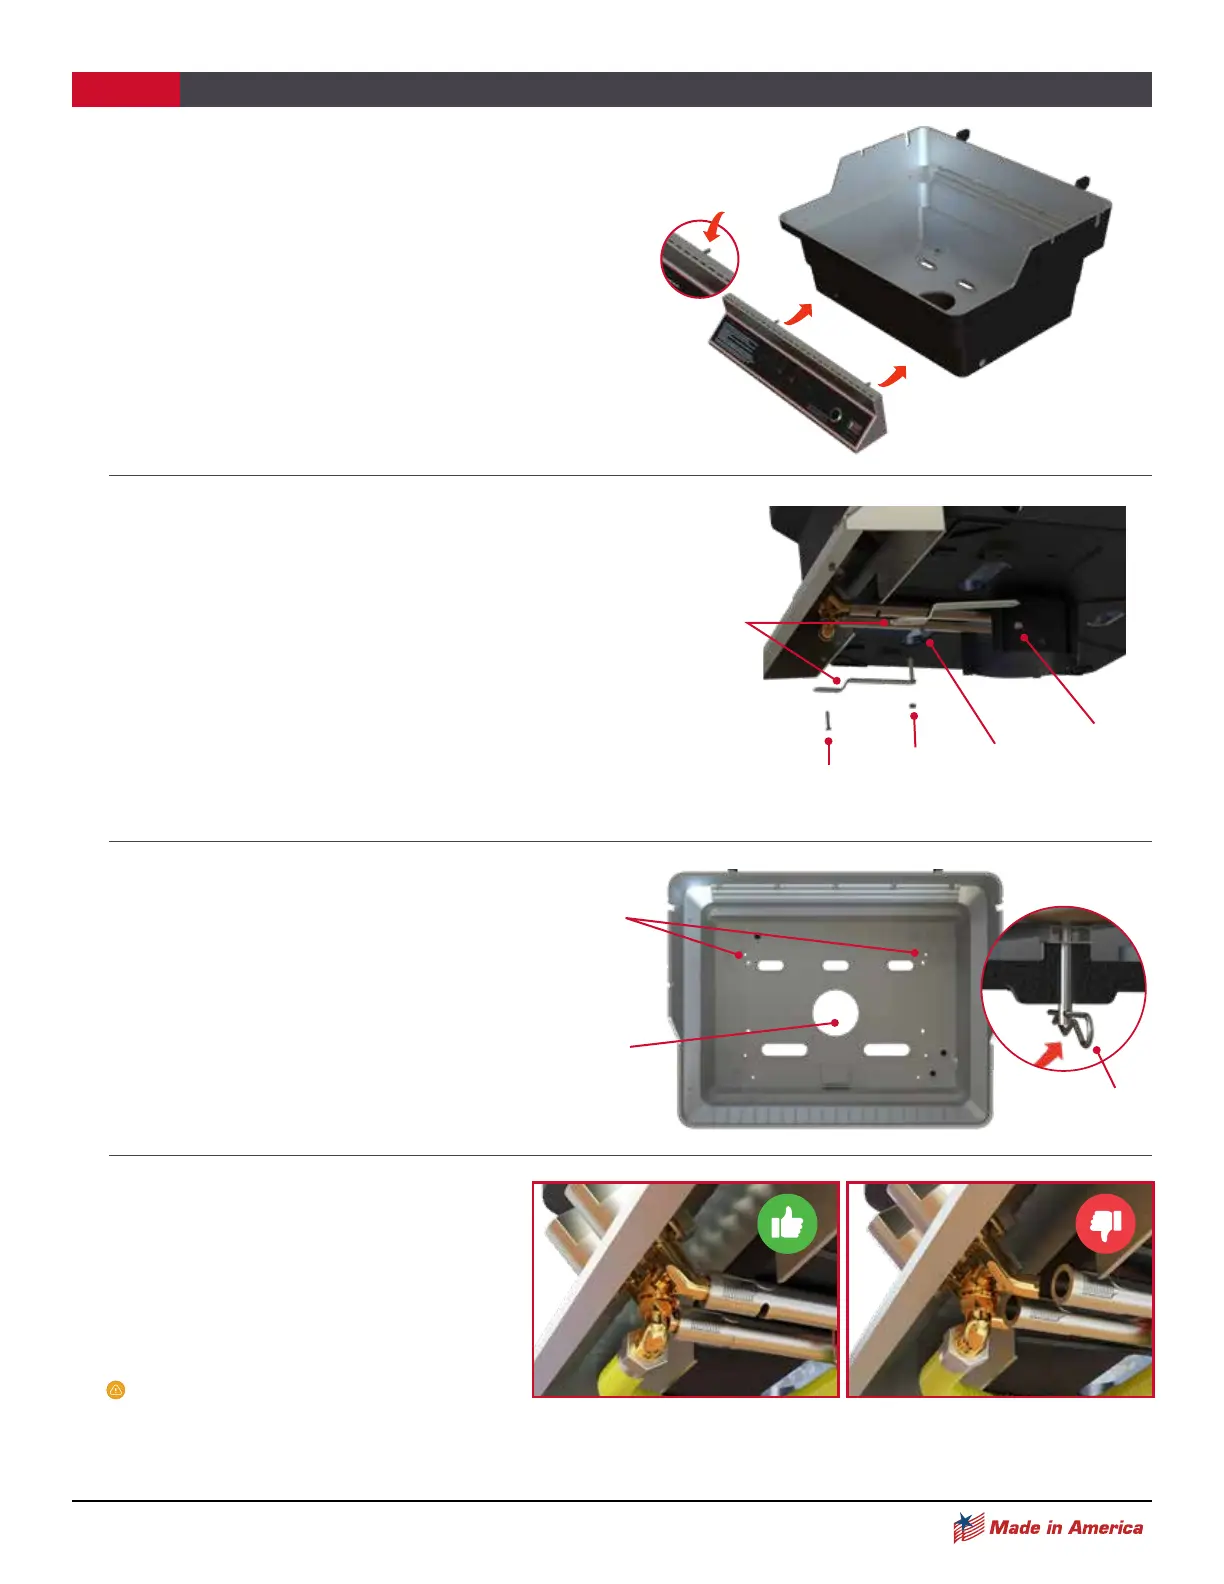
Attaching the Control Panel Assembly to the Front of
the Bottom Casting
• Attach the complete control panel assembly to the front
of the grill bottom casting with two 1/4-20 Kep Nuts and
hand tighten
• Make sure the valve orifices on the control panel align
with the burner venturi correctly and that the venturi tubes
go over the valve orifices at least 1/4" to 3/8". (see Valve
Stem Engagement below)
• Tighten all nuts using a 7/16" combination wrench
INSTALLING THE CONTROL PANEL, CONTINUED
STEP 1
Connecting the Control Panel Support Brackets
Two support brackets are connected beneath the control panel
to the grill bottom casting for added support.
• Push a 1/4 - 20 x 1-1/4" Phillips Head Bolt down through the
grill bottom casting from the inside and continue through the
back hole on the support bracket. Secure the bracket with
a 1/4 - 20 Kep Nut.
• Attach the control panel to the support bracket by pushing up
a 1/4 - 20 x 1/2" Phillips Head Bolt through the front hole of the
support bracket and the lower lip of the control panel. Fasten bracket
with a 1/4-20 Kep Nut.
• Tighten all nuts using a screwdriver and a 7/16" combination wrench.
Venturi Engagement
At the top end of each valve there is a tiny
gas opening known as the orifice. Gas exits
the orifice and enters a venturi where it mixes
with air coming in from the side air shutter.
The proper mixture of air and gas produces
a clean blue flame at the burner.
Make sure the valve orifice on the control
panel aligns with the burner venturi tube
correctly. The orifice should fit into the
venturi tube 1/4" to 3/8".
1/4-20 x 1/2"
BOLT
1/4-20 x 1/2"
BOLT
1/4-20"
KEP NUT
1/4-20"
KEP NUT
SHELF
BRACKETS
Reinstall the Burner
• Drop the burner into the bottom of the
grill casting making sure the venturi tubes
go through the bottom opening.
• The burner leg pins pins should align with
the predrilled holes in the bottom of the
grill pit.
• Reattach small cotter pins onto the
burner leg pins.
OPENING FOR
VENTURI TUBES
COTTER PIN
LEG PIN
HOLES
CORRECT INCORRECT