6.4 PROCEDURE TO INSTALL THE DRAFT TOWERS AND AIR SUPPLY HOSE
(ONLY “DD” MODELS)
Models: MDD17-E, MDD23-E, MDD58-E, MDD68-E, MDD78-E and MDD94-E
This procedure describes how to install the air channel needed to provide cold air directly into the beer towers.
Tools needed: Philips screwdriver
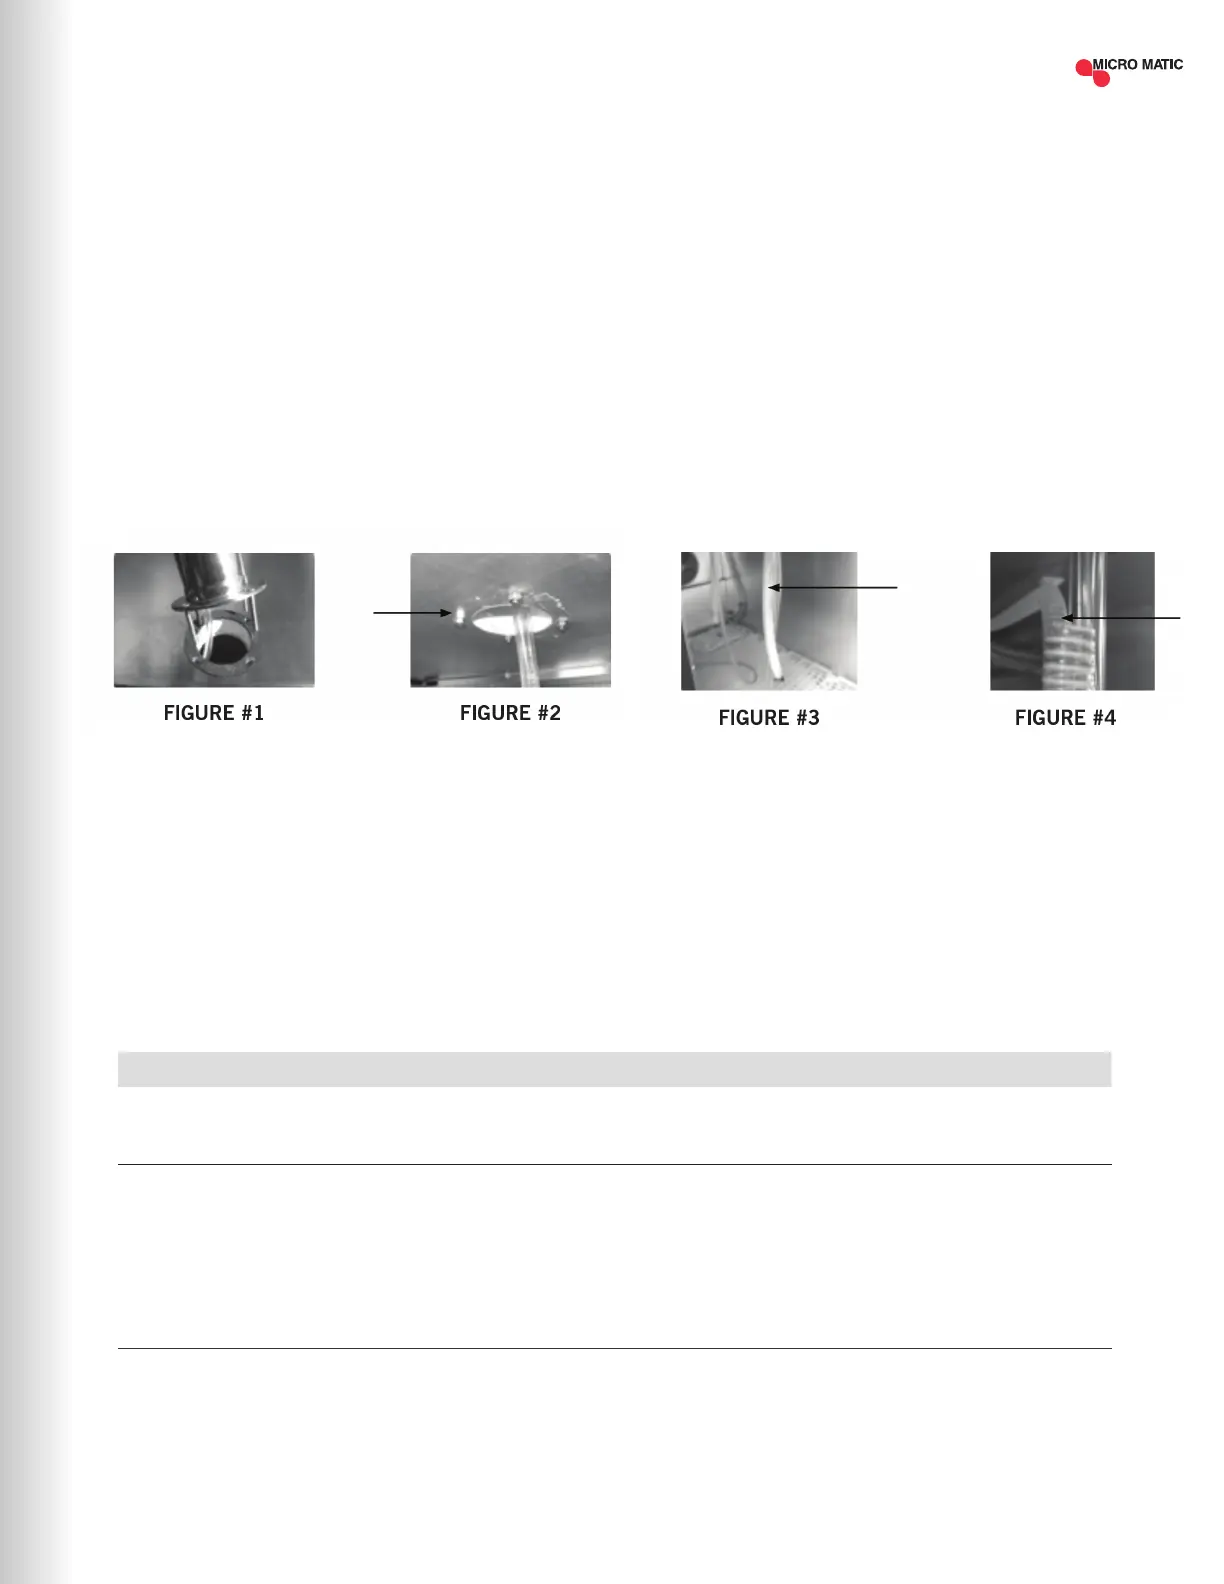
STEP 1 Locate the gaskets and bolts included in with your Tower. Place gasket over the pre-drilled holes and place
the 4 screws thru the tower base. Align the tower with screws and gasket to the cabinet top as shown below
while dropping the beer line(s) thru the top of the unit (Figure #1).
STEP 2 Tighten the screws using the nuts found in your tower box (Figure #2).
STEP 3 Identify the “COLD AIR HOSE” (Figure #3) which is found inside of the equipment.
STEP 4 Introduce the “COLD AIR HOSE” (Figure #4) which is found inside of the equipment into the tower’s base hole.
Push the cold air hose as far as possible up into the tower body. Be sure and secure cold air hose by hooking
on to beer hose elbow.
7 TROUBLESHOOTING
ERROR DESCRIPTION HANDLING
REFRIGERATION DOES
NOT WORK
• Check unit to see if still connected to power supply.
• Make sure power switch is in ON position.
REFRIGERATOR DOES NOT
REACH TEMPERATURE
• Check the thermostat is not in OFF position.
• Check the unit is not on defrost cycle.
• Check gasket is in good condition and door is sealed.
• Check fan is moving.
• Don't put any food inside until unit is at temperature
THERE IS WATER UNDER
THE REFRIGERATOR
• Verify the condensor drain pipe is over the pan.
• Check cabinet is level.
Sometimes, working failures are due to simple causes which can be solved by the user. Before
asking for the help of a qualied technician, please review the points below. These failures are not
covered by the warranty:
| 13MICROMATIC.COM SUPPORT (866) 327-4159