aponorm
®
Basis
15
EN
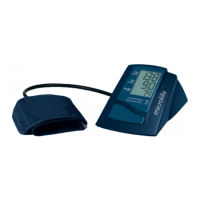
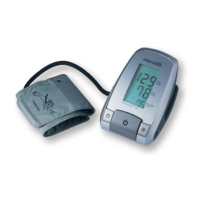
Only use aponorm
®
by microlife cuffs.
Connectthecufftothedevicebyinsertingthecuff
connector
7
into the cuff socket
3
as far as it will go.
3. Taking a Blood Pressure Measurement using
this Device
Checklist for taking a reliable measurement
1. Avoid activity, eating or smoking immediately before the
measurement.
2. Sit down for at least 5 minutes before the measurement
and relax.
3. Always measure on the same arm (normally left).
It is recommended that doctors perform double arm measu
-
rements on a patients first visit in order to determine which
arm to measure in the future. The arm with the higher blood
pressure should be measured.
4. Removeclose-ttinggarmentsfromtheupperarm.Toavoid
constriction, shirt sleeves should not be rolled up – they do
notinterferewiththecuffiftheyarelaidat.
5. Always ensure that the correct cuff size is used (marking on
the cuff).
• Fitthecuffclosely,butnottootight.
• Makesurethatthecuffispositioned2cmabovethe
elbow.
• Theartery mark located on the cuff (ca. 3 cm long bar)
must lie over the artery which runs down the inner side of
the arm.
• Supportyourarmsoitisrelaxed.
• Ensurethatthecuffisatthesameheightasyourheart.
6. Slide the lock switch
12
down to the «unlock» position. Press
theSTART/STOPbutton
1
to start measuring.
7. Thecuffwillnowpumpupautomatically.Relax,donotmove
and do not tense your arm muscles until the measurement
result is displayed. Breathe normally and do not talk.
8. When the correct pressure is reached, the pumping stops
and the pressure falls gradually. If the required pressure was
not reached, the device will automatically pump some more
air into the cuff.
9. During the measurement, the pulse indicator
20
ashesin
the display.
10. The result, comprising the systolic
14
and the diastolic
15
blood pressure and the pulse rate
16
is displayed. Note also
the explanations on further display symbols in this booklet.
11. When the device has finished measuring, remove the cuff.
12. Switch off the device. (The monitor does switch off
automatically after approx. 1 min.).
How not to store a reading
PresstheSTART/STOPbutton
1
while the reading is being
displayed. Keep the button pressed until «M»
19
isashingand
thenreleaseit.ConrmbypressingtheM-button
9
again.
You can stop the measurement at any time by pressing the
START/STOPbutton(e.g.ifyoufeeluneasyoran
unpleasant pressure sensation).
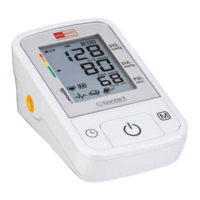
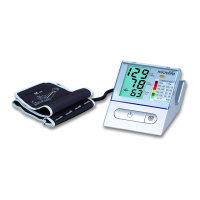
4. Traffic Light Indicator in the Display
The bars on the left-hand edge of the traffic light display
18
show you the range within which the indicated blood pressure
value lies. Depending on the height of the bar, the readout value
is either within the optimum (green), elevated (yellow), too high
(orange) or dangerously high (red) range. The classification corre
-
sponds to the 4 ranges in the table as defined by the internatio-
nalguidelines(ESH,AHA,JSH),asdescribedin«Section1.».
 Loading...