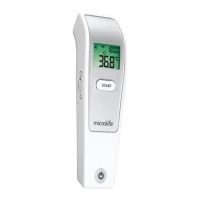
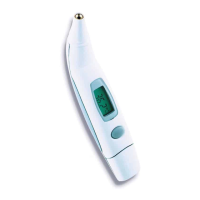
1. Press the ON/OFF button 5. The display 3 is activated to show all segments for 1 second.
2. When the «°C» or «°F» icon is flashing, a beep sound is heard and the thermometer is ready for measuring AK.
3. Aim the thermometer at the center of the forehead with a distance of no more than 5 cm . Please remove any hair, sweat, or dirt
from the forehead before measuring to improve the accuracy of the readings.
4. Press the START button 4 and ensure that the activated blue tracking light is aimed at the center of the forehead . After 3
seconds a long beep will verify the completion of measurement.
5. Read the recorded temperature from the LCD display.
Measuring in object mode
1. Follow steps 1-2 above, then aim the thermometer at the center of the object you want to measure with a distance of no more than 5
cm. Press the START button 4. After 3 seconds a long beep will verify the completion of measurement.
2. Read the recorded temperature from the LCD display.
NOTE:
• Patients and thermometer should stay in similar room conditions for at least 30 minutes.
• Don’t take a measurement while or immediately after nursing a baby.
• Don’t use the thermometer in high humidity environments.
• Patients should not drink, eat or exercise before/while taking the measurement.
• Don’t move the measurement device from the measuring area before hearing the termination beep.
• 10 short beeps and a red LCD backlight alert the patient that he/ she may have a temperature equal to or higher than 37.5 °C.
• Always take the temperature in the same location, since temperature readings may vary according to locations.
• Doctors recommend rectal measurement for newborn infants within the first 6 months, as all other measuring methods might lead to
ambiguous results. If using a noncontact thermometer on those infants, we always recommend verifying the readings with a rectal
measurement.
• In the following situations it is recommended that three temperatures are taken with the highest one taken as the reading:
1. Children under three years of age with a compromised immune system and for whom the presence or absence of fever is critical.
2. When the user is learning how to use the thermometer for the first time until he/she has familiarized himself/herself with
the device and obtains consistent readings.
3. If the measurement is surprisingly low.
• Readings from different measuring sites should not be compared as the normal body temperature varies by measuring site
and time of day, being highest in the evening and lowest about one hour before waking up.
Normal body temperature ranges:
– Axillar: 34.7 – 37.3 °C / 94.5 – 99.1 °F
– Oral: 35.5 – 37.5 °C / 95.9 – 99.5 °F
– Rectal: 36.6 – 38.0 °C / 97.9 – 100.4 °F
– Microlife NC 150 BT: 35.4 – 37.4 °C / 95.7 – 99.3 °F
8. Changing between Celsius and Fahrenheit
This thermometer can display temperature readings in either Fahrenheit or Celsius. To switch the display between °C and °F, simply turn
OFF the unit, press and hold the START button 4 for 5 seconds; after 5 seconds, the current measurement scale («°C» or «°F» icon) will
flash on the display AP. Change the measurement scale between °C and °F by pressing the START button 4. When the measurement
scale has been chosen, wait for 5 seconds and the unit will automatically enter the «ready for measuring» mode.
9. How to recall 30 readings in Memory Mode
This thermometer can recall the last 30 readings with a record of
both time and date.
• Recall mode 17: Press the M-button 8 to enter recall mode when the power is off. The memory icon «M» will flash.
• Reading 1 – the last reading AR: Press and release the M button 8 to recall the last reading. Number «1» and a flashing
«M» is displayed.
• Reading 30 – readings in succession: Press and release the M-button 8 consecutively to recall the last 30 readings in succession.
Pressing and releasing the M-button 8 after the last 30 readings have been recalled will resume the above sequence from reading 1.
10. Bluetooth ® Function
This device can be used in conjunction with a smartphone running the «Microlife Connected Health+» App. The measurement results will
be automatically transferred via Bluetooth ®.
Downloading the «Microlife Connected Health+» App
Download «Microlife Connected Health+» App for free from Google Play™ (Android) or App Store (iOS) and install it on your
smartphone.®
How the Bluetooth Function works ®
The Bluetooth function on your device will automatically turn on and will be ready to connect with the «Microlife connected Health+» App
after the device is switched on. Your device will automatically upload the data once it is connected to the smartphone.
Bluetooth ® Icon Indicator
The Bluetooth® icon indicator on your device, located in the middle-left portion of the display, is designed to provide information about
the connection between your device and smartphone.
NOTE:
• The Bluetooth function is enabled: The Bluetooth ® icon indi-cator AK appears steady on the display.
• The Bluetooth® icon indicator AK flashes when connecting with a device or uploading data to the device.
• The Bluetooth® function is automatically switched off during measurement; after measurement, the device will switch it on and upload
the data to the «Microlife Connected Health+» App.
App Tutorial
To access the tutorial, select «Tutorial» in the menu of the «Microlife Connected Health+» App (located in the upper left corner on the
screen).
11. Error Messages
• Measured temperature too high AS: Displays «H» when the measured temperature is higher than 43 °C / 109.4 °F in body mode or
99.9 °C / 211.8 °F in object mode.
• Measured temperature too low BT: Displays «L» when the measured temperature is lower than 34 °C / 93.2 °F in body
 Loading...