2 LightLid 35 Plus Installing and Getting Started
B. Positioning the LightLid 35 Plus
The lower slots are for
loading 35mm slides
The upper slots are for
loading 35mm filmstrips
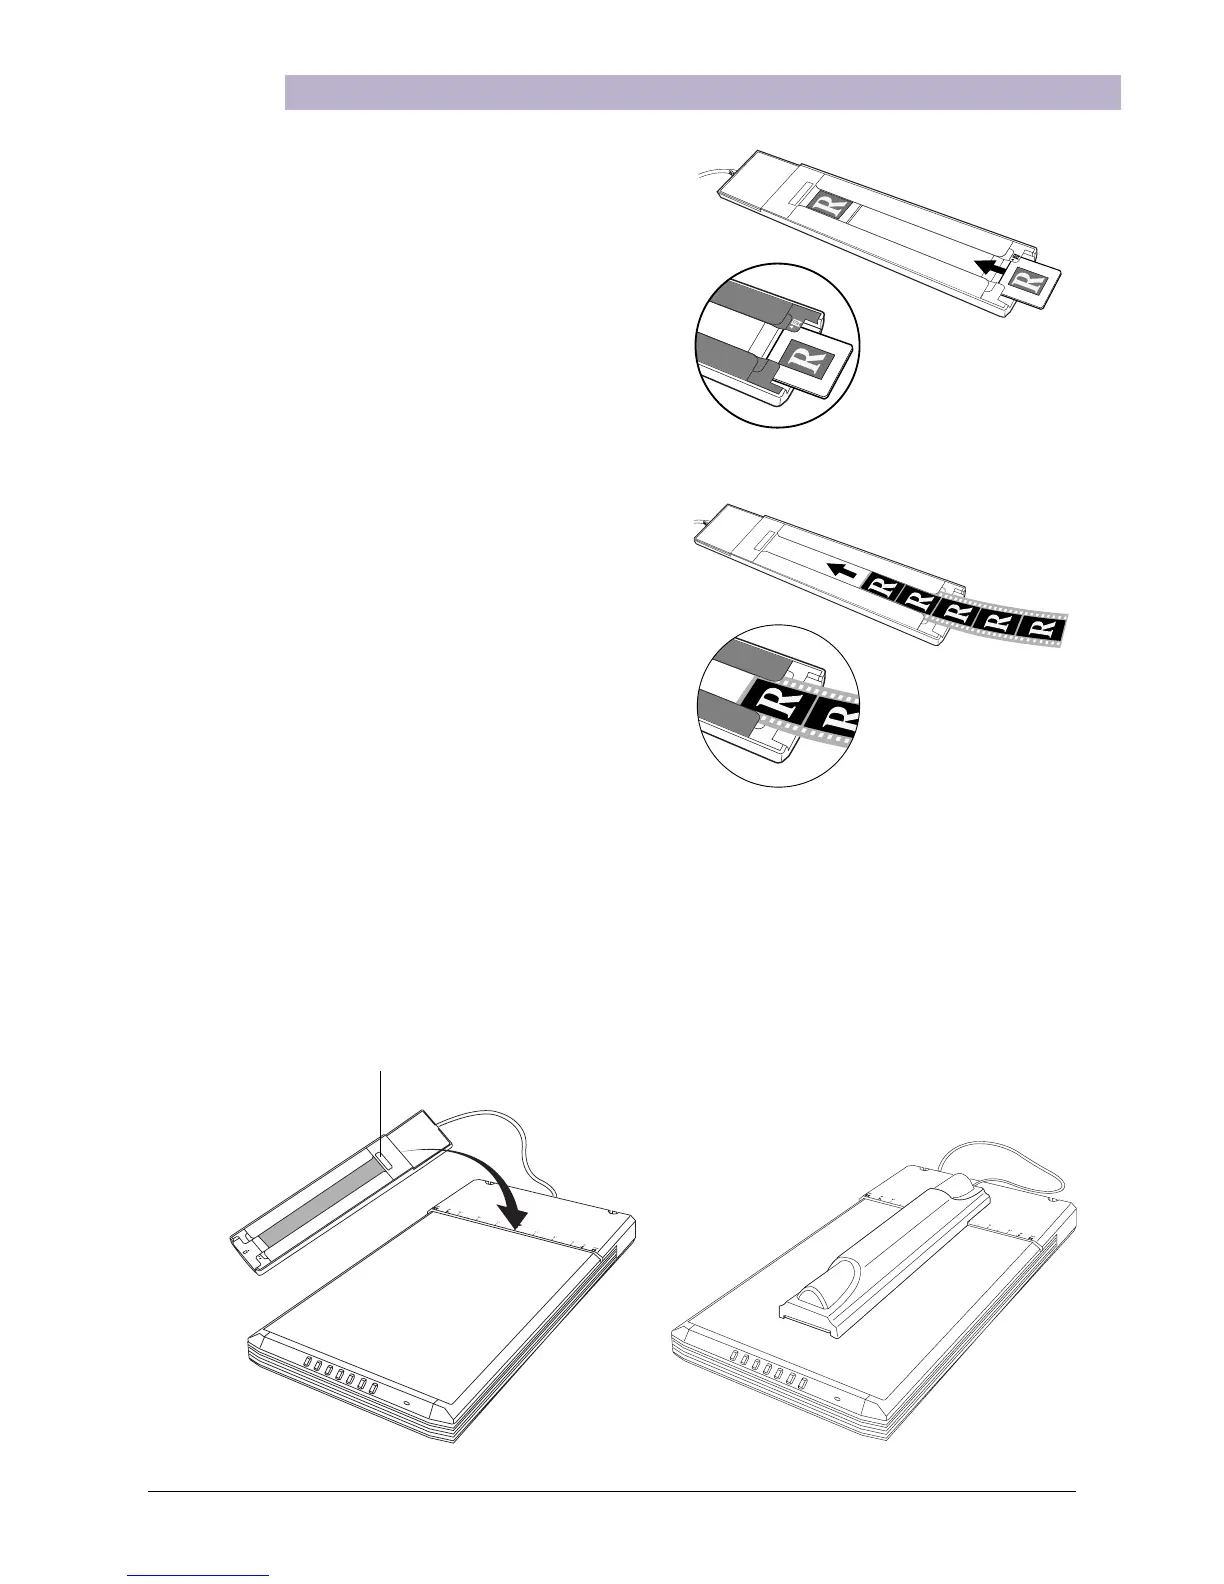
1. Load the transparent film.
A. Loading 35mm slides:
Turn the LightLid 35 Plus over. Load
the 35mm slide face up along the slots
of the LightLid.
The slides should be inserted inside the
slots specifically allotted for slides, as
shown in the illustration.
A maximum of four slides can be
loaded at a time into the LightLid 35
Plus.
B. Loading 35mm filmstrips:
Turn the LightLid 35 Plus over. Load
the 35mm filmstrip face up inside the
slots of the LightLid.
The filmstrip should be inserted inside
the slots specifically allotted for film,
as shown in the illustration.
A maximum of five frames in a
filmstrip can be scanned at a time.
2. Place the LightLid 35 Plus vertically on the glass surface of the scanner, and center
it along the top ruler of the scanner.
Important: Place lengthwise on
center of scan bed and align notch
flush with the top edge of the glass.
Ensure that the calibration window
is kept clear and free from any
obstruction for successful calibration
and best image results.