B. Advanced Control Panel:
1. Launch the ScanWizard 5 scanning software, then click the Switch icon ( ) on the
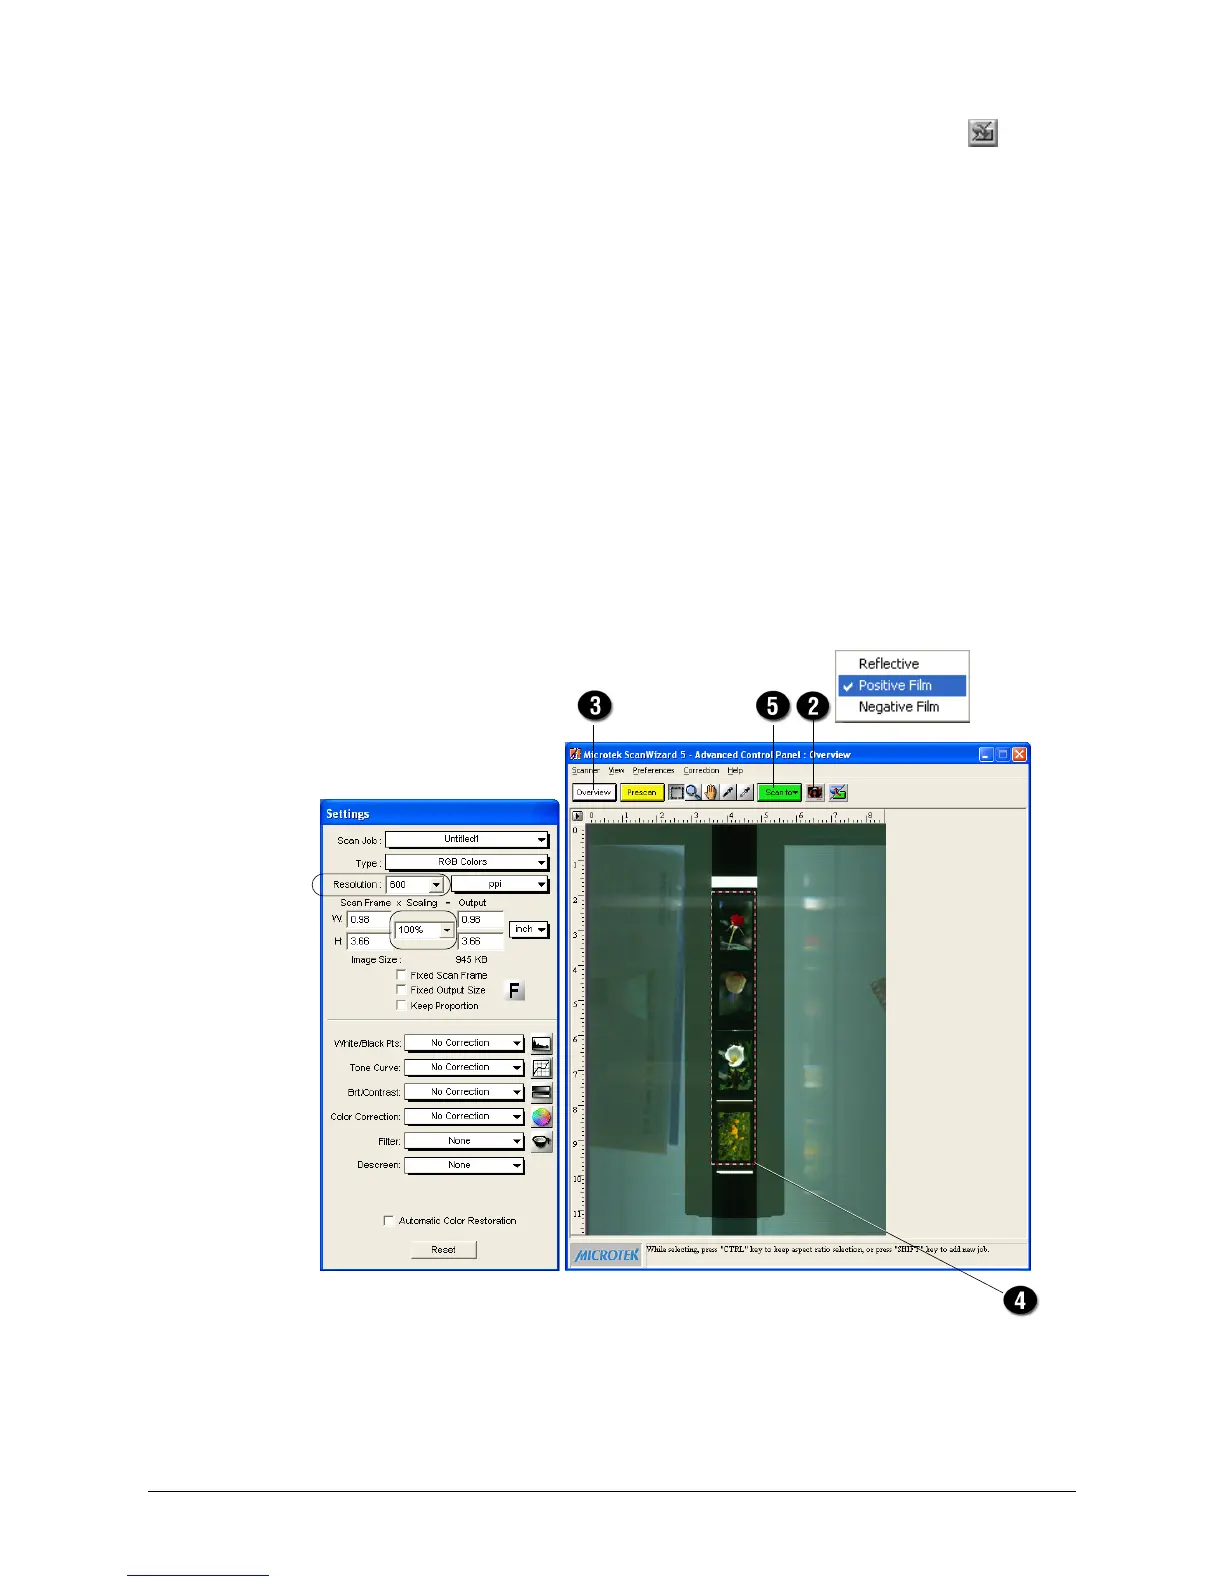
right corner of the Standard Control Panel to switch to Advanced Control Panel.
2. Click the Scan Material button, and choose Positive Film or Negative Film,
depending on the material you wish to scan. Note: For Mac OS X, select Positive or
Negative from the Scan Material pull-down menu.
When selected, the light source of the LightLid 35 Plus lights up.
3. Click the Overview button to perform a preliminary view of the entire image.
4. In the preview window, you can resize the scan frame (floating dotted lines) around
the image by dragging on the edge or corner of the scan frame to determine the
final size of the actual scan.
5. Click the Scan to button to scan the image.
After the scan, the scanned and processed image can be saved as a file, opened in an
image-editing program, sent to a printer, attached in an e-mail, or uploaded to a
website.
4 LightLid 35 Plus Installing and Getting Started
To obtain best results when
scanning with the LightLid
35 Plus, set the scan
Resolution to a minimum
600 dpi and the Scaling to
100%.

 Loading...