75730 Instructions for Kit #75729 = West Temperature Controller • Rev. H • 09-27-21 Page 2 of 8
CONTROLLER REPLACEMENT PROCEDURES
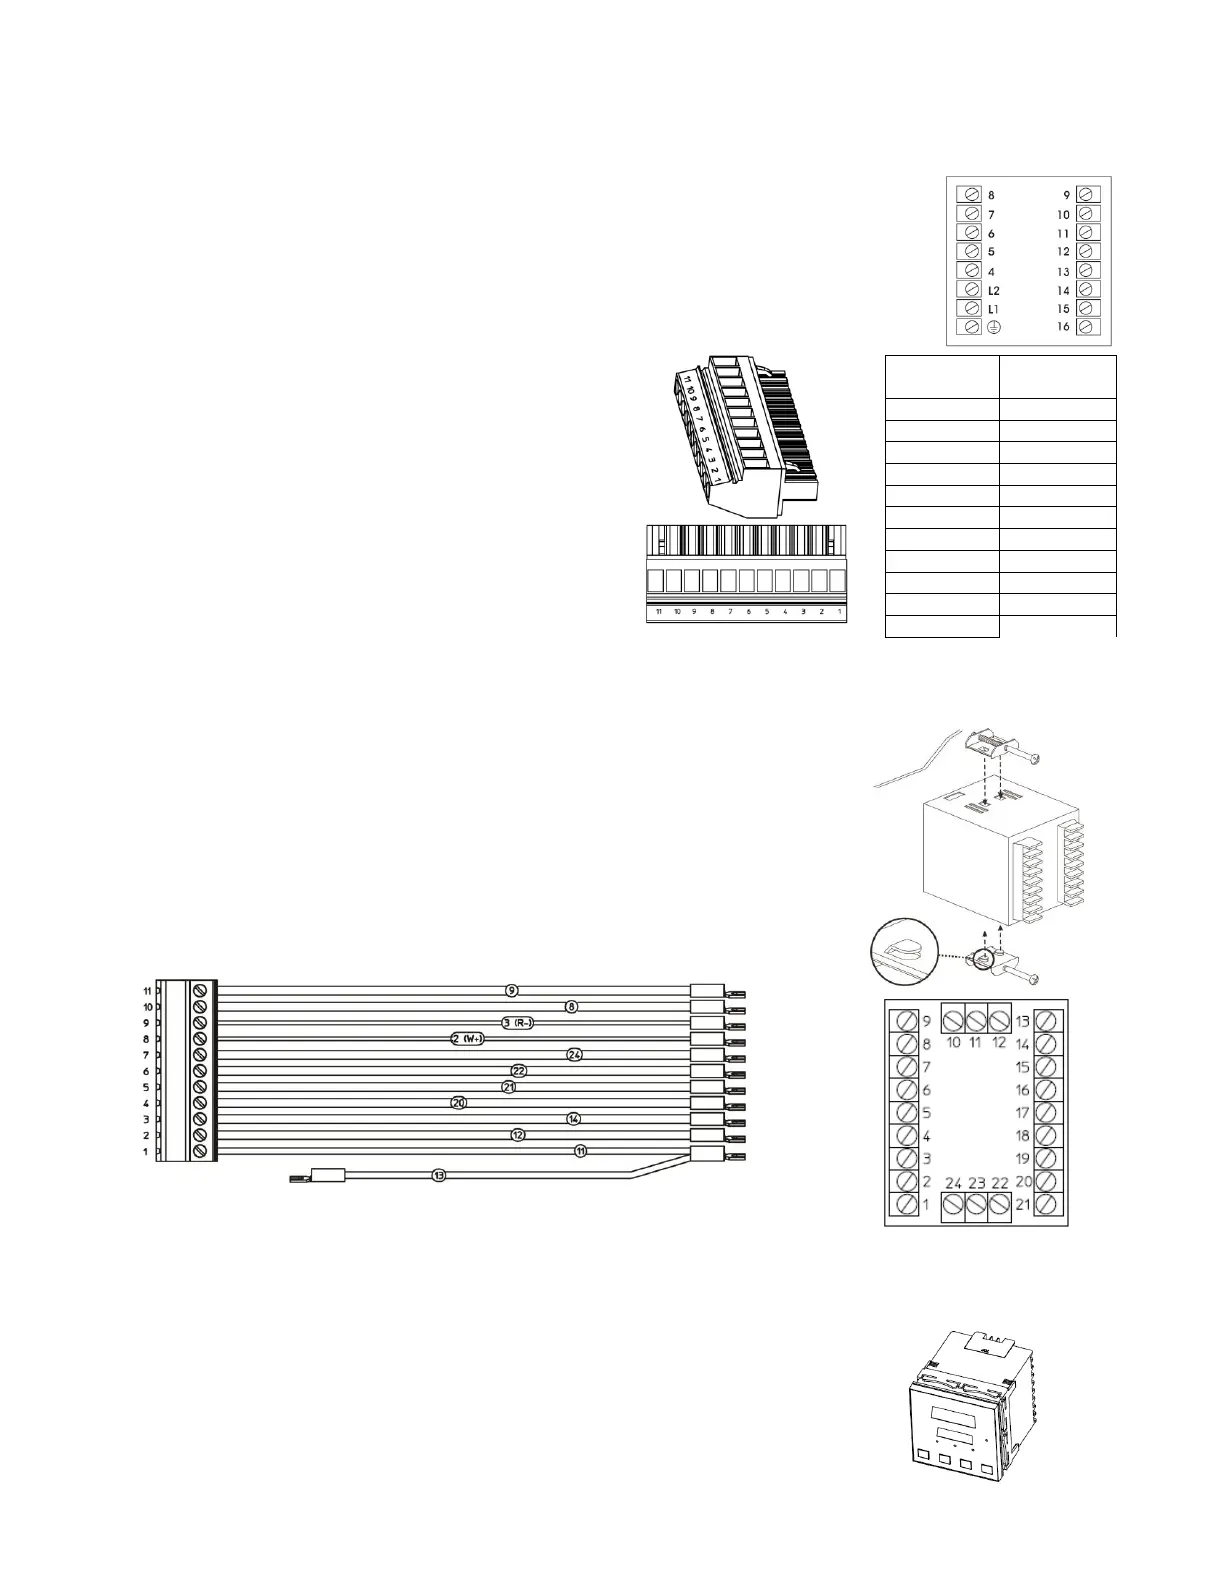
Instructions to replace Honeywell controller using pigtail (ALL OVENS EXCEPT PS640VE2, PS740VE2,
PS745, and PS840VE2)
1. Open the control panel of the oven with the old controller.
2. Label all wires going into the Honeywell controller with associated Honeywell
terminal positions.
3. Disconnect the orange or green female terminal block from the pigtail.
4. One by one, route the labeled wires from the
Honeywell control to the terminal block poles based
on the chart to the right. Make sure ALL wires in the
Honeywell terminal are transferred to their respective
terminal block position. Some terminal block positions
may be empty, and some may have multiple wires.
NOTE: JUMPERS: Discard the jumper between
Honeywell positons L1 and 10, if applicable.
OTHER JUMPERS: Any other jumper will be rerouted
to the appropriate poles on the terminal block, jumping
two positions on the terminal block.
NOTE: L1/10: All wires connected to L1 and 10 will be routed into the same terminal pole (#1).
5. PS555E ONLY: Remove the wire connected to position 9 on the Honeywell controller. Reroute the wire
connected to position 10 to Terminal Block Pole 2.
6. Reroute ground wires into nearby chassis ground studs.
7. Remove the Honeywell controller by unscrewing the two retaining brackets
and pulling the controller out of the front of the panel.
8. Remove the plastic retaining bracket from the back of the West controller.
Ensure that the rubber gasket remains installed in the inside bevel of the
controller.
9. If pigtail is not assembled to the West controller, assemble the pigtail to the
controller by matching the wire numbers to the position on the West controller.
To facilitate insertion into the control panel, do not connect wires 22 and 24.
10. Insert the pigtail and controller through the square hole in the control panel. If
wires 22 and 24 have been connected, disconnect to allow the controller to fit
through the square hole.
11. Assemble the plastic bracket to the back of the controller, with retaining feet
pointed away from the control panel and tighten as much as possible by hand.
12. Connect wires 22 and 24 to the matching terminals on the West controller.
13. Plug the male and female terminal blocks together.
14. Tidy wires with cable ties. Use electrical tape as needed to prevent shorts.
 Loading...