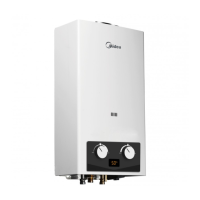
Installation Modes
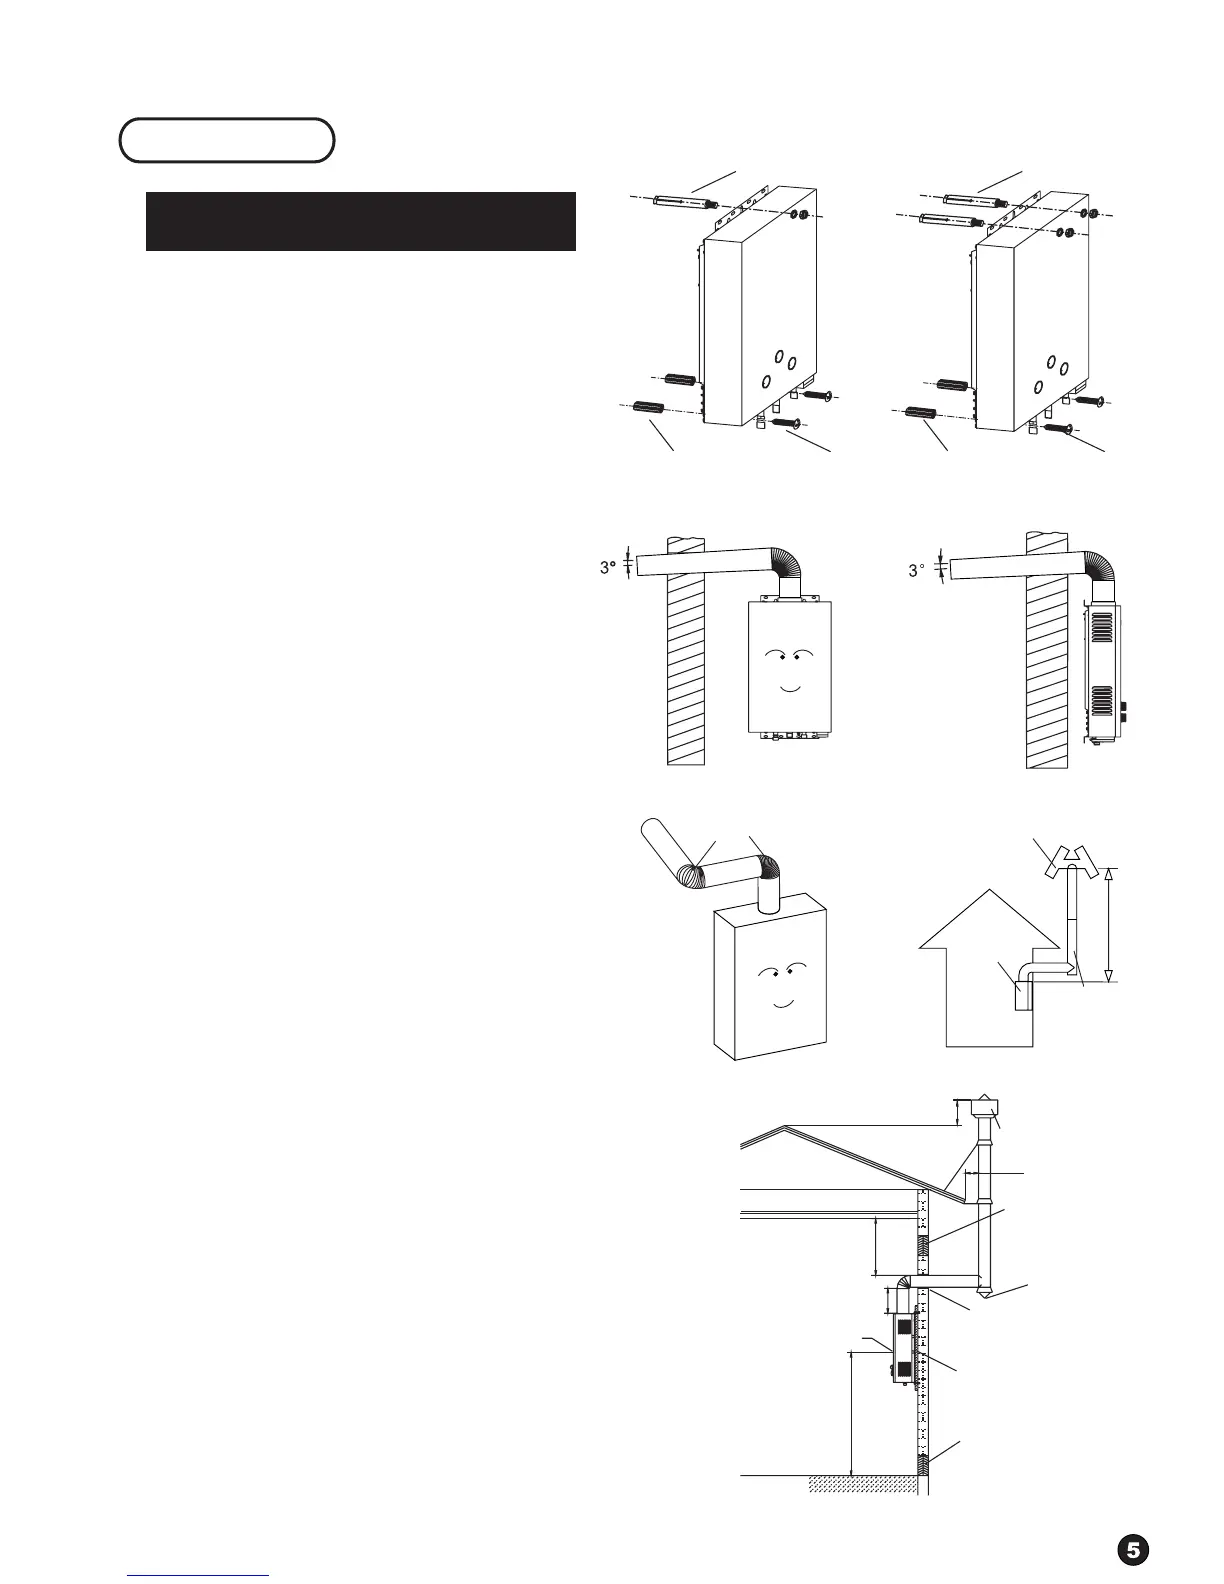
1. Keep the water heater vertical and not inclined during
the installation. As shown in the right diagram, drill
installation holes on the wall. Knock the expansion
screws into the installation holes on the top for fixing,
and insert the plastic plugs into the installation holes at
the bottom. After mounting the water heater, place the
gaskets and nuts into the expansion screws and screw
up the nuts. Screw on the tapping screw at the bottom.
The user can choose any installation mode from A and B
installation modes according to the actual situation of
each model.
2. Cautions for the Installation of the Smoke Exhaust Pipe:
a. The water heater must be installed with a smoke exhaust
pipe during the use. For the dimensions of the smoke
exhaust pipe, see the Technical Performance Parameter
List. The pipe should be installed according to the
requirements in this manual.
b. Determine the length of the corrugated tube as needed,
but the total height of the tube should be greater than
2m, the horizontal length no more than 3m, the elbows
no more than 2 and the angles no less than 90° so as to
reduce the smoke exhaust resistance.
c. Fasten the corrugated tube and the smoke vent of the
water heater with clamps to prevent exhaust gases
being vented to the indoors.
d. Make the flue pipe inclined 3° outward and downward to
facilitate the outflow of condensate water.
e. Blanket the flue pipe with heat-insulating and fire
retardant materials whose thickness must be greater
than 20mm when the flue pipe passes through the wall
made up of combustible materials.
f. Try not to hide the flue pipe inside the ceiling. Wrap up
the flue pipe with heat-insulating materials whose
thickness is greater than 20mm if it is inevitable. Keep a
distance greater than 150mm between the flue pipe and
the combustibles such as the ceiling and the furniture.
g. For maintenance, do not use cement to fill the clearance
between the flue pipe and the round hole on the wall
through which the flue pipe threads.
3. Installation of the Smoke Exhaust Pipe
a. Open a hole with its diameter slightly greater than that of
the smoke exhaust pipe in place near the water heater to
easily put the horizontal smoke exhaust pipe through the
hole. Extend the smoke exhaust pipe outside the room
and make the outdoor terminal slightly inclined
downward.
b. Set the air vent at a higher position with its minimum
height no less than the height of the water heater.
c. Set the air intake at a lower position to prevent the
outdoor air from directly entering the combustion
chamber.
d. Install a wind resistant cap firmly.
Note: It is absolutely forbidden to use this water heater
with no smoke exhaust pipe installed.
Expansion Screw
Plastic Base
No more than 2 Wind Resistant Cap
Wind Resistant Cap
600mm above
150mm above
150mm above
250mm above
Viewport
Air Vent
Brick Wall Hole
Condensate
Water Hole
Height above the Ground
Adult’s Line of Sight
Heat-insulating Panel
Air Intake
Smoke Exhaust
Pipe
2m
above
Water
Heater
Horizontal Length no more
than 3m
Angle no less than 90°
Installation Mode A Installation Mode B
Plastic Base Tapping Screw Tapping Screw
Expansion Screw