8. Check Installation
9. Suitable Weather Stripping
Check that air conditioner is tilted back about 1/4” to 1/2” (tilted about 2° to 4° downward to the outside, see
Fig. 12A & Fig. 12B). After proper installation, condensate, should not drain from the overfl ow drain hole during
normal use, correct the slope otherwise.
about
1/4”~1/2”
INSIDE
OUTSIDE
H
H
Wooden Windows
Bottom Rail
Fig. 12A
INSIDE
OUTSIDE
H=H1-H2 about 1/4”~1/2”
H1
H
Vinyl-Clad Window
Bottom
Rail
Fig. 12B
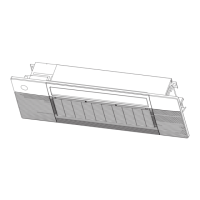
Weather stripping
Fig. 13
In order to minimize air/light leaks between the room
air conditioner and the window opening, suitable
weather stripping (trim the provided weather
stripping into suitable size) should be applied in case
of any gaps found at the location as indicated by the
arrows in Fig. 13.
Removing the air conditioner from Window
• Turn the air conditioner off, and disconnect
power cord.
• Remove sash seal from between windows, and
unscrew sash lock.
• Remove screws installed through frame and
framelock.
• Remove the insulation panel and close (slide) side
panels into frame.
• Keeping a fi rm grip on air conditioner, raise sash
and carefully remove.
• Be careful not to spill any condensate water while
lifting unit from window. Store parts WITH air
conditioner.
 Loading...