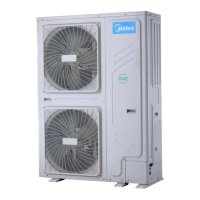
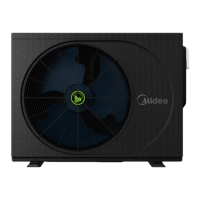
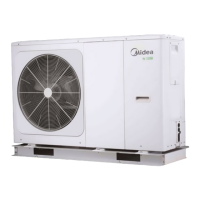
The Midea M-thermal Mono ATW Heat Pump is a comprehensive air-to-water heat pump system designed for both space heating and domestic hot water production. This quick installation manual provides essential information for preparing, installing, wiring, and operating the unit, along with troubleshooting tips and operational data. The system is distributed by Freedom Heat Pumps, a wholesale distribution company specializing in air source heat pumps and underfloor heating systems, offering technical support, training, design, and consultancy services.
Function Description:
The M-thermal Mono ATW Heat Pump operates as a single outdoor unit that manages both heating and hot water requirements for a building. It incorporates an inbuilt weather compensation system, which adjusts its operation based on external ambient temperatures to optimize efficiency. The unit can be controlled via an external thermostat or an underfloor heating system, receiving a 240V AC run signal to initiate heating mode. For domestic hot water, the target tank water temperature is set on the Midea remote controller. The unit intelligently switches to hot water mode, stopping the heating pump (Pump Po) and activating a 3-port valve (SV1) to direct heat to the hot water cylinder.
Important Technical Specifications:
The heat pump is available in various capacities, including 4/6 kW and 8/10/12/14/16 kW models, catering to different heating demands.
- Dimensions:
- 4/6 kW units: 1295mm (A) x 397mm (B) x 429mm (C) x 760mm (D) x 256mm (E) x 105mm (F) x 225mm (G) x 792mm (H) x 161mm (I).
- 8/10/12/14/16 kW units: 1385mm (A) x 482mm (B) x 526mm (C) x 760mm (D) x 270mm (E) x 160mm (F) x 221mm (G) x 945mm (H) x 182mm (I) x 81mm (J).
- Water Connections: Flow at the top, return at the bottom, both 1 1/4" male. Adapters to 1" male and flexi hoses are supplied. Connection requires 28mm copper or plastic pipe.
- Pump Capacity: The internal pump is capable of pushing water a maximum of 12m each way to the hot water cylinder and low loss header. Longer pipe runs (over 12m of 28mm copper) may require consultation.
- Condensate Drainage: The unit can produce up to 6 L/hour of condensate and requires adequate drainage.
- Electrical Supply: Power supply for 4, 6, 8, and 10kW units is 240V 16A; for 12, 14, and 16kW units, it is 240V 32A.
- Sensor and Controller Cabling: The cylinder sensor is 10m long and can be extended to 20m with 1mm flex. The remote controller requires a 5-core 0.1mm cable, with a maximum length of 20m.
Usage Features:
- Remote Controller: The system is managed via a remote controller with a user-friendly interface. It displays current water temperature, operational status, and allows for various settings adjustments.
- Weather Compensation: An inbuilt weather compensation system automatically adjusts the heating water temperature based on ambient conditions, ensuring efficient operation. For example, heating water can be set to 55°C at -2°C ambient and 37°C at 15°C ambient.
- Domestic Hot Water (DHW) Mode: The target DHW temperature is set via the remote controller. The unit prioritizes DHW heating when required, switching the 3-port valve to direct heat to the cylinder.
- Legionella Protection: The system supports legionella protection, typically managed by an external immersion heater running for 1 hour a week, controlled by an external time clock. The internal thermostat on the immersion should be set to 60°C.
- Room Thermostat Integration: The unit can integrate with an external room thermostat or underfloor heating system to receive a 240V AC run signal for space heating.
- Error Codes: The remote controller displays error codes (e.g., E0, E2, E8) to indicate system issues, such as wiring problems or air in the system.
- Test Run Mode: A dedicated "TEST RUN" mode allows installers to verify the correct operation of components like the 3-way valve, pumps (Pump I and Pump O), and to force the heat pump to run for testing purposes.
- Operational Data Review: A detailed "OPERATION PARAMETER" menu provides comprehensive data for installers and service engineers, including online units number, operate mode, SV states, pump statuses, water temperatures (leaving water, tank, buffer tank, plate), water flow, heat pump capacity, power consumption, ambient and room temperatures, ODU model, compressor current/frequency/run time, expansion valve position, fan speed, IDU target frequency, supply voltage, DC generatrix voltage/current, and various component temperatures (compressor suction/discharge, outdoor exchange, TF module).
Maintenance Features:
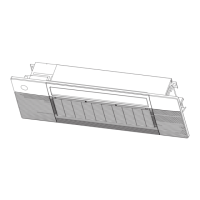
- Coil Cover Removal: The blue protective cover over the coil must be removed during installation.
- Compressor Support Removal: For larger 8-12-14kW units, a compressor plate (transportation support) must be removed prior to installation. The metal frame the unit is bolted to is structural and should not be removed.
- Air Purging: During initial setup, it is crucial to remove air from the water circuit using air purge valves to prevent flow errors (E0 and E8). The automatic air vent (AAV) in the outdoor unit must be open when filling the system.
- Drainage: The unit requires adequate drainage for condensate. If installed at height, a drain pan can be used, but direct drainage into the ground is preferred.
- Factory Settings Restore: The remote controller offers a "RESTORE FACTORY SETTINGS" option to revert all parameters to their default values, useful for troubleshooting or re-configuration.
- Installation Clearances: Specific clearances are required around the unit for optimal airflow and maintenance access: 300mm to the left, 300mm to the right, 300mm to the rear, and 1500mm to the front.
- Low Loss Header Requirement: Every system must include a low loss header (buffer or plate heat exchanger) in the heating circuit. Failure to install one will void the warranty.
- Coastal Installation: For units installed within a mile of the sea, a Blygold coating is recommended for protection. This is also a requirement for RHI (Renewable Heat Incentive) and MCS (Microgeneration Certification Scheme) compliance (MIS020).
- Mounting: The outdoor unit must be installed on a flat, stable surface, securely mounted at least 100mm off the ground. Rubber feet can be used but are not essential.