10 11
MY-SS5051P 220-240V~ 50/60Hz 900W
220-240V~50/60Hz
L
N
E
N
L
θ
θ
12
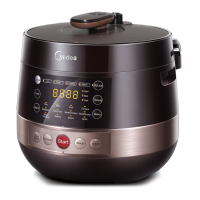
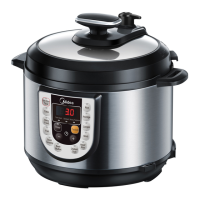
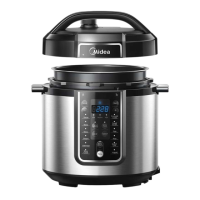
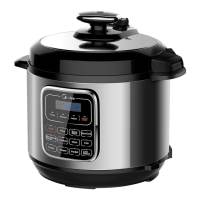
Electric Pressure Cooker
Instructions
Please read the manual carefully before using this appliance and keep them for future reference.
Repair Service
Suspicious Problem
When you think the product has a malfunction, please check and confirm the following
situations before taking it to service center.
Problem
Leakage from lid
Difficult to open the lid
Difficult to close the lid
Possible Reason
Sealing ring not installed properly
Lid handle is not at the lid open position
Lid handle gets stuck
Pressure exists inside the cooker
Float valve stuck
The sealing ring wore out
Food debris attached to the sealing ring
Food debris attached to float valve gasket
Float valve gasket wore out
No float valve installed
The lid is not closed properly
Circuit malfunction
Heating base malfunction
Position the sealing ring well.
Turn lid handle to lid open position
Send the appliance to repair service for overhaul
Wait till safety valve completely drops down
Pat the lid
Remove steam vent, press the float valve lightly with sharp
object. If it doesn’t work, send it service center.
Replace the sealing ring
Clean the sealing ring
Clean float valve gasket
Send appliance to repair network to replace float valve gasket
Install float valve
Close the lid again
Send the appliance to repair service for overhaul
Anomaly self-checking
Display anomaly judgement, please take the appliance to local dealer or service center for
repair or installation.
Indicator state Abnormal display
Possible Reason
Solutions
Display
Display
Display
Display
Display Open circuit of bottom sensor
Short circuit of bottom sensor
Short circuit of upper
housing sensor
Overtemperature protection
Open circuit of press switch
Please return the appliance to service center
for repair.
Please return the appliance to service center for
repair.
Please return the appliance to service center
for repair.
Please check whether there is water or food in
the pot; press “Cancel” button after adjustment,
th
e appliance can be normally used after beep
stops; otherwise, send it to repair network.
Please return the appliance to service center
for repair.
Solutions
Technical specification
Model Rated voltage/Rated frequency
Rated power
Capacity
Working
Pressure
70kPa
Circuit Principle Diagram
Circuit breaker
Temperature fuse
erusserP
hctiws
socket
Electric hot tray
Power
panel
Connecting line
Lid open/close
check switch
Temperature sensor of upper housing
Temperature
sensor of base
Display panel
Pressure
sense switch
Solenoid
valve
All contents of this manual have been carefully checked. In case of any printing errors
and omissions or any resulting misunderstanding, please consult us.
Note: This product is subject to any technical improvement which will be incorporated
into the new version of this manual in the future without the prior notice. Any change in
the appearance and colour of the product is subject to the real object.
Heating plate doesn’t
heat in operation state.
21
3
IMPORTANT SAFETY INSTRUCTIONS
IMPORTANT SAFETY INSTRUCTIONS
IMPORTANT SAFETY INSTRUCTIONS
Tips
4 5
Manual
Preset
Count down
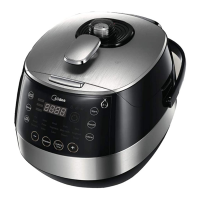
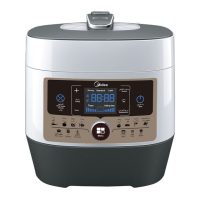
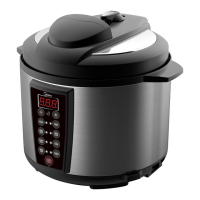
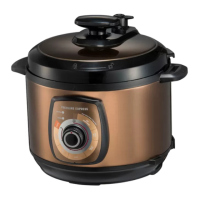
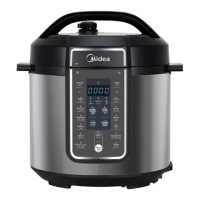
The product is subject to the real object.
Parts and features
Lid Handle
Sealing Ring
Magnetic Float Valve
Lid
Lid Open
Control Panel
Bottom housing
Steam Vent
Upper Housing
Anti-block Shield
Float Valve
Temperature sensor
Condensation Collector
Handle
Power Cord
Serving
Spatula
Soup
Ladle
Measuring
Cup
Steam
Rack
Control Panel
Cancel/Keep
warm button
Manual button
Add ingredient
button
Temperature
button
Start button
Preset button
Function display
Menu button
Cooking time button
Product Overview
a
a
a
a
b
b
b
b
c
c
d
c
6
Remove coverplate for cleaning
Caution: Please make sure the
appliance is unplugged before cleaning!
Grasp and pull the coverplate from lid.
Steam vent cleaning
Scrub debris on anti-block shield, float valve and Lid.
Install coverplate again properly.
Hold the front of steam vent and pull it up.
Press buckles of steam vent to both sides, wash and
dry it.
Position float valve mandril into upper housing of
steam vent and reinstall it.
Condensation collector cleaning
Remove
Install
Pull condensation collector out horizontally.
Reinstall condensation collector in place.
Pot cleaning
Wash and dry condensation collector.
Clean water, grain, debris for inner cooking pot and
exterior pot.
Clean and dry the bottom of inner cooking pot.
Install and Clean
Wash coverplate and sealing ring, dry completely.
1
1
3 4
5 6
2
3
4
7
1
1
1
2
2
2
7 8 9
Manual
Preset
Count down
Manual
Preset
Count down
Manual
Preset
Count down
Manual
Preset
Count down
Manual
Preset
Count down
Manual
Preset
Count down
Instructions for Use
Soup
Taking “soup” for example, other options include Fry, Stew, Meat, Fish, Rice, Bread, Pasta,
Vegetable, Slow cook, Yoghurt, Desserts, Bake, Cake, Steam
Clean soup base (pork bone, corn, carrot
etc.), chop them and then put all into
inner cooking pot.
Add water to corresponding fill line.
Add appropriate water to corresponding fill line
based on ingredients or personal preference.
Note: Water shall not exceed max fill line.
Select a function
Connect the power
Insert the power plug and ensure proper
connection with the socket.
Start cooking
Soup cooking state
Press “Menu” button, select “Soup” function.
Press “Start” button to enter
soup cooking state.
Soup cooking completed
If you’d like to switch or cancel current
function, press “cancel” button to
select again.
After the soup is completed, the cooker automatically goes into “keep warm” state.
Note: Open the lid after the float valve drops down.
Instructions for Use
Preset Meat
Eg: Preset “Meat”, Start cooking at 7:30 the next day. (Preset time refers to count down
time. If it’s now 10:30 pm, the preset time should be 9:00).
Note: Fry, Yoghurt, Desserts, Cake cannot be preset.
Prepare rice and water
Place the rinsed rice into the cooking and
choose the appropriate water level according
to rice amount. Add water until the water level
and increase or reduce the amount as desired.
Note: Water shall not exceed max fill line.
Preset time setting
Press “Preset” button to enter preset state
,and then press “+” “-” button to adjust
time needed.
Press “Menu” button or “+” “-” button, select
needed function(such as Meat).
Start preset
Press “Start” button, the cooking will start at
appointed time.
Instructions for Use
Temperature setting
Manual
Preset
Count down
Press “Manual” button and then adjust
temperature via “Temperature
” or “+” “-”
button;
(Before use
“+” “-” button to adjust
temperature, you need press
“Temperature” button first)
Setting completed, press “Start” button
to start cooking.
Add ingredient
Cooking without lid
Cooking Time
Press “Add ingredient/vent” button
during cook, the add ingredient indicator
will be on and start vent.
Take Pasta as an example (other functions include Fry)
When the add ingredient indicator starts
flashing and meanwhile beep (last for
2 minutes), the lid can be opened.
“Add ingredient” function is available for “Stew, Meat, Soup” functions.
Prepare soup base and clean it
Press “Menu” or “+” “-”button, select
needed function(such as Stew), and
then adjust cooking time via “Cooking
Time” “+” “-” button. (Before use “+” “-”
button to adjust cooking time, you need
press “Cooking Time”button first)
Setting completed, press “Start” button to
start cooking.
1
Open the lid, switch the handle to
2
Press “Function” button, choose “Pasta”.
Then press “Start” button, and the unit
will work without lid.
Oil shall not exceed 4 fill line when use the fry
function.
Structural diagram
of float valve
Tips:
Confirm that the float
valve, block proof cover
and seal ring are
correctly installed before
use each time;
Before putting the inner
pot into the cooker each
time, please remove the
dirt and water from the
external side of the
inner pot and internal
side of the external pot;
Please move the
product with the handle
of the cooker body;
Please remove the
water from the housing
cover with cloth.
Note:
① Exhaust valve: Pull out the exhaust valve from the lid. Clean the internal side of the exhaust valve and
the exhaust valve and float valve of the lid with brush and cloth at least once a month.
② Sealing gate: Please remove oil and dirt from the sealing gate with detergent and brush. The remained
oil and dirt in it may appear in yellowish. After washing, it may recover to the original color as stainless
steel. It is suggested to clean the sealing gate once every 2 months.
③ Water box: After cooking, the steam may stay in the water box of the external pot as water. Water in
the box should be removed for avoiding bad odor, please clean it with clean cloth.
To avoid personal injury and property loss, be sure to observe the following safety precautions.
The danger caused by mistaken use if following warnings are neglected includes to two grades
Meanings of the marks:
Safety precautions
Means “Forbidden”
items
Means “Mandatory” items
General Forbid
Disassemble
Forbidden
Wet hands Forbidden
Contact Forbidden
Spray Water
Forbidden
Must be executed
Remove the
power plug
Warning
It may possibly cause death or serious injury if the warming items are disobeyed.
It may cause physical injury or property damage if the caution items are disobeyed.
Caution
En
vironment for storing the Product
Periodically clean the cooker and remove oil and dirt if it is stored on the table.
Put the electric pressure cooker 30cm away from other kitchen appliances.
This appliance is labeled in compliance with European directive
2012/19/EU for Waste Electrical and Electronic Equipment (WEEE).
By ensuring that this appliance is disposed of correctly, you will
help prevent any possible damage to the environment and to
human health, which might otherwise be caused if it were disposed
of in the wrong way.
The symbol on the product indicates that it may not be treated as
normal household waste. It should be taken to a collection point for
the recycling of electrical and electronic goods.
This appliance requires specialist waste disposal. For further
information regarding the treatment, recovery and recycling of this
product please contact your local office, your household waste
disposal service, or the shop where you purchased it.
For more detailed information about treatment, recovery and
recycling of this product, please contact your local office, your
household waste disposal service or the shop where you purchased
the product.
DISPOSAL: Do not
dispose this product
as unsorted municipal
waste. Collection of
such waste separately
for special treatment is
necessary.
——If the fault is not removed after above check, please contact our authorized service center for repair.
4.8L