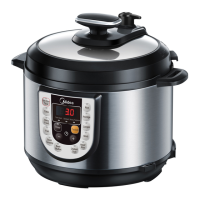
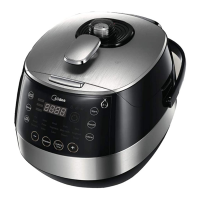
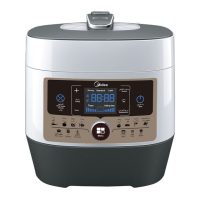
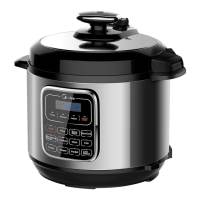
This document is a user manual for the Midea Electric Pressure Cooker, Model MY-CS5039P. It provides comprehensive information on the device's functions, specifications, usage, and maintenance.
Function Description
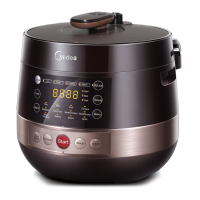
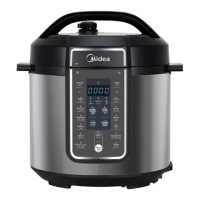
The Midea Electric Pressure Cooker is designed for various cooking tasks, offering multiple preset functions to simplify meal preparation. Its primary function is pressure cooking, which allows for faster cooking times compared to conventional methods while retaining nutrients and flavors. The cooker features an LED display and a control panel with both operation keys and quick function buttons, making it user-friendly.
Key Functions:
- Pressure Cooking: The core function, enabling efficient cooking of a wide range of foods.
- Preset Functions: Includes dedicated settings for "Rice," "Ribs," "Fish," "Congee," "Multigrain," "Baby food," "Meat/Chicken," "Beef/Mutton," "Bean/Tendons," "Reheat," "Steam," and "Broth." These functions are accessible via the "Menu" button or quick function buttons.
- Timer Function: Allows users to pre-set cooking times, useful for delayed cooking.
- Keep-Warm Function: Automatically activates after cooking is complete, maintaining food temperature. It can also be manually activated from standby.
- Texture Selection: For certain functions like "Rice," "Ribs," "Fish," "Congee," "Multigrain," "Baby food," "Meat/Chicken," "Beef/Mutton," "Bean/Tendons," "Steam," and "Broth," users can select desired food texture (Light, Med, High). This feature is not available for "Reheat," "Hot pot," "Fast Cook," "Porridge," "Soup," and "Stew" functions.
- Quick Release: A method to quickly release steam from the cooker by pressing the "Steam Release" key.
- Nature Release: Allows the cooker to cool down naturally, releasing pressure over time.
Control Panel Elements:
- LED Display: Shows the cooker's current state (OPEN, Standby "----", Preset time countdown, Program operating "----", Keep-Warm "0H").
- Operation Keys:
- Cancel: Stops current program or setting, returns to standby. Activates keep-warm from standby.
- Timer: Sets pre-set time for delayed cooking.
- Warm: Activates or controls the keep-warm function.
- Hot pot: For cooking with the lid in an open state.
- Texture: Adjusts food texture for applicable functions.
- Menu: Selects general functions.
- Quick Function Buttons: "Fast Cook," "Porridge," "Start," "Soup," and "Stew" for direct access to these popular cooking modes.
Important Technical Specifications
The manual provides a clear table of specifications for the Midea Electric Pressure Cooker:
- Model: MY-CS5039P
- Voltage/Frequency: 220-240V~50/60Hz
- Power: 900-1070W
- Inner Pot Caliber: 22cm
- Inner Pot Volume: 5.0L
- Working Pressure: 70kPa
- Warm Temperature: 60°C~80°C
- Accessories: Includes Rice paddle, soup spoon, measuring cup, Condensation collector, and user manual.
Usage Features
The manual outlines detailed steps for using the pressure cooker, from initial setup to specific cooking programs.
Before First Use:
- Unpack all accessories and read the manual.
- Wash the inside of the lid and inner pot with warm soapy water, rinse, and dry.
- Wipe the outer housing with a damp cloth.
- Crucially, never immerse the cooker housing in water or any other liquid.
- The inner pot, sealing ring, exhaust valve, and all accessories are dishwasher safe, but the lid and housing are not.
Assembly and Disassembly:
- Anti-Block Shield: Can be removed by pushing it to the side and lifting up. Installed by positioning and pressing down.
- Sealing Ring: Removed by pulling upwards in sections. Installed by pressing down into the rack section by section. Can be installed with either side facing up.
Safe Lid Opening:
- Ensure the cooking program is complete or terminated with "Cancel."
- Release pressure using either:
- Quick Release: Press the "Steam Release" key until the float valve drops. Caution: Keep hands and face away from the steam vent as steam is very hot. Not suitable for large liquid volumes or high-starch foods to prevent splattering.
- Nature Release: Allow the cooker to cool naturally until the float valve drops (10-15 minutes). A wet towel on the lid can speed cooling.
- Open the lid by holding the handle, turning counter-clockwise, and lifting. Caution: The lid is locked until pressure is fully released and the float valve drops. If stuck, gently push the float valve down with a pen or chopsticks after confirming pressure release.
Cooking Preparation:
- Open the Lid: Rotate the lid handle counter-clockwise approximately 30 degrees.
- Check Lid Parts: Ensure float valve and exhaust valve are free of obstructions. Verify the sealing ring is properly seated, the anti-block shield is installed, and the float valve moves freely.
- Add Food and Liquid: Remove the inner pot. Do not exceed the maximum fill level (2/3 full, or 1/2 full for expanding foods like rice, beans, or dried vegetables) to prevent clogging and spillage.
- Place Inner Pot: Ensure the inner pot's exterior and the heating element are clean and dry. Rotate the inner pot slightly after placement to ensure good contact.
- Close the Lid: Align the marks on the lid and housing rim, then rotate the lid clockwise approximately 30 degrees until it locks.
Cooking Process (Example: Original Flavor Soup):
- Prepare ingredients (e.g., pork bone, corn, carrot), clean, chop, and place in the inner pot.
- Add water up to the corresponding fill line, not exceeding the max fill line.
- Connect the power plug securely.
- Press the "Soup" button to enter the soup cooking state. To change or cancel, press "Cancel."
- Once soup is completed, the cooker automatically enters "Keep Warm" state.
Pre-set Fragrant Steamed Rice (Example):
- Rinse rice and place in the inner pot, adding water according to rice amount and desired level. Do not exceed max fill line.
- Close the lid. Press the "Menu" button to select "Rice" or another desired function.
- Press the "Timer" button repeatedly to adjust the pre-set time.
- Press the "Start" button to begin the pre-set cooking.
Food Texture Selection:
- For applicable functions (e.g., Rice), after selecting the function, press the "Texture" button to choose "Light," "Med," or "High" taste.
- Then press "Start" to begin cooking.
Reheat Function:
- After stirring loose the rice, sprinkle 50-80 grams of water.
- Press the "Menu" button to select "Reheat."
- Press the "Timer" button to adjust heating time (8-20 minutes).
- Press "Start" to begin reheating.
- Note: Maximum rice amount for reheat is mark 4.
Warming:
- Pressing "Warm" in standby activates the "Keep Warm" function.
- The indicator lights up, and "0H" is displayed, counting time in hours. After 24 hours, it displays "----".
- The "Keep Warm" function can be used with or without the lid closed.
Maintenance Features
Proper care and maintenance are crucial for the safe and long-term operation of the pressure cooker.
Safety Precautions for Maintenance:
- Stop using the appliance immediately and contact support if:
- Power cord or plug shows expansion, deformation, discoloration, or damage.
- A portion of the power cord or plug gets unusually hot.
- The cooker heats abnormally or emits a burnt smell.
- Unusual sounds or vibrations occur when powered on.
- Remove dust or dirt from the plug or socket with a dry brush.
- Caution: Always ensure the appliance has cooled down and is unplugged before cleaning.
Cleaning Instructions:
- After Each Use: Clean the product. Wipe the black inner housing rim and slot dry with a cloth to prevent rusting.
- Inner Pot and Lid: Remove the lid and inner pot. Wash them with detergent, rinse with clear water, and wipe dry with a soft cloth.
- Lid Components: Use water to clean the lid, including the removable sealing ring, exhaust valve, and anti-block shield. Wipe them dry with a soft cloth. Do not take apart the steam release pipe assembly.
- Cooker Body: Clean with a clean damp cloth. Do not immerse the cooker into water. Do not use a wet cloth to clean the pot while the power cord is plugged into the power outlet.
Sealing Ring Care:
- Prior to each use, inspect the sealing ring to ensure it's well-seated and the anti-block shield is properly mounted.
- After use, remove any foreign objects.
- Keep the sealing ring clean to avoid odor. Washing in warm soapy water or dishwater can remove odor, but it's normal for it to absorb smells from acidic foods. Having multiple sealing rings is recommended.
- Never pull the sealing ring by force, as this can cause deformation and affect its sealing function.
- Replace any sealing ring with cracks, cuts, or other damages.
Troubleshooting:
The manual includes a comprehensive troubleshooting guide for common issues, listing problems, possible reasons, and solutions. Examples include:
- Difficult to close/open lid: Often due to improper sealing ring installation, popped-up float valve, or residual pressure. Solutions involve repositioning the sealing ring, pressing down the float valve, or releasing steam.
- Steam leaks: Can be caused by a damaged sealing ring, food debris on the silicone seal, or the lid not being closed properly. Solutions include cleaning, replacing parts, or re-closing the lid.
- Float valve issues: May be obstructed by debris or the locking pin. Solutions involve cleaning or ensuring proper closure.
- Display issues: Blank display could indicate a bad power connection or blown fuse. Error codes (E1, E2, C1, E8) point to sensor or switch issues, requiring service.
- Cooking results (rice): Half-cooked/hard rice suggests too little water or premature cover opening. Soft rice indicates too much water. Solutions involve adjusting water ratios or leaving the cover on longer.