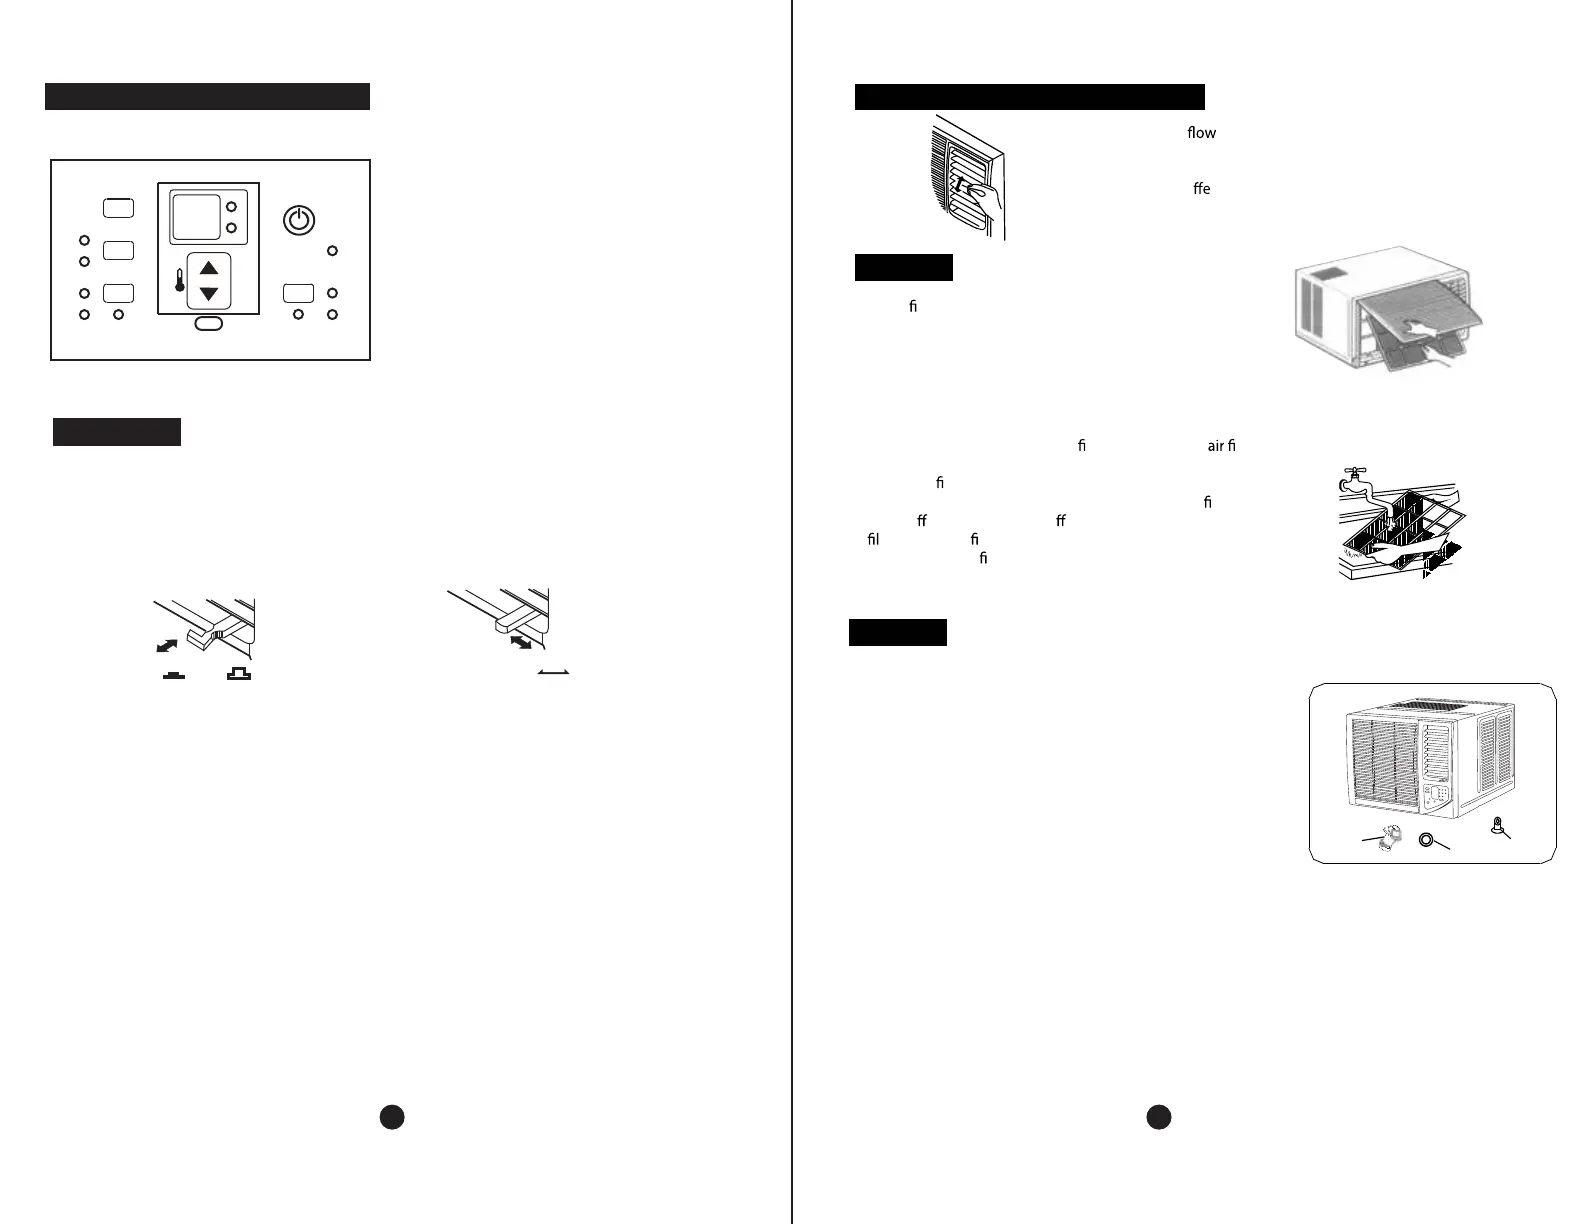
Control Panel
AIR CONDITIONER FEATURES
Vent Control
The vent control is located above the control knobs. The operation method is different on
different models (see the following figures).
For maximum cooling efficiency, CLOSE the vent. This will allow internal air circulation.
OPEN the vent to discharge stale air.
CLOSE VENT OPEN
To open the vent, pull the lever toward you
To close it, push it in.
To open the vent, set the lever to the right position
To close it, set the lever in the left position.
CLOSE OPEN
NOTE: The VENTILATION LEVER should normally be kept in the CLOSED position during
cooling for maximum cooling effect. The "OPEN" position is used only for ventilation.
To adjust vertical air direction, adjust any one of the
horizontal louvre blades. When adjusting the horizontal louver
blades up or down, always keep the top or bottom blades
. This can e
ctively prevent water droplets condensing
on the front panel of the unit.
horizontal
The air
lter behind the inlet grille should be checked and
cleaned at least once every 2 weeks (or as necessary) to
maintain optimal performance of the air conditioner.
Vertical air flow adjustment (manually)
Air Filter
How to remove the air filter
1.
2.
3. Clean the
lter with warm, soapy water. The water
should be below 40 C to prevent distortion of the
lter.
4. Rinse o
and gently shake o excess water from the
ter. Allow the lter to dry before replacing it. To prevent
distortion of the
lter, do not dry in direct sunlight.
Hold the slot under the front panel, then uplift it outwards,
and remove the front panel.
Pinch the handle under the air
lter and make the lter
arched, remove it from the slot from underside to upside.
O
See the following procedures to perform back drainage:
1. Fit the seal onto the drain joint (provided with your air
conditioner as accessory.)
2. Remove the rubber plug from the back of the unit
(if applicable) and insert it into the bottom drain hole.
3. Attach the drain joint to the back of the cabinet where you
removed the plug and rotate it 90
o
to securely assemble them.
4. Connect the drain joint with an extension drain hose
(locally purchased)
Note: If you choose non-drainage when cooling, both the bottom and the back drain holes of the unit
should be inserted with rubber plugs. When you choose non-drainage, the air conditioner will give
optimal cooling efficiency, but the unit may have a splashing sound due to the blower wheel hitting the
accumulat
ed water gathered in the base pan. The water then hits the condenser, and this results in a
higher cooling efficiency.
Drainage
SEAL
DRAIN
JOINT
RUBBER
PLUG
5 6
POWER
SWING
SLEEP
HIGH
MED
LOW
AUTO
COOL
DRY FAN
TIME R
SWING
FAN
MODE
TIME ON
O
TIME OFF
TEMP
C