Part 3
-
System Design and Installation
2.2.3 Hanging brackets
MS box hanging brackets installation should take account of the following considerations:
Use a suspension bolt size of M10
Use mold-in inserts and embedded foundation bolts for new installations or hole-in anchor bolts or similar hardware
for existing installations, taking care to install them in a manner that can withstand the unit’s weight.
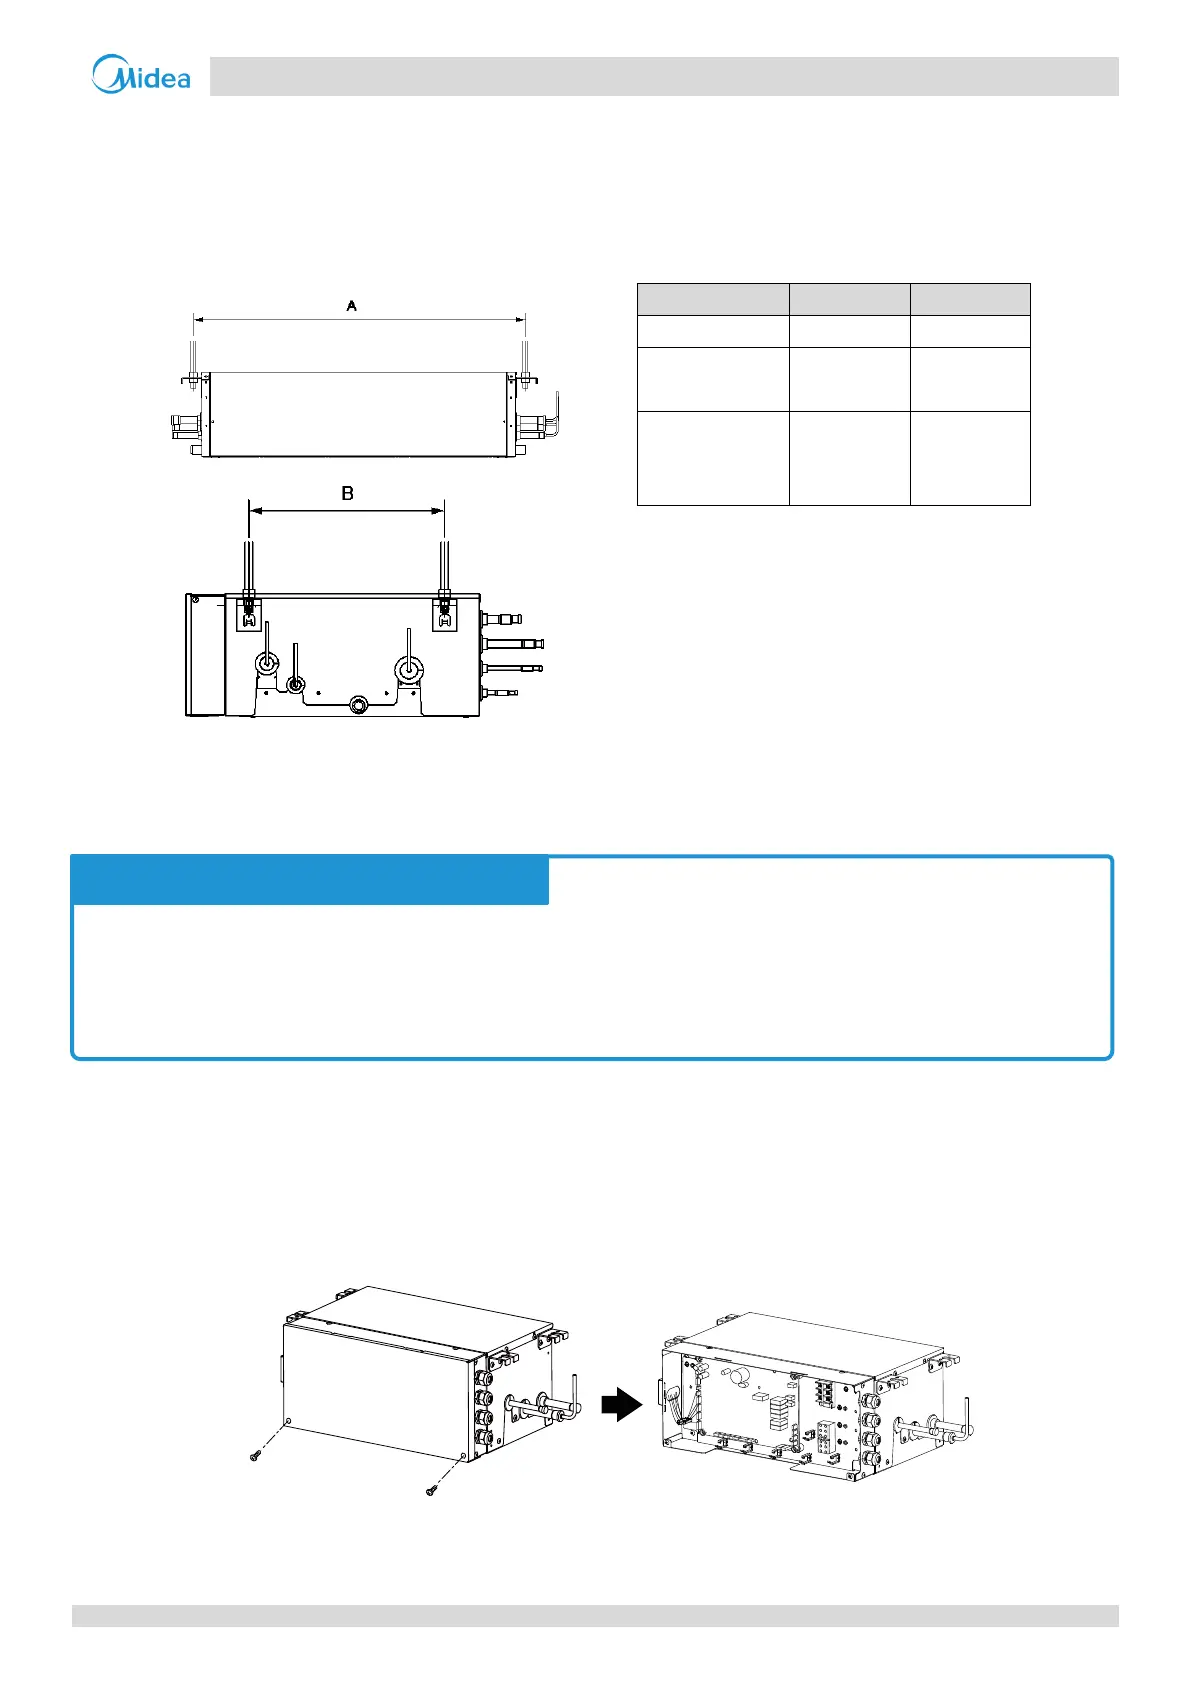
Figure 3-2.10: Suspension bolt spacing
Table 3-2.3: Suspension bolt spacing (unit: mm)
2.2.4 Acceptance and unpacking
2.2.5 Multiple installations for MS01
Electric control box replacing
If the installation location of the electric control box must be changed because of the installation conditions, follow these
steps (1) to (4):
(1) Remove the screws and pull off the electrical box cover.
Figure 3-2.11: Step 1 for electric control box replacing
(2) Remove 1 screw shown in the figure on the below. Remove the sealing plate.
Figure 3-2.12: Step 2 for electric control box replacing
When units are delivered check whether any damage occurred during shipment. If there is damage to the surface
or outside of a unit, submit a written report to the shipping company.
Check that the model, specifications and quantity of the units delivered are as ordered.
Check that all accessories ordered have been included.
 Loading...