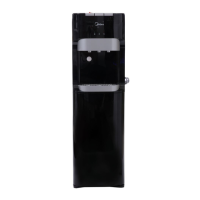
1. The machine had been disinfected before deparng from factory. Clean the
Clean the dispenser prior to installing a full bole of water for the fist me.
2. Cleaning and draining instrucon:
1)make sure the power switch in the O(off) posion and unplug the water
disperser before cleaning.
2)Twist out the two screws , the take down top cover, cold tank cover,
and separator
3)Fill 0.6 gallons pure water into cold tank to clean it.
4)Place a large water bucket beneath the drain outlet which is in the back of
water dispenser, then remove the drain cover and drain the water
5)Reposion the drain cover, sparator, cold tank cover, and top cover aer
draining. Ensure the pipe and wires are connected properly, then you can use
the machine normally.
Water is leaking.
Unplug dispenser, remove bole and replace it.
No water is coming from the spout.
Make sure the bole is not empty. If empty, replace it.
Make sure to completely depress the pushbuon controls.
Cold water is not cold.
It takes up to one hour aer setup to dispense cold water.
Make sure the power cord is properly connected to a working outlet.
Make sure the back of the dispenser is at least 20cm from a wall and
there is free airflow on all 20cm sides of the dispenser.
Make sure green power switch on back of dispenser is ON.
If water sll isn’t cold, please ask a service agent for assistance.
Hot water is not hot.
Dispenser is noisy.
It takes 15-20 minutes aer setup to dispense hot water.
Make sure the power cord is properly connected to a workin
g outlet.
Make suer red power switch on back of dispenser is ON.
Make sure the dispenser is posioned on a level surface.
To avoid accident, cut off the power supply before operaon according
to the following instrucons.
E: TROUBLE SHOOTING
F: CLEANING
6

 Loading...