2.0 Valve Installation
2.1
Preliminary Considerations
2.1.1 New valves are tested, adjusted and sealed at Midland. If a new valve has been left in its original
packaging, is undamaged and is not more than six (6) months old, it may be installed on a tank
car without retesting or recalibration.
2.1.2 Prior to installation, ensure that the valve remains clean and the gasket-sealing surfaces are not
damaged.
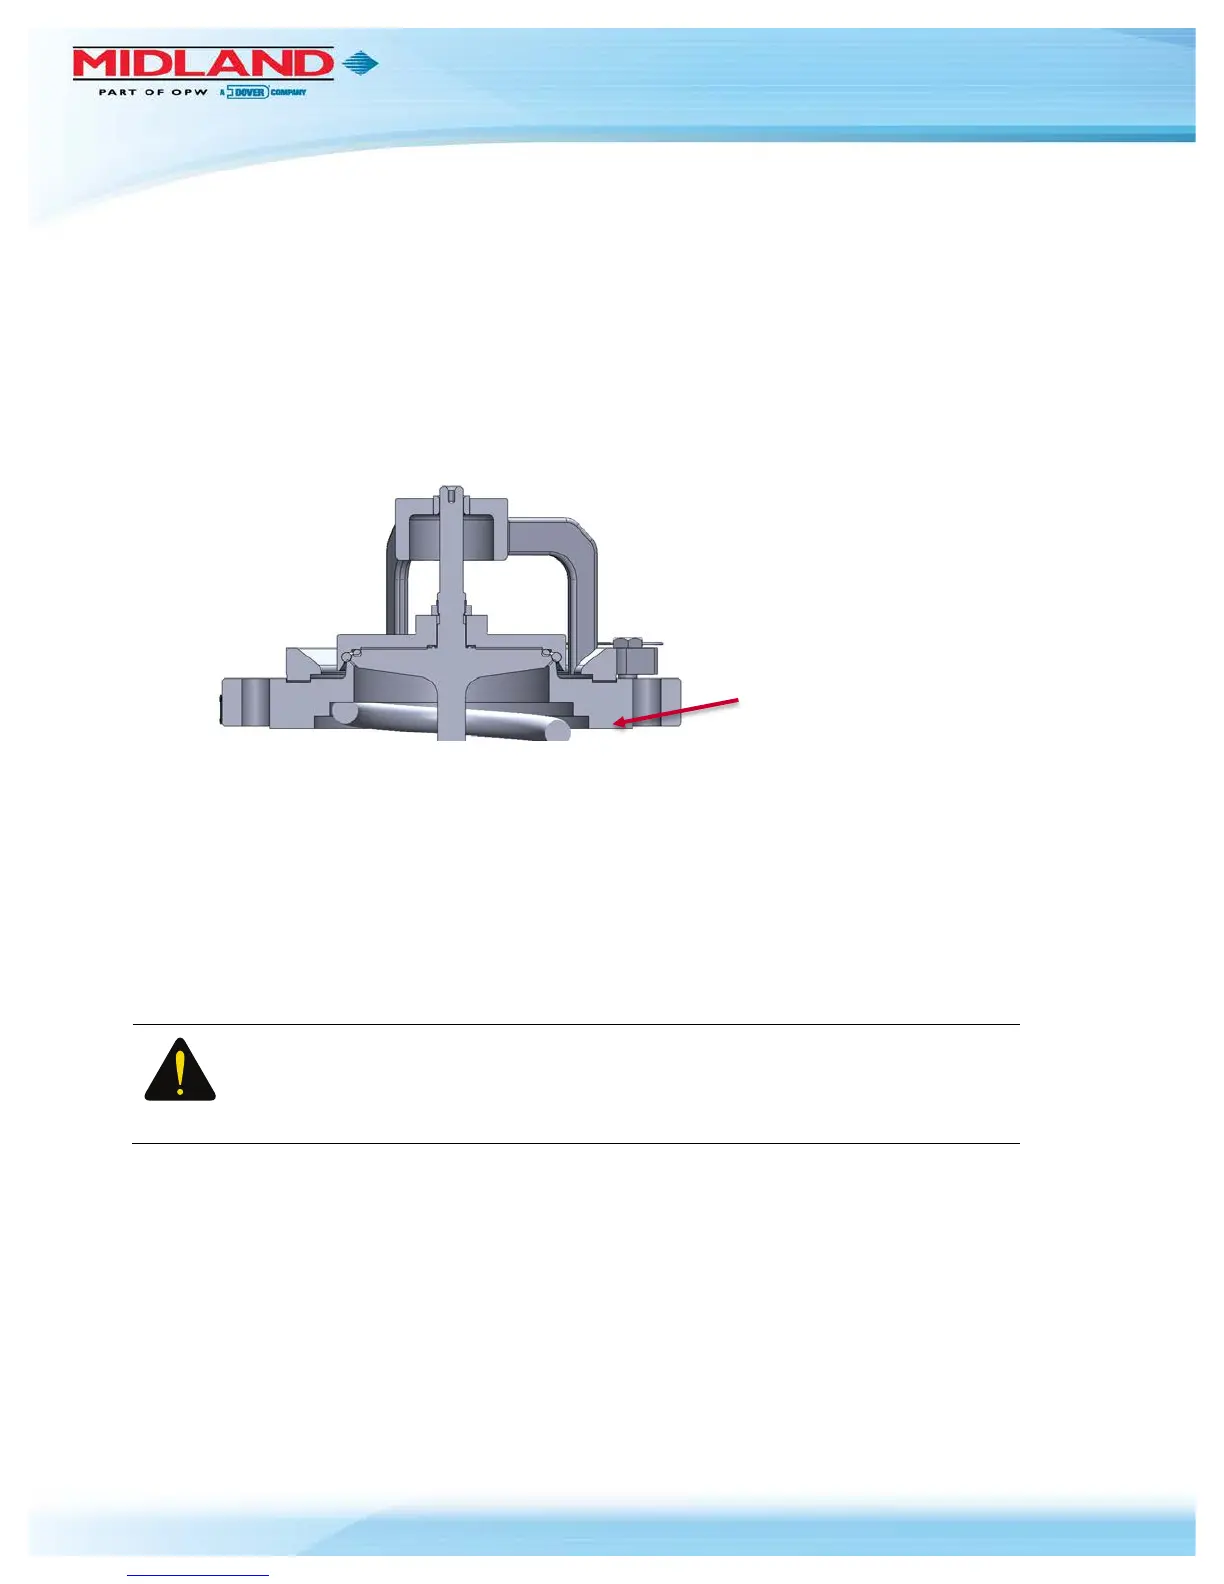
Figure 2-1 Gasket-Sealing Surfaces
2.2 Procedure
2.2.1 Remove the old valve and then insert a soft rubber plug into the tank opening to prevent debris
from entering the tank during cleaning of the valve-mounting groove and studs on the manway
cover plate.
2.2.2 Using a wire brush, brush the threads of the mounting studs to remove rust or scale. Nuts should
move freely on clean studs. Studs should not exhibit excessive corrosion.
2.2.3 Remove and discard all used gasket material.
CAUTION: Groove Damage. In order to avoid groove damage, do not scratch the
metal in the bottom of the groove when removing the old gasket.
2.2.4 Using a lint-free cloth and appropriate cleaning solvent, wipe clean the valve and cover-plate
sealing surfaces and the mounting-stud threads.
2.2.5 For tongue-and-groove mountings, examine the sides of the groove. Because the valve tongue
fits tightly into the groove, any peening-over of the edges of the groove may make it difficult to
properly fit the valve tongue into the groove. If the sides of the groove are peened over, make
corrections to meet the AAR’s groove tolerances.
2.2.6 Install the new gasket. Ensure it is fully seated. When a groove gasket is fully seated, 1/16" of
free space should remain above the gasket to permit locating and entry of the valve tongue.

 Loading...