12
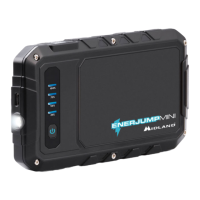
CHARGE LEVEL INDICATOR
Press the switch button to check the battery level.
The number of steady indicator lights indicates the battery capa-
city:
Indicators No 1 steady 2 steady 3 steady 4 steady
Storage level 0% 25% 50% 75% 100%
All indicator lights will turn off when charging is complete.
CHARGING ENERJUMP MINI
• Plug the supplied cable into any working USB output port.
• Connect the micro USB plug to the “5V 2A” Input port of
ENERJUMP MINI.
STARTING A VEHICLE
• Make sure that ENERJUMP MINI is properly charged (the num-
ber of the indicator lights must be not less than 3).
• Turn off all the accessories on the vehicle.
• Connect the clamps’ blue plug into the “JUMPER CABLE”
socket of Enerjump Mini.
• Connect the red battery clamp to the vehicle’s positive (+) bat
-
tery terminal and connect the black battery clamp to the vehi-
cle’s negative (-) battery terminal. Warning: pay attention to the
polarity! A reverse polarity connection (positive to negative)
may cause damage to Enerjump Mini and/or create a spar-
king/explosion hazard.
 Loading...