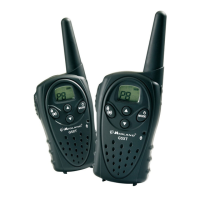
MIDLAND G5 XT
PMR446 transceiver
Thanks for choosing Midland! Midland G5XT is a portable
transceiver that is free use in almost all European countries. For
further information, we suggest you look at the “Restrictions on the
use” chart.
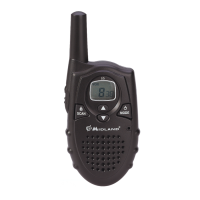
Combining the latest technology in radio communication along with a
sturdy mechanical frame, the Midland G5XT makes the ideal and effective
solution for the professionals who need to stay in touch with colleagues
(construction sites, buildings, hotels, trade fairs, shows) or with leisure
users that just want to keep up with friends and family.
Its robust frame and the simple design make it ideal for any activity.
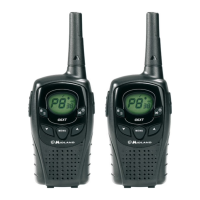
CONTENT
• 2 MIDLAND G5 XT transceiver
• 6 Ni-MH rechargeable batteries
• 2 belt clips
• 2 wall chargers
COVERAGE/RANGE
The maximum range depends on terrain condition and is obtained during
use in an open spaces.
The only limitations to maximum possible range are environmental factors
such as blockage caused by trees, buildings, or other obstructions. Inside
a car or a metallic construction, the range can be reduced.
Normally the coverage in the city, with buildings or other obstructions is
about 1 or 2 Km. In open spaces but with obstructions like trees, leaves
or houses the maximum possible range is about 4-6 Km. In open spaces,
without obstructions and in sight, like for example in mountain, the
coverage can be more than 12 Km.
DESCRIPTION OF THE CONTROLS
AND FUNCTIONS
DISPLAY
Your midland G5XT keeps you constantly updated about its operational
status through a Liquid Crystal Display (LCD). The symbols and their
corresponding parameters that may appear, according to the operational
status of the device, are described as follows:
TX Appears while you are transmitting a signal (PTT button
pressed)
RX Means that the radio is receiving a signal.
Indicates the channel selected
Indicates the sub audio tone selected. (of-38).
VOX Indicates if VOX MODE is active.
Indicates the battery level.
Indicates if the Out of Range is active.
Indicates that the baby sitting function is on.
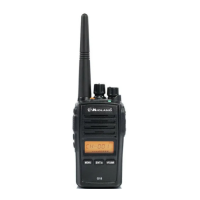
DESCRIPTION OF THE CONTROLS
Refer to this picture to identify the various parts of the device:
ANTENNA
BUILT-IN SPEAKER - Here is where the
speaker is housed.
BUILT-IN MICROPHONE - Here is where
sound is picked up by the microphone.
PTT (push to talk) Push this button to transmit.
▲▼ use these buttons for changing the
settings
/ - Pressing this button you can use the
Out of range function. If you keep it pressed for
about 5 seconds, the keypad lock is activated.
MODE/
- Press this button to enter the
radio’s menu. If you keep it pressed for about 3
seconds, you turn on/turn off the radio.
EXTERNAL SPEAKER/MIC/CHG JACK - allows the connection with
external devices as headsets, microphones, charger…
OPERATIONS AND FUNCTIONS
POWER ON/POWER OFF
Press and keep pressing the button for about 3 seconds. The
transceiver will make 3 different beep tones and the display will do an
auto scanning for about 1 second. You will visualize on the display the
last used channel.
VOLUME ADJUSTMENT
Use the ▲▼ to increase or decrease the volume setting.
CHANNEL SELECTION
Press the MODE button. The number of the channel will start ashing
on the display.
Press the scroll buttons ▼▲ till you select the desired channel. Press the
PTT button to conrm, or wait for 5 seconds.
Channel FREQ. RX/TX (MHz) Channel FREQ. RX/TX (MHz)
01 446.00625 05 446.05625
02 446.01875 06 446.06875
03 446.03125 07 446.08125
04 446.04375 08 446.09375
The pre-set channels correspond (as here following) to:
Channel CTCSS Channels and tones Channel CTCSS Channels and tones
09 correspond to channel 01 16 17 correspond to channel 01 31
10 correspond to channel 02 16 18 correspond to channel 03 31
11 correspond to channel 03 16 19 correspond to channel 05 31
12 correspond to channel 04 16 20 correspond to channel 07 31
13 correspond to channel 05 16 21 correspond to channel 02 31
14 correspond to channel 06 16 22 correspond to channel 04 31
15 correspond to channel 07 16 23 correspond to channel 06 31
16 correspond to channel 08 16 24 correspond to channel 08 31
For displaying the channel/sub audio tone
To momentarily display the PMR446 channel and the subadio tone used
in the pre-set channels, go to the desired channel (from 9 to 24) and keep
pressed the buttons ▲▼ for 5 seconds.
TRANSMISSION AND RECEPTION
To communicate, all radios in your group must be set on the same
channel.
To transmit, press and hold the PTT button and speak in a normal voice
into the microphone
. The “TX” icon will appear continuously on the LCD
display while transmitting.
You can communicate also using an external accessory or a hand mic,
pressing and holding the PTT button on the side of the hand mic. For a
maximum clarity, hold the device at a distance of about 2/3 cm.
To receive a CALL, release the PTT button. The “RX” icon will appear on
the display when your radio is receiving a transmission.
SQUELCH
With the SQUELCH function, noises can be suppressed on the free
channel. In MIDLAND G5 XT this function is always active.
KEYPAD LOCK
Keep pressed the button for about 5 seconds and the lock function will
be activated. “Lc on” will appear on the display.
To disable this function, keep pressed again the button
for 5 seconds
approx. The display will show “Lc of”.
CTCSS TONES
The CTCSS tones are codes that can be added to the channels for
creating new private ones. For each channel you can choose until 38
CTCSS.
The addition of these codes can be made on the main PMR channels
(from 01 to 08).
The pre-set channels from 9 to 24 can not be modied.
To select a privacy code for the current channel press twice the MODE
button, then with the scroll buttons ▲▼ select the desired code.
To conrm the selection, press the PTT button or wait for 5 seconds.
con tutte le funzionalità attive, oppure in modalità “Baby Sitter” con
attive solo le funzionalità speciche per l’utilizzo come baby monitor
(controllo del bambino nella culla). Per impostare la radio da posizionare
vicino alla culla del bambino, premere il tasto MODE diverse volte, no
a visualizzare sul display la voce “bp of” (baby sitter off). Ora grazie
ai tasti ▲▼ potete scorrere tra le due opzioni possibili e selezionate la
voce “b” (che identica “baby”). Premete quindi il tasto PTT per conferma
o aspettate 5 secondi. Sul display apparirà l’icona
che vi indicherà
che la funzione è attiva. Avendo selezionato l’opzione “b”, sul display
comparirà l’indicazione del canale “b1”. Ora prendete l’altra radio, quella
che utilizzerà il genitore e fate la stessa procedura selezionando però
questa volta l’opzione “p” (che indica “parent”). Anche in questo caso
apparirà l’icona
sullo schermo, che vi indicherà che la funzione è
attiva, insieme all’indicazione del canale “p1”. Potrebbe capitare che il
canale selezionato sia disturbato, quindi è opportuno scegliere un altro
canale. Premere il tasto MODE una volta e cambiate canale con i tasti
▲ e ▼ (questa procedura va fatta su entrambe le radio). Sono disponibili
9 canali, da “p1” a “p9” per la radio del genitore (parent) e da “b1” a
“b9” per la radio del bambino (baby). Naturalmente entrambe le radio
devono essere posizionate sullo stesso numero di canale.
Esempio: se la radio posta vicino al bambino è stata impostata sul canale
“b4”, la radio del genitore dovrà essere posizionata sul canale “p4”.
La modalità “baby sitter” offre una serie di funzionalità speciche
realizzate per l’utilizzo come baby monitor:
• Trasmissione automatica radio baby (vox): la radio del bambino
andrà automaticamente in trasmissione quando capterà un qualsiasi
rumore emesso nelle sue vicinanze (per esempio bambino che piange)
• Verica della portata (automatico): se la radio del genitore si
allontana troppo e risulta essere fuori portata, dopo circa 2 minuti la
radio emette un segnale sonoro, indicando che se il bambino dovesse
piangere non lo si sentirebbe. Al riavvicinamento e quindi rientrando in
portata, la radio non emetterà più tale segnale sonoro.
• Vericadellaportata(manuale): se volete assicurarvi che la radio
del bambino sia in portata e funzionante, potete inviare manualmente
dalla radio del genitore, una richiesta di verica. Premete brevemente
il tasto (
/ ). Se la radio del bambino risponde, verrà emesso un
segnale sonoro.
• Parlare al bambino: in ogni momento potete parlare al bambino
semplicemente premendo il tasto PTT presente sulla radio. Mentre il
bambino piange, cioè quando la vostra radio è in ricezione, dovreste
aspettare che il bambino smetta di piangere perchè possiate parlare
(nel tentativo magari di tranquilizzarlo). Grazie alla funzione “Talk
Back” la radio smette automaticamente di trasmettere dopo circa
20 secondi di trasmissione continua (anche se il bambino sta ancora
piangendo), dandovi così la possibilità di parlargli.
Per disabilitare la funzione baby sitter è sufciente premere il tasto
MODE diverse volte, no a visualizzare sul display la voce “bp p”, o “bp
b”.Conitasti▲▼selezionate“bpof” poi premere il tasto PTT per
conferma o attendere 5 secondi.
Ora la radio ha la funzione baby sitter disattivata e tutte le funzionalità
standard sono tornate attive!
CANALI BABY SITTER
Canale Frequenza Ctcss Ch Livello VOX Out of range
Canale
corrispondente
b1 446.00625 156.7 (25) On Lv 4 Of 01 25
b2 446.01875 156.7 (25) On Lv 4 Of 02 25
b3 446.03125 156.7 (25) On Lv 4 Of 03 25
b4 446.04375 156.7 (25) On Lv 4 Of 04 25
b5 446.05625 156.7 (25) On Lv 4 Of 05 25
b6 446.06875 156.7 (25) On Lv 4 Of 06 25
b7 446.08125 156.7 (25) On Lv 4 Of 07 25
b8 446.09375 156.7 (25) On Lv 4 Of 08 25
b9 446.09375 Of On Lv 4 Of 08
p1 446.00625 156.7 (25) Of On AU 01 25
p2 446.01875 156.7 (25) Of On AU 02 25
p3 446.03125 156.7 (25) Of On AU 03 25
p4 446.04375 156.7 (25) Of On AU 04 25
p5 446.05625 156.7 (25) Of On AU 05 25
p6 446.06875 156.7 (25) Of On AU 06 25
p7 446.08125 156.7 (25) Of On AU 07 25
p8 446.09375 156.7 (25) Of On AU 08 25
p9 446.09375 Of Of On AU 08
Per visualizzare momentaneamente il corrispondente canale PMR446 e
il tono sub audio utilizzato dei canali Baby sitter, posizionarsi sul canale
voluto e tenere premuto per 5 secondi i tasti ▲▼.
VANO BATTERIA E CLIP DA CINTURA
La clip posteriore di serie vi permette di ssare
facilmente il ricetrasmettitore alla cintura.
Tuttavia questa va rimossa nel caso in cui
dobbiate rimuovere le batterie.
Per rimuovere la clip cintura sollevare la linguetta
centrale e far scivolare la clip verso il basso.
Per ssare nuovamente la clip all’apparecchio,
posizionatela nell’apposita scanalatura, posta
sul retro del ricetrasmettitore, e fatela scorrere
nchè non la udirete scattare.
Dopo aver rimosso la clip spingere il coperchio
del vano batteria verso il basso ed inserire 3
batterie AAA alcaline oppure ricaricabili.
RICARICA DELLE BATTERIE E RISPARMIO ENERGIA
Midland G5XT è dotato di un dispositivo automatico di risparmio batterie
che consente di ridurre i consumi delle batterie no al 50%.
Se la radio non riceve alcun segnale per circa sette secondi la funzione
viene attivata automaticamente.
Inserire nella presa “MIC/CHG” lo spinotto dell’apposito caricatore
originale.
Si raccomanda di caricare le batterie esclusivamente con l’apposito
caricatore.
Per una carica completa delle batterie sono necessarie 8/10 ore.
Ricordiamo e raccomandiamo che per un rendimento migliore, la
carica va effettuata con l’apparato spento e quando le batterie sono
completamente scariche.
Il display, prima dello spegnimento completo della radio, mostrerà l’icona
“bt lo”
.
Per caricare le batterie ricaricabili Ni-MH occorre inserire la spina del
cavo di ricarica in una presa di alimentazione.
ATTENZIONE:
! Non sovraccaricate le batterie! Quando le batterie sono
completamente cariche, il processo di carica non si blocca
automaticamente.
Non dimenticate quindi di staccare al più presto il ricetrasmettitore
dal caricabatteria non appena é trascorso il tempo necessario;
diversamente, potreste danneggiare le batterie e/o il
ricetrasmettitore.
! Non cercate di caricare batterie alcaline o comunque batterie non
ricaricabili. Accertatevi che nel vano batterie dell’apparecchio,
con il caricabatterie collegato, siano inserite esclusivamente
batterie ricaricabili NI-MH!
Le batterie alcaline non sono ricaricabili! Batterie non idonee
possono perdere liquido, esplodere o anche bruciare e causare
gravi danni!
! L’utilizzo di un caricabatterie non originale può causare danni al
vostro apparecchio o causare esplosioni e lesioni personali.
! Non gettate mai le batterie nel fuoco, né avvicinatele a sorgenti di
calore: possono causare esplosioni e lesioni personali.
Smaltite le batterie esclusivamente seguendo le normative
locali.
! Non mescolate assieme batterie vecchie e nuove e/o di tipo
diverso e/o utilizzate in modo diverso.
Effetto memoria delle batterie ricaricabili
Le batterie ricaricabili Ni-MH (Nickel-metal-idrato) possono essere soggette
a quello che viene chiamato “Effetto Memoria”. Quest’ultimo si manifesta
con una drastica diminuzione dell’autonomia d’uso dell’apparecchio
e viene innescato se, sistematicamente, ricaricate le batterie prima di
averlo scaricato del tutto e/o non le caricate completamente.
Per evitare il manifestarsi dell’effetto memoria:
• Quando possibile, ricaricate le vostre batterie ricaricabili solo dopo
averlo scaricato completamente (no a che l’apparecchio si spegne
con il normale uso)
• Non scollegate il caricabatterie prima del tempo necessario ad
effettuare una carica completa.
• Scaricate e caricate a fondo le batterie almeno due volte al mese.
Per eliminare l’effetto memoria, basta semplicemente effettuare tre o
quattro cicli di scarica/carica profonda.
L’effetto memoria non va confuso con la normale vita delle batterie che
MIDLAND G5 XT
Ricetrasmettitore PMR446
Grazie per aver scelto i prodotti Midland! L’apparato Midland G5XT
è un ricetrasmettitore che può essere utilizzato senza licenza, in
quasi tutta Europa. Per ulteriori informazioni, consultate la tabella
“Restrizioni all’uso”.
Come previsto da dl 259 del 01/08/2003 aggiornato con dl nr.70
del 28/05/12, e da nota 101C del PNF, gli apparati PMR446 sono
soggetti ad una dichiarazione d’utilizzo e ad un contributo annuo. Per
ottenere la modulistica e le modalità di ottenimento dell’autorizzazione
generale contattate l’Ispettorato Territoriale nel vostro capoluogo di
regione o visitate il sito web del Ministero delle Comunicazioni (www.
sviluppoeconomico.gov.it).
L’utilizzo dell’apparato è consentito solamente dopo aver inviato la pratica
all’Ispettorato Territoriale.
Raccomandiamo di conservare una copia di tale pratica.
L’apparato Midland G5XT grazie all’utilizzo delle tecnologie più avanzate
nel campo della radiocomunicazione ed alla sua robusta struttura
meccanica è decisamente la soluzione più afdabile ed ideale per la
gestione professionale di team di lavoro, per la comunicazione con più
persone all’interno di cantieri, di edici, nelle manifestazioni sportive,
spettacoli, ere ed alberghi o semplicemente è la soluzione ideale per il
tempo libero (escursioni in montagna, in moto, in bicicletta, ecc).
DOTAZIONE
• 2 Ricetrasmettitori Midland G5XT
• 6 batterie ricaricabili Ni-MH
• 2 Clip da cintura
• 2 Caricatori da muro
COPERTURA/PORTATA
Le prestazioni dei ricetrasmettitori dipendono dalle condizioni ambientali
ed atmosferiche. Fattori ambientali quali alture, edici, alberi, fogliame
possono diminuire la copertura.
Le prestazioni ottimali si ottengono in campo aperto mentre la portata
si potrà ridurre, per esempio all’interno di un’automobile o di un edicio.
Tipicamente la copertura in città, in presenza di edici è di 1-2 Km.
In campo aperto, ma con presenza di alberi, case, fogliame, la copertura
è di 4-6 Km.
In campo aperto, a vista e senza nessun tipo d’interferenza, come per
esempio in montagna, la copertura può essere anche superiore ai 12
Km.
DESCRIZIONE DELLE PARTI
DISPLAY
Il vostro ricetrasmettitore utilizza un display LCD (a cristalli liquidi); i simboli
ed i parametri che possono apparire di volta in volta sono i seguenti:
TX Compare quando state trasmettendo (pulsante PTT premuto).
RX Appare sul display quando il ricetrasmettitore sta ricevendo un
segnale.
Queste due cifre indicano il numero del canale selezionato.
Queste piccole icone indicano il codice del tono CTCSS
selezionato (of-38).
VOX Indica quando la funzione VOX è attiva.
Il simbolo della batteria indica lo stato di carica delle batterie.
Indica che la funzione out of range è attiva.
Indica che è attiva la funzione baby sitting.
DESCRIZIONE DELL’APPARATO
MIDLAND G5 XT
Fate riferimento all’immagine per identicare tutte le parti
principali dell’apparato.
ANTENNA
ALTOPARLANTE - Serve per ricevere l’audio.
- In questo punto si trova il microfono per la
trasmissione.
PTT - Premendo il pulsante permette la
trasmissione vocale e la comunicazione.
▲▼ - Incrementa/decrementa il volume audio
in ricezione.
/ - serve per inviare un segnale di chiamata
dell’out of range oppure tenendo premuto per
circa cinque secondi per attivare il blocco della
tastiera.
MODE/
- La pressione di questo pulsante
permette di entrare nel menu di congurazione
della radio, mentre tenendo premuto per circa
tre secondi permette di accendere o spegnere
l’apparato.
PRESA ESTERNA “SPK/MIC-CHG”
Consente il collegamento a dispositivi esterni
quali:cufe,microfoni, caricatore ecc (2 pin).
OPERAZIONI G5XT
ACCENSIONE/SPEGNIMENTO
Premere e tenere premuto il tasto per circa tre secondi. L’apparato
emetterà tre beep di tonalità diverse, il display eseguirà un auto test per
un secondo e visualizzerà l’ultimo canale utilizzato.
REGOLAZIONE VOLUME
Per regolare il volume sul livello ottimale, premere i tasti ▲▼ nché non
si ottiene il livello desiderato.
SELEZIONE CANALI
Premere una volta il tasto MODE e di seguito i tasti ▲▼ per selezionare
uno dei canali disponibili. Premere PTT per confermare la selezione
effettuata oppure attendere circa 5 secondi.
I canali disponibili sono 8.
CANALE FREQ. RX/TX (MHz) CANALE FREQ. RX/TX (MHz)
01 446.00625 05 446.05625
02 446.01875 06 446.06875
03 446.03125 07 446.08125
04 446.04375 08 446.09375
Vi sono anche canali pre-registrati che corrispondono come riportato qui
di seguito a:
CANALE CANALE E TONI CTCSS CANALE CANALE E TONI CTCSS
09 corrisponde al canale 01 16 17 corrisponde al canale 01 31
10 corrisponde al canale 02 16 18 corrisponde al canale 03 31
11 corrisponde al canale 03 16 19 corrisponde al canale 05 31
12 corrisponde al canale 04 16 20 corrisponde al canale 07 31
13 corrisponde al canale 05 16 21 corrisponde al canale 02 31
14 corrisponde al canale 06 16 22 corrisponde al canale 04 31
15 corrisponde al canale 07 16 23 corrisponde al canale 06 31
16 corrisponde al canale 08 16 24 corrisponde al canale 08 31
Per visualizzare momentaneamente il canale PMR446 e il tono sub audio
utilizzato posizionarsi sul canale voluto e tenere premuto per 5 secondi
circa, i tasti ▲▼. Il display mostrerà il canale scelto.
TRASMISSIONE E RICEZIONE
Per comunicare con altre radio, è necessario che tutte siano sintonizzate
sullo stesso canale.
Per trasmettere, premere il pulsante PTT e parlare con un tono di voce
normale nel microfono
. L’icona “TX” apparirà sul display durante la
trasmissione. E’ possibile comunicare anche usando un accessorio
esterno o un microfono palmare tenendo premuto l’apposito pulsante
PTT. Per una massima chiarezza della voce tenere il microfono distante
dalla bocca 2/3 centimetri.
Per poter ricevere, rilasciare il pulsante PTT.
Sul display apparirà l’icona “RX”.
SQUELCH
eliminazione dei rumori di fondo/estenzione copertura
Nel MIDLAND G5 XT il ltro per la riduzione del rumore di fondo (squelch)
è sempre attivo.
BLOCCO TASTIERA
Premendo per circa 5 secondi il tasto verrà attivato il blocco tastiera.
Sul display apparirà per tre secondi “Lc on”.
Per disattivare premere e tenere premuto nuovamente il tasto
per 5
secondi. Il display visualizzerà “Lc of”.
TONI CTCSS
I toni CTCSS sono dei codici che possono essere aggiunti ai canali per
crearne altri personali.
Per ogni canale, si possono scegliere no a 38 codici CTCSS differenti.
L’implementazione di questi codici può essere fatta solo sugli 8 canali
principali (da 01 a 08).
I canali pre-registrati da 9 a 24 non possono essere modicati.
Per attivare i codici CTCSS premere due volte il pulsante MODE, poi
tramite i tasti ▲▼ selezionare il tono desiderato “of-38”. Per confermare
premere il pulsante PTT o attendere cinque secondi. Sul display apparirà
il tono scelto.
Per disabilitare le funzioni CTCSS selezionare il canale desiderato,
premere il pulsante MODE sino a visualizzare sul display il codice del
tono CTCSS lampeggiante a destra, e selezionare “of” tramite ▲▼.
Per confermare premere PTT o attendere 5 secondi.
N.B.: Per poter comunicare con le altre radio le impostazioni dei toni
devono essere le stesse.
Toni CTCSS
Numero
sul display
Tono
frequenza Hz
Numero
sul display
Tono
frequenza Hz
Numero
sul display
Tono
frequenza Hz
01 67.0 14 107.2 27 167.9
02 71.9 15 110.9 28 173.8
03 74.4 16 114.8 29 179.9
04 77.0 17 118.8 30 186.2
05 79.7 18 123.0 31 192.8
06 82.5 19 127.3 32 203.5
07 85.4 20 131.8 33 210.7
08 88.5 21 136.5 34 218.1
09 91.5 22 141.3 35 225.7
10 94.8 23 146.2 36 233.6
11 97.4 24 151.4 37 241.8
12 100.0 25 156.7 38 250.3
13 103.5 26 162.2
VOX
Il G5XT ha 4 livelli di VOX (off,1,2,3,4). Questa funzione permette di
attivare la comunicazione senza premere il pulsante PTT. E’ sufciente
parlare e la comunicazione viene attivata.
La sensibilità è regolabile su 3 livelli (livello 1 più sensibile) e attivabile con
o senza accessori, il quarto livello disponibile attiva la funzione VOX con
Talkback: nel caso in cui uno dei due apparati trasmette ininterrottamente
per più di 20 secondi, il VOX Talkback ne interrompe la trasmissione per
dieci secondi, liberando il canale e concedendo così all’altro utente la
possibilità di parlare.
Per attivare i vari livelli del VOX premere il tasto MODE no a visualizzare
sul display “Vo of” e “VOX” in alto a sinistra lampeggiante, dopodiché
tramite i tasti ▲▼ selezionare “1”,”2”,”3” o “4” Per confermare premere
il pulsante PTT o attendere cinque secondi.
Per disattivare la funzione VOX seguire le indicazioni sopra indicate
selezionando la voce “off”.
BEEP TASTIERA
Questa funzione, se attiva, genera un beep audio ogni volta che si preme un
tasto. Nel caso si desideri escludere il beep audio, è possibile farlo premendo
il tasto MODE, sino a visualizzare sul display “bP on”, e poi selezionare
tramite i tasti ▲▼ “bP of”.
Confermare premendo il pulsante PTT oppure attendere 5 secondi. In questo
modo, alla pressione di un tasto non si sentirà alcun suono. Per attivare
questa funzione ripetere la procedura indicata selezionando “bP on”.
ROGER BEEP
(Tonalitàdiconfermaneconversazione)
Al rilascio del tasto PTT, quindi alla ne di ogni trasmissione, viene emessa
una tonalità, che indica al vostro interlocutore che può iniziare a parlare.
Nel G5XT questa funzione si attiva premendo il tasto MODE, sino a
visualizzare sul display “rb of”; con i tasti ▲▼ selezionare “on”.
Premere il pulsante PTT oppure attendere 5 secondi per confermare la
programmazione.
Per disattivare la funzione ripetere la procedura indicata selezionando “rb of”.
CALL
G5XT consente di inviare un segnale sonoro di avviso chiamata a tutti gli
utenti sullo stesso canale; per inviare la chiamata occorre premere due
volte velocemente il pulsante PTT.
Sul display apparirà l’icona “TX” e il tono può essere sentito sul proprio
altoparlante per la conferma. Sono disponibili tre suonerie differenti (off/1-3).
Per selezionare i toni premere il tasto MODE no a visualizzare sul
display “CA” con il numero del tono attivo. Tramite i tasti ▲▼ si possono
ascoltare e selezionare le 3 melodie pre-impostate. Occorre precisare
che ciò è possibile solo se la radio è impostata su “BP on”, ossia solo
se è attivo l’audio.
Confermare premendo PTT oppure attendere 5 secondi.
Per disattivare questa funzione ripetere la procedura selezionando “CA of”.
DUAL WATCH
Questa funzione permette di monitorare, costantemente in ricezione, un
secondo canale oltre a quello in uso.
Per attivare questa funzione premere il tasto MODE ripetutamente sino a
visualizzare sul display “of - TX/RX”.
Con i tasti ▲▼ selezionare il secondo canale che si desidera monitorare;
se inoltre si vuole impostare un tono CTCSS premere ancora MODE e
selezionare tramite i tasti ▲▼ il tono scelto. Premere il pulsante PTT
oppure attendere 5 secondi per conferma.
Per interrompere la funzione DUAL WATCH, premere il tasto MODE.
Quando la radio riceverà un segnale su uno dei due canali monitorati,
la funzione “DUAL WATCH” viene momentaneamente sospesa,
permettendo la trasmissione e la ricezione sul canale in quel momento
in uso.
Dopo 5 secondi, se non viene effettuata nessuna attività di trasmissione
o ricezione, la funzione DUAL WATCH riprende.
OUT OF RANGE
Midland G5XT ha la possibilità di selezionare out of range manuale o
automatico.
Grazie a questa funzione è possibile vericare se una coppia di apparati
rimane sempre in portata.
Per attivare su entrambe le radio la funzione Out of Range:
Out of range automatico:
Premere il tasto MODE sino a visualizzare sul display “OU of”; selezionare
quindi con i tasti ▲▼ la modalità “OU AU”(automatico).
Confermare le impostazioni con il pulsante PTT o attendere 5 secondi.
Sul display apparirà
.
Dal momento in cui le due radio vengono accoppiate, automaticamente
si trasmetteranno a vicenda un codice di controllo ogni 60 secondi. Non
appena questa trasmissione si interrompe ed uno dei due apparati non
riceve il codice di controllo per più di 2 volte consecutive, sul display
lampeggerà l’icona “OU no” (fuori portata) e la radio emetterà un suono
di avviso. Inoltre, l’icona
lampeggerà sul display nché la radio non
tornerà in portata.
Out of range manuale:
Premere il tasto MODE sino a visualizzare sul display “OU of”; selezionare
quindi con i tasti ▲▼ la modalità “OU PB”(manuale).
Confermare le impostazioni con il pulsante PTT o attendere 5 secondi.
Sul display apparirà
.
Per inviare la richiesta manualmente premere il tasto (
/ ).
Se la radio risulta essere in portata emetterà il suono di chiamata scelto
secondo l’impostazione “CA”, mentre se non sentirete alcun suono di
avviso la radio risulterà fuori portata.
Inoltre, la radio in ricezione risponderà sempre ad una richiesta da
parte della radio richiedente, senza che anch’essa debba essere
precedentemente impostata.
Per disattivare la funzione, premere il tasto MODE sino a visualizzare sul
display “OU AU” o “OU PB”; quindi, selezionare con ▲▼ “OU of”.
FUNZIONALITÁ BABY SITTER
Midland G5XT può operare in due modalità distinte: radio standard
ITALIANOENGLISH
é mediamente di circa 300-400 cicli di carica/scarica. E’ normale che
l’autonomia operativa si riduca quando le batterie stanno raggiungendo il
termine del ciclo di vita; in questo caso sostituite le batterie.
INDICAZIONE LIVELLO DELLE BATTERIE
Il livello di potenza delle batterie del G5 XT viene indicato attraverso
un’icona posta in alto a destra del display
.
Quando il numero delle barre è completo, il pacco batteria è carico;
mentre quando il livello della batteria è basso il display mostrerà
lampeggiante. Questo indicherà la necessità di ricaricare la batteria.
UTILIZZO E CURA DELLA RADIO
! Utilizzare un panno morbido per pulire la radio. Non usare alcool
o detergenti.
! Non immergere nell’acqua.
! Spegnere la radio e rimuovere le batterie durante un lungo tempo
di inutilizzo.
AVVERTENZE
NON APRITE LA RADIO PER NESSUN MOTIVO!!
La meccanica ed elettronica di precisione di cui é composto l’apparato
richiede esperienza e strumentazione; per lo stesso motivo la radio non
va assolutamente riallineata, essa infatti é già stata tarata in fabbrica per
le massime prestazioni.
L’apertura del ricetrasmettitore da parte di personale non autorizzato farà
decadere automaticamente la garanzia.
DEUTSCHESPAÑOL
from the baby’s radio, after 2 minutes an alert beep tone is emitted
from the “parent” radio, advising you that the two radios are not in
range anymore. You must reduce the distance between the radios to
stop the alert sound.
• Manual out of range: you can also manually check if the “baby” radio
is in range. Briey press the button
/ on the “parent” radio. If the
two radios are in range, you will hear the “CA” tone previously set,
otherwise if you don’t hear any tone, that means that your radio is out
of range.
• Talk to the baby: normally at any moment, you can talk to the baby
just pressing the PTT button on the parent’s radio. But if the baby is
crying (that means that the radio is transmitting), you should wait until
the baby stops crying. Thanks to the Talk back function, if you hear
your baby crying for more than 20 seconds, the VOX Talkback stops
the transmission for 10 seconds, permitting you to talk and calm the
baby down.
To disable the baby sitter function, press the MODE button several times,
till “bp b” or “bp p” is displayed; Press now the buttons ▲▼ to choose
“bp of”. Conrm your selection by pushing PTT or wait for 5 seconds.
Now the baby sitter function is disable and all the standard functions are
back.
BABY SITTER CHANNELS
Channel Frequency CTCSS Ch Vox level
Out of
range
Correspon-
ding channel
b1 446.00625 156.7 (25) On Lv 4 Of 01 25
b2 446.01875 156.7 (25) On Lv 4 Of 02 25
b3 446.03125 156.7 (25) On Lv 4 Of 03 25
b4 446.04375 156.7 (25) On Lv 4 Of 04 25
b5 446.05625 156.7 (25) On Lv 4 Of 05 25
b6 446.06875 156.7 (25) On Lv 4 Of 06 25
b7 446.08125 156.7 (25) On Lv 4 Of 07 25
b8 446.09375 156.7 (25) On Lv 4 Of 08 25
b9 446.09375 Of On Lv 4 Of 08
p1 446.00625 156.7 (25) Of On AU 01 25
p2 446.01875 156.7 (25) Of On AU 02 25
p3 446.03125 156.7 (25) Of On AU 03 25
p4 446.04375 156.7 (25) Of On AU 04 25
p5 446.05625 156.7 (25) Of On AU 05 25
p6 446.06875 156.7 (25) Of On AU 06 25
p7 446.08125 156.7 (25) Of On AU 07 25
p8 446.09375 156.7 (25) Of On AU 08 25
p9 446.09375 Of Of On AU 08
To momentarily display the PMR446 channel and the sub-audio tone of
the Baby sitter channel, , go to the desired channel and keep pressed the
▲▼ buttons for 5 seconds.
THE BATTERY COMPARTMENT AND THE BELT CLIP
Installing and removing the belt clip:
with the belt clip you can easily attach the
transceiver to your belt.
The clip however, must be removed in
order to install or change the batteries.
To remove the belt clip lift the trigger and
slide the clip down.
To x the clip back to the device slot it in
the guides at the back of the transceiver
until it clicks into place.
Installation of the batteries:
1) Remove the belt clip
2) Insert the AAA Alkaline battery or the
rechargeable battery into the battery
compartment;
3) Replace the battery cover and x the
belt clip.
RECHARGING THE BATTERY AND POWER SAFE
The battery power saving feature enables a reduction in the consumption
of up to 50%; power saving comes on automatically when the transceiver
does not receive any signal for more than 7 seconds.
To recharge the batteries you need to connect the socket of the wall
adaptor to a main power socket and insert the jack of the wall adaptor
into the charging jack of the G5 XT. It takes 8/10 hours to fully recharge.
For maximum battery life, we recommend charging the battery pack when
the G5 XT is off and the low battery icon comes on.
When the batteries are discharged, the icon appears “bt lo”
on the
display.
WARNINGS:
! Do not overcharge the batteries! When these are fully charged the
charging process does not stop automatically.
Do not forget therefore, to remove the transceiver from the
charger as soon as the batteries are charged.
! Do not try to charge alkaline batteries or non rechargeable
batteries. Make sure that when you charge the radio, only
rechargeable NI-MH batteries should be contained in the battery
compartment! It is very dangerous attempting to recharge other
types of batteries (for example alkaline or manganese batteries).
Batteries which are not suitable to be recharged may leak, explode
or even burn and cause damage!
! Using a different battery charger, other than the one specied can
cause damage to your device or may even cause explosions and
personal injuries.
! Do not throw batteries into re or place them near heat, as
this may cause explosions or personal injuries. Dispose of the
batteries according to procedures set out by local regulations.
! Do not mix old and new batteries or batteries of different types or
batteries which have been used in different manners.
MEMORY EFFECT OF RECHARGEABLE BATTERIES
Rechargeable NiMH (Nickel-Metal-Hydrate) batteries are affected by
what is known as the “memory effect”. This phenomenon is associated
with a drastic reduction of battery autonomy and is triggered if the
batteries are regularly charged before being fully discharged and/or are
not completely recharged.
To avoid the memory effect:
• When possible, recharge the batteries only when they are completely
discharged (until the device turns itself off during normal use)
• Do not disconnect the battery charger before the time indicated for a
full battery charge.
• Discharge and recharge your batteries completely at least twice a
month.
In any case, the best solution for avoiding the memory effect is to use in
turn two battery sets: one in use, and the other as a spare set.
The memory effect can be easily eliminated by completely discharging/
charging the batteries 3 or 4 times.
The memory effect should not be confused with the normal battery life,
which is 300-400 cycles of charge/discharge on average.
It is completely normal for operating duty to decrease when the batteries
have reached the end of their life; at this point, you will need to substitute
the batteries.
BATTERY LEVEL INDICATOR
G5 XT has a BATTERY LEVEL METER that shows the battery power
level.
The greater the number of bars visible, the stronger the battery level
will be. When the battery level is low, the battery icon
will ash in the
display, indicating that your batteries should be replace or recharged if
using a rechargeable battery.
USE AND CARE
! Use a soft damp cloth to clean the radio. Do not use alcohol or
cleaning solutions.
! Do not immerse the radio in water.
! Turn off the radio and remove the batteries during long term
storage.
WARNINGS
! DO NOT OPEN THE RADIO FOR ANY REASON!
The mechanics and electronics radio precision require experience and
specialized equipment; for the same reason, the radio should under
no circumstances be realigned as it has already been calibrated for
maximum performance.
Unauthorized opening of the transceiver will void the warranty.
The selected Privacy Code will appear on the display.
To disable the CTCSS function, select the private code and then press the
MODE button, until you visualize the ashing CTCSS Privacy Code on
the display. Select then “off” using the scroll buttons ▲▼.
To conrm, press PTT or wait for 5 seconds.
Note: To communicate with other radios, they must be set to the same
channel and Privacy Code selections.
CTCSS TONE TABLE
Number
Displayed
Tone
Frequency Hz
Number
displayed
Tone
Frequency Hz
Number
displayed
Tone
Frequency Hz
01 67.0 14 107.2 27 167.9
02 71.9 15 110.9 28 173.8
03 74.4 16 114.8 29 179.9
04 77.0 17 118.8 30 186.2
05 79.7 18 123.0 31 192.8
06 82.5 19 127.3 32 203.5
07 85.4 20 131.8 33 210.7
08 88.5 21 136.5 34 218.1
09 91.5 22 141.3 35 225.7
10 94.8 23 146.2 36 233.6
11 97.4 24 151.4 37 241.8
12 100.0 25 156.7 38 250.3
13 103.5 26 162.2
VOX
Your G5 XT has 4 VOX levels (off, 1, 2, 3, and 4). This function allows the
user to activate the communication without pressing the PTT button. You
just have to speak and the communication is on.
You can set the VOX on 3 levels, with or without accessories.
The fourth level activates the VOX with Talkback function: when one of
the two devices transmit for more than 20 seconds, the VOX Talkback
stops the transmission for 10 seconds; so the other user has himself the
opportunity to talk.
To set the VOX level, press the MODE button, until the display shows “Vo
of” and “VOX” ashing in the upper side of the display.
After that, with the scroll buttons ▲▼, select “1”,”2”,”3” or “4”.
To conrm, press the PTT button or wait for 5 seconds.
To disable the VOX function, follow the previous indications, but select
“oF” and then push the PTT key to conrm.
BEEP TONE
This function permits you to produce a beep tone every time you press
a button.
If you want to disable this function, press the MODE button until the
display shows “bp on”, then select by the scroll buttons ▲▼ “bp of”.
To conrm, press the PTT button or wait for 5 seconds.
In this way, all “beeps” and “tones” are disabled.
To re-enable this function, repeat the procedure selecting the “bp on”
using the scroll buttons ▲▼ and conrm by pressing the PTT button or
wait for 5 seconds.
ROGER BEEP (end of transmission tone)
When the PTT button is released, the radio will beep to conrm to other
users that you’ve nished your transmission and that they can begin to
speak.
To turn the ROGER BEEP on, press the MODE button till the display
shows “rb of”; than by the scroll buttons ▲▼, select “rb on”.
To conrm, push the PTT button or wait for 5 seconds.
To disable this function, repeat the procedure selecting the “rb of”.
CALL ALERT SELECTION
G5 XT allows to send a CALL alert signal to all the users of the same
channel.
To CALL, quickly press twice the PTT button. On the display the “TX” icon
appears and the tone of conrmation can be heard by your own speaker.
G5 XT has 3 selectable CALL alerts (oF, 1, 2 and 3).
To select, press the MODE button until a “CA” icon with the current CALL
ALERT number is displayed.
Use the scroll button ▲▼ to make the CALL alert selections; the radio will
emit a corresponding tone for each selection.
Note that all this is possible only if the radio is set on “BP on”.
To conrm, press the PTT button or wait for 5 seconds.
To dis-able this function repeat this procedure selecting “CA of”.
DUAL WATCH
The DUAL WATCH function enables users to monitor, only in reception, 2
selected channels for any activity.
To turn on the DUAL WATCH function, press the MODE button until the
display shows “of-TX/RX”.
Select the second channel with the scroll buttons ▲▼. If you also want to
select one of the 38 CTCSS tone for the second channel press again the
MODE button and select with ▲▼ the desired tone.
To conrm press the PTT button or wait for 5 seconds.
To turn off the DUAL WATCH function, you can just press the MODE
button.
When the radio will receive a signal on one of the two channels selected, the
“DUAL WATCH” function will temporarily stops, allowing the transmission
and the reception of the active signal on the channel in use.
G5 XT will stay in the active channel as long as the signal is present and
will resume scanning 5 seconds after the signal is no longer present.
OUT OF RANGE
The G5 XT is equipped with the “out of range” function.
With the MIDLAND G5 XT you can choose between the automatic Out of
Range or the manual one.
To enable/disable the Out-Of-Range function:
Automatic Out of Range
Press MODE till the display shows “OU of”, than select “OU AU”
(automatic) with the buttons ▲▼.
Conrm the settings with the PTT button or wait for 5 seconds. The
display will show
.
By setting this function a pair of G5 XT transmitts every 60 seconds a data
control code. As soon as the contact between both units is getting lost and
one station doesn’t receive this data control code twice consecutively, the
icon “OU no” starts ashing in the display and you will hear a beep tone.
Manual Out of range:
Press MODE till the display shows “OU of”, than select “OU PB” (manual)
with the buttons ▲▼.
Conrm the settings with the PTT button or wait for 5 seconds. The
display will show
.
To switch on this function manually, press the button (
/ ).
If there is a contact between the units, you will hear the “CA” tone
previously set, otherwise if you don’t hear any tone, that means that your
radio is out of range.
To disable this function, push MODE till “OU AU” or “OU PB” is displayed;
select “OU of” (disabled) with the buttons ▲▼.
Conrm your selection by pushing PTT or waiting for 5 seconds.
BABY SITTER FUNCTION
Midland G5 XT can operate on 2 different ways: as a standard radio
with all the traditional functions, or as baby monitor, for holding your baby
in check.
If you set the radio in baby sitter mode, all the other traditional functions
are disabled and the transceiver works only as baby monitor.
To set the radio for the baby, that will be put near the cradle, press the
MODE button several times, until the display will show “bp of”(baby sitter
off). Using the scroll buttons ▲▼, you can choose between the 2 possible
options: “b” or “p”; select “p” and then press the PTT button to conrm or
wait for 5 seconds. The radio will display
, that means that the function
is active. At the same time, on the display you will also see “b1”, that is
the “baby” channel in use.
Now take the other radio, the one used by the parent, follow the same
procedure and select the option “p”. Also in this case, the icon
will
appear on the screen together with “p1”, that is the “parent” channel
in use.
If the channel in use is noisy, you can choose another baby sitter channel.
There are 9 available baby sitter channels: from “p1” to “p9” for the
parent’s radio and from “b1” to ”b9” for the baby’s one. Press the MODE
button once and then change the channel using the scroll buttons ▲▼
in both radios.
Remember that the 2 radio should operate in the same channel
number.
For example: if the radio placed near the baby is set on the channel “b4”,
the other one used for listening the baby should be set on channel “p4”.
The baby sitter mode allows some specic functions for monitoring the
baby:
• Automatic transmission of the baby’s radio (vox): the baby’s radio
will automatically transmit when it picks any noises up. E.g.: when the
baby cries.
• Automatic out of range: if the parent’s radio moves too much away
TABLE OF SOLUTIONS
Problem Possible cause Solution
The radio doesn’t switch on The batteries are discharged and/or have not been
installed correctly.
Verify that the batteries are charged and that they have
been correctly installed.
The radio switches
off shortly after it has been
switched on
Discharged batteries. Recharge the batteries if they are rechargeable or
change them .
The battery does not recharge The battery-charger has not been connected or
installed correctly.
Inspect the connections of the battery-charger and the
installation of the batteries.
The radio switches on but is
unable to receive signals
The site of installation is too shielded. Move to another area.
The volume is too low Adjust the volume.
Incorrect CTCSS Check that the CTCSS tone corresponds to the one set
by the parties you are communicating with.
It is not possible to
communicate with other
parties
An incorrect radio channel has been selected. Select the same radio channel used by the parties you
are communicating with.
The radio is installed in a shielded area or is too far
from the party you are communicating with
Move to another area.
Incorrect CTCSS Check that the CTCSS tone corresponds to the one set
by the parties you are communicating with.
Reception is fragmented
and/or disturbed
The transmission distance is excessive and/or there are
obstacles in the transmission path
Move closer to the party you are communicating with or
to another area.
The radio has been installed too close to equipment
that causes interference (televisions, computers, etc.)
Increase the distance between the radio and this
equipment.
VOX causes the radio
to accidentally enable
transmission
The sensitivity and/or environmental noise are too high.
Reduce the VOX sensitivity
The VOX feature requires
speaking in a loud voice The sensitivity is too low.
If the environmental noise is not high, increase the
sensitivity or use an optional microphone
Logic related faults
(unreadable displayed
symbols, functions )
Incorrect setting caused by a problem with the power
supply.
Recharge the batteries or change them.
TECHNICAL SPECIFICATIONS
MIDLAND G5 XT
PMR446 Handfunkgerät
Vielen Dank, dass Sie Midland gewählt haben! Das Midland G5
XT ist ein Handfunkgerät zur freien Benutzung in den meisten
europäischen Ländern. Weitere Informationen finden Sie in den
„Benutzungsbeschränkungen”.
Das Midland G5XT verbindet die neueste Technologie bei der
Funkkommunikation mit einem robusten Gehäuse und macht es damit
zu einer idealen und effektiven Lösung für Arbeitnehmer, die mit ihren
Kollegen in Verbindung bleiben müssen (Baustellen, Gebäude, Hotels,
Ausstellungen, Messen) wie auch für Freizeitnutzer, die einfach nur mit
Freunden oder Familie in Kontakt bleiben wollen.
Das robuste Gehäuse und das einfache Design machen es ideal für alle
Bereiche.
LIEFERUMFANG
• 2 MIDLAND G5 XT Handfunkgeräte
• 6 Ni-MH Akkus
• 2 Gürtelclips
• 2 Ladegeräte
REICHWEITE
Die Reichweite hängt von der Umgebung ab, die größte Reichweite wird
im freien Gelände erreicht.
Eine Verringerung der Reichweite haben Sie beispielsweise durch
Bäume, Gebäude oder sonstige Hindernisse. Bei Benutzung im Fahrzeug
oder innerhalb einer Stahlkonstruktion verringert sich die Reichweite
ebenfalls.
Gewöhnlich beträgt die Reichweite im städtischen Bereich, mit Gebäuden
und sonstigen Hindernissen, etwa 1 bis 2 km. Im offenen Gelände mit
Hindernissen wie Bäumen, Blättern oder Häusern ist die Reichweite
etwa 4-6 km. Im offenen Gelände ohne Hindernisse und mit freiem
Blickfeld, wie zum Beispiel in den Bergen, kann die Reichweite über 12
km betragen.
BEDIENELEMENTE UND FUNKTIONEN
DISPLAY
Ihr Midland G5 XT hält Sie durchgehend zu seinem Betriebsstatus über
die Flüssigkristallanzeige (LCD) auf dem Laufenden. Symbole und die
entsprechenden Parameter haben, entsprechend dem Betriebsstatus,
folgende Bedeutung:
TX Anzeige während des Sendens (PTT (Sendetaste) gedrückt).
RX Anzeige während des Empfangs.
Anzeige des gewählten Kanals
Anzeige der Art des gewählten Unterlagerungstons (aus 38).
VOX Anzeige bei aktiviertem VOX-Modus.
Anzeige des Batteriestatus.
Anzeige bei aktivierter Außer-Reichweite-Funktion.
Anzeige bei aktivierter Babysitterfunktion.
BEDIENELEMENTE
Hier beschreiben wir die unterschiedlichen
Komponenten des Geräts:
ANTENNE
EINGEBAUTER LAUTSPRECHER - Hier befindet
sich der Lautsprecher.
EINGEBAUTES MIKROFON - Hier befindet
sich das Mikrofon.
PTT (push to talk): Mit Tastendruck senden Sie.
▲▼ Einstellungen ändern.
/ - Mit Tastendruck aktivieren Sie die
Außer-Reichweite-Funktion. Taste für 5 Sekunden
zur Aktivierung der Tastensperre gedrückt halten.
MODE/
- Mit Tastendruck rufen Sie das Menü des Funkgeräts auf. Taste
für 3 Sekunden zum Ein- und Ausschalten des Handfunkgeräts gedrückt
halten.
EXTERNE LAUTSPRECHER-/MIKROFON-/LADEGERÄTBUCHSE - Hier
schließen Sie externe Geräte wie Headset, Mikrofon, Ladegerät usw. an.
BEDIENUNGSHINWEISE
EIN- UND AUSSCHALTEN
Halten Sie zum Einschalten für etwa 3 Sekunden gedrückt. Das
Handfunkgerät gibt drei Signaltöne ab und das Display führt für etwa
1 Sekunde einen automatischen Selbsttest durch. Im Display wird der
zuletzt benutzte Kanal angezeigt.
LAUTSTÄRKE
Mit ▲▼ erhöhen oder verringern Sie die Lautstärke.
KANALWAHL
Drücken Sie MODE. Die Kanalnummer im Display blinkt.
Drücken Sie die Wahltasten ▼▲, bis Sie den gewünschten Kanal
erreichen. Mit der Sendetaste PTT bestätigen Sie oder warten Sie 5
Sekunden ab.
Kanal FREQ. RX/TX (MHz) Kanal FREQ. RX/TX (MHz)
01 446.00625 05 446.05625
02 446.01875 06 446.06875
03 446.03125 07 446.08125
04 446.04375 08 446.09375
Folgende Kanäle sind voreingestellt:
Kanal CTCSS-Kanäle und Töne Kanal CTCSS-Kanäle und Töne
09 entspricht Kanal 01 16 17 entspricht Kanal 01 31
10 entspricht Kanal 02 16 18 entspricht Kanal 03 31
11 entspricht Kanal 03 16 19 entspricht Kanal 05 31
12 entspricht Kanal 04 16 20 entspricht Kanal 07 31
13 entspricht Kanal 05 16 21 entspricht Kanal 02 31
14 entspricht Kanal 06 16 22 entspricht Kanal 04 31
15 entspricht Kanal 07 16 23 entspricht Kanal 06 31
16 entspricht Kanal 08 16 24 entspricht Kanal 08 31
Anzeige des Kanals/Unterlagerungstons
Zur kurzzeitigen Anzeige des PMR446-Kanals und des Unterlagerungstons
der voreingestellten Kanäle gehen Sie zu dem gewünschten Kanal (9 bis
24) und halten Sie ▲▼ für 5 Sekunden gedrückt.
SENDEN UND EMPFANGEN
Zur Kommunikation müssen alle Funkgeräte in Ihrer Gruppe auf das
gleiche Frequenzband und den gleichen Kanal eingestellt sein.
Zum Senden halten Sie die Sendetaste PTT gedrückt und sprechen
Sie mit normaler Lautstärke in das Mikrofon
. „TX” wird während des
Sendens im Display angezeigt.
Sie können ebenfalls ein externes Handmikrofon benutzen, halten Sie
die Sendetaste PTT auf der Seite des Handmikrofons gedrückt. Für
beste Klarheit halten Sie das Handfunkgerät etwa 2 bis 3 cm vom Mund
entfernt.
Zum EMPFANGEN lassen Sie die Sendetaste PTT los. „RX” wird
während des Empfangs im Display angezeigt.
SQUELCH
Mit der SQUELCH-Funktion stellen Sie die Rauschunterdrückung für den
benutzten Kanal ein. Beim MIDLAND G5 XT ist diese Funktion immer
aktiviert.
TASTENSPERRE
Halten Sie für etwa 5 Sekunden zur Aktivierung der Tastensperre
gedrückt. Im Display wird „Lc on” angezeigt.
Zur Deaktivierung der Tastensperre halten Sie
erneut für 5 Sekunden
gedrückt. Im Display wird „Lc of” angezeigt.
CTCSS-TÖNE
Die CTCSS-Töne sind Codes, welche dem Kanal zur „Privatisierung”
hinzugefügt werden können. Für jeden Kanal können Sie bis zu 38
CTCSS-Töne wählen.
Zusätzlich können weitere Codes auf den PMR-Hauptkanälen (01 bis 08)
erstellt werden.
einen weiteren Babysitterkanal wählen, insgesamt stehen Ihnen 9
Babysitterkanäle von „p1” bis „p9” für das Elterngerät und von „b1” bis
„b9” für das Babygerät zur Verfügung. Drücken Sie einmal mode und
stellen Sie den Kanal auf beiden Funkgeräten mit ▲▼ um.
Bitte beachten Sie, dass beide Funkgeräte auf die gleiche
Kanalnummer eingestellt sein müssen.
Beispiel: Ist das Funkgerät im Kinderzimmer auf Kanal „b4” eingestellt,
dann muss das elterliche Gerät auf Kanal „p4” eingestellt sein.
Der Babysittermodus bietet Ihnen besondere Funktionen zur
Überwachung von Kleinkindern:
• Automatische Übertragung vom Babygerät (VOX): Das Babygerät
sendet automatisch, wenn es Geräusche wahrnimmt, beispielsweise
wenn das Baby schreit.
• Automatische Außer-Reichweite-Funktion: Entfernt sich das
Elterngerät zu weit vom Babygerät, so hören Sie nach 2 Minuten einen
Signalton als Warnhinweis, dass Sie nun außerhalb der Reichweite
des Babygeräts sind. Verringern Sie den Abstand, um den Warnton zu
beenden.
• Manuelle Außer-Reichweite-Funktion: Sie können ebenfalls manuell
überprüfen, ob Sie sich außerhalb der Reichweite des Babygeräts
benden. Drücken Sie auf dem Elterngerät einmal kurz . Stehen
die beiden Geräte in Kontakt, so hören Sie den zuvor eingestellten
„CA” Ton. Hören Sie keinen Ton, so benden Sie sich außerhalb der
Reichweite des Babygeräts.
• Wechselsprechen mit dem Baby: Normalerweise können Sie
jederzeit mit dem Kleinkind sprechen, hierzu müssen Sie nur die
Sprachtaste PTT auf dem Elterngerät drücken. Schreit Ihr Kind
jedoch (was bedeutet, dass das Funkgerät sendet), dann müssten
Sie normalerweise warten, bis es wieder ruhig wird. Dank der
Wechselsprechfunktion unterbricht VOX Talkback Ihr Baby jedoch
nach 20 Sekunden und Sie sind für 10 Sekunden zur Beruhigung des
Kindes auf Sendung.
Zur Deaktivierung der Babysitterfunktion drücken Sie mehrfach MODE,
bis im Display „bp b” oder „bp p” angezeigt wird. Nun wählen Sie mit
▲▼ „bp of”. Bestätigen Sie Ihre Auswahl mit der Sendetaste PTT oder
warten Sie 5 Sekunden ab.
Die Babysitterfunktion ist nun deaktiviert und es stehen Ihnen wieder die
Normalfunktionen zur Verfügung.
BABYSITTERKANÄLE
Kanal Frequenz
CTCSS-
Kanal
VOX
Außer Re-
ichweite
Entsprechender
Kanal
b1 446.00625 156.7 (25) On Lv 4 Of 01 25
b2 446.01875 156.7 (25) On Lv 4 Of 02 25
b3 446.03125 156.7 (25) On Lv 4 Of 03 25
b4 446.04375 156.7 (25) On Lv 4 Of 04 25
b5 446.05625 156.7 (25) On Lv 4 Of 05 25
b6 446.06875 156.7 (25) On Lv 4 Of 06 25
b7 446.08125 156.7 (25) On Lv 4 Of 07 25
b8 446.09375 156.7 (25) On Lv 4 Of 08 25
b9 446.09375 Of On Lv 4 Of 08
p1 446.00625 156.7 (25) Of On AU 01 25
p2 446.01875 156.7 (25) Of On AU 02 25
p3 446.03125 156.7 (25) Of On AU 03 25
p4 446.04375 156.7 (25) Of On AU 04 25
p5 446.05625 156.7 (25) Of On AU 05 25
p6 446.06875 156.7 (25) Of On AU 06 25
p7 446.08125 156.7 (25) Of On AU 07 25
p8 446.09375 156.7 (25) Of On AU 08 25
p9 446.09375 Of Of On AU 08
Zur vorübergehenden Anzeige des PMR446-Kanals und des benutzten
Unterlagerungstons gehen Sie zu dem gewünschten Kanal und drücken
Sie für 5 Sekunden ▲▼.
BATTERIEFACH UND GÜRTELCLIP
Anbringen und Abnehmen des Gürtelclips
Mit dem Gürtelclip können Sie das
Handfunkgerät leicht am Gürtel befestigen.
Der Clip muss jedoch entfernt werden, um die
Batterien auszutauschen. Zum Abnehmen des
Gürtelclips, ziehen sie bitte an der Rastfeder
und schieben Sie den Gürtelclip nach unten
weg.
Zum erneuten Anbringen des Gürtelclips
schieben Sie ihn in die Führung auf der
Rückseite des Funkgeräts ein, bis er einrastet.
Einsetzen der Batterien
1) Nehmen Sie den Gürtelclip ab.
2) Setzen Sie zwei AAA-Alkali-Batterien oder
Akkus in das Batteriefach ein.
3) Setzen Sie Batteriefach und Gürtelclip zurück.
AKKU LADEN UND ENERGIE SPAREN
Die Batterie-Sparfunktion ermöglicht eine Einsparung des Verbrauchs
von bis zu 50 %. Der Energiesparmodus wird automatisch aktiviert, wenn
das Handfunkgerät länger als 7 Sekunden kein Signal empfängt.
Zum Laden der Akkus schließen Sie das Ladegerät an der Steckdose
an, dann schließen Sie das Anschlusskabel am Eingang des G5 XT an.
Eine volle Ladung dauert etwa 8 bis 10 Stunden.
Für eine maximale Lebensdauer der Akkus empfehlen wir die Ladung,
wenn das G5 XT ausgeschaltet ist und die Akku-Statusanzeige leuchtet.
Beim Entladen der Akkus wird im Display “bt lo”
angezeigt.
WARNHINWEISE
! Überladen Sie die Akkus nicht! Die Ladung wird bei vollen Akkus
nicht automatisch unterbrochen.
Trennen Sie daher bitte das Handfunkgerät vom Ladegerät ab,
sobald die Akkus geladen sind.
! Laden Sie keinesfalls Alkali-Batterien oder sonstige Batterien
auf. Bitte benutzen Sie ausschließlich NI-MH Akkus im Funkgerät!
Das Laden anderer Batterien ist gefährlich. Batterien können
auslaufen, explodieren oder brennen und zu erheblichen Schäden
führen!
! Die Benutzung eines anderen Ladegeräts als hier spezifiziert,
kann zu Schäden am Funkgerät, Explosion und Verletzungen
führen.
! Werfen Sie Batterien nicht ins Feuer und lagern Sie Batterien nicht
in unmittelbarer Nähe von Wärmequellen, das kann zu Explosion
und Verletzung führen. Entsorgen Sie Batterien umweltgerecht.
! Mischen Sie nicht erschöpfte und neue Batterien, Batterien
unterschiedlicher Bauart oder unterschiedliche Batterietypen.
MEMORYEFFEKT BEI AKKUS
NiMH (Nickel-Metall-Hydrid) Akkus unterliegen dem sogenannten
„Memoryeffekt”. Hiermit haben Sie eine drastische Verringerung der
Akkukapazität und er wird ausgelöst, wenn Akkus regelmäßig geladen
werden, bevor sie vollständig entladen sind oder wenn sie nicht
vollständig geladen werden.
Vermeiden des Memoryeffekts:
• Laden Sie Akkus möglichst erst nach, nachdem sie völlig erschöpft
sind (das Gerät schaltet sich automatisch aus).
• Trennen Sie das Ladegerät nicht ab, bevor der Akku vollständig
geladen ist.
• Laden und entladen Sie Ihre Akkus wenigstens zweimal monatlich.
Die beste Lösung zur Vermeidung des Memoryeffekts ist die Benutzung
von zwei Akkusätzen: einer ist in Gebrauch, der andere dient der Reserve.
Der Memoryeffekt kann einfach vermieden werden, wenn Sie Akkus drei-
oder viermal vollständig entladen/laden.
Der Memoryeffekt sollte allerdings nicht mit der normalen Lebensdauer
von Akkus verwechselt werden, der durchschnittlich 300-400 Ladezyklen
beträgt.
Eine Verkürzung der Betriebszeit beim Erreichen der Lebensdauer von
Akkus ist vollkommen normal. Zu diesem Zeitpunkt müssen Sie Akkus
ersetzen.
BATTERIE-STATUSANZEIGE
Das G5 XT ist mit einer BATTERIE-STATUSANZEIGE ausgestattet,
welche den Ladezustand anzeigt.
Je mehr Balken angezeigt werden, desto höher ist der Ladezustand.
Bei geringem Ladezustand blinkt das Symbol
im Display, Ihre Batterien
müssen nun ausgetauscht bzw. Ihre Akkus geladen werden.
Die voreingestellten Kanäle 9 bis 24 können nicht modifiziert werden.
Zur Auswahl eines Privatcodes für den aktuellen Kanal drücken Sie
zweimal MODE, danach wählen Sie mit ▲▼ den gewünschten Code.
Drücken Sie zur Bestätigung die Sendetaste PTT oder warten Sie 5
Sekunden ab.
Der gewählte Privatcode wird im Display angezeigt.
Zur Deaktivierung der CTCSS-Funktion wählen Sie den Privatcode und
drücken Sie MODE, bis der CTCSS-Privatcode im Display blinkt. Wählen
Sie nun mit ▲▼„off”.
Zur Bestätigung drücken Sie die Sendetaste PTT.
Bitte beachten Sie: Zur Kommunikation mit anderen Funkgeräten
müssen diese auf den gleichen Kanal und Privatcode eingestellt sein.
CTCSS-TÖNE
Angezeigte
Nummer
Tonfrequenz Hz
Angezeigte
Nummer
Tonfrequenz Hz
Angezeigte
Nummer
Tonfrequenz Hz
01 67.0 14 107.2 27 167.9
02 71.9 15 110.9 28 173.8
03 74.4 16 114.8 29 179.9
04 77.0 17 118.8 30 186.2
05 79.7 18 123.0 31 192.8
06 82.5 19 127.3 32 203.5
07 85.4 20 131.8 33 210.7
08 88.5 21 136.5 34 218.1
09 91.5 22 141.3 35 225.7
10 94.8 23 146.2 36 233.6
11 97.4 24 151.4 37 241.8
12 100.0 25 156.7 38 250.3
13 103.5 26 162.2
VOX
Ihr G5 XT hat 4 VOX-Pegel (aus, 1, 2, 3 und 4). Mit dieser Funktion
können Sie senden, ohne die Sendetaste PTT zu drücken. Sprechen Sie
einfach in das Mikrofon.
Sie können VOX auf 3 Pegel einstellen, mit oder ohne Zubehörteilen.
Der vierte Pegel aktiviert VOX mit Wechselsprechfunktion: Sendet
eines der beiden Geräte länger als 20 Sekunden, dann unterbricht VOX
Talkback die Übertragung für 10 Sekunden, damit die Gegenseite die
Möglichkeit zur Erwiderung erhält.
Zum Einstellen des VOX-Pegels drücken Sie (MODE), bis im Display
„Vo of ” und „VOX” im oberen Displaybereich blinken.
Anschließend wählen Sie mit ▲▼ „1”, „2”, „3” oder „4”.
Zur Bestätigung drücken Sie die Sendetaste PTT oder warten Sie 5
Sekunden ab.
Zur Deaktivierung der VOX-Funktion folgen Sie der vorstehenden
Anleitung, wählen Sie jedoch „oF” und drücken Sie dann die Sendetaste
PTT zur Bestätigung.
TASTENTON
Mit dieser Funktion haben Sie für jeden Tastendruck einen Signalton.
Zur Deaktivierung der Funktion drücken Sie MODE, bis im Display „bp
on” angezeigt wird oder wählen Sie mit ▲▼ „bp of”.
Zur Bestätigung drücken Sie die Sendetaste PTT oder warten Sie 5
Sekunden ab.
Auf diese Weise sind alle „Signaltöne” und „Töne” deaktiviert.
Zur erneuten Aktivierung der Funktion wiederholen Sie den Vorgang mit
Auswahl von „bp on” mit ▲▼ und bestätigen Sie mit der Sendetaste PTT
oder warten Sie 5 Sekunden ab.
ROGER BEEP (Signalton am Ende der Übertragung)
Beim Loslassen der Sendetaste PTT gibt das Funkgerät einen Signalton
ab, um der Gegenseite anzuzeigen, dass Sie die Übertragung beendet
haben und die Gegenseite nun sprechen kann.
Zur Aktivierung des ROGER BEEP drücken Sie MODE, bis im Display
„rb of” angezeigt wird, dann wählen Sie mit ▲▼ „rb on”.
Zur Bestätigung drücken Sie die Sendetaste PTT oder warten Sie 5
Sekunden ab.
Zur Deaktivierung dieser Funktion gehen Sie wie vorstehend vor, wählen
Sie jedoch „rb of”.
ANRUFALARMIERUNG
Das G5 XT ermöglicht das Aussenden eines Rufsignals an alle Nutzer
des gleichen Kanals.
Zum SENDEN drücken Sie in schneller Folge zweimal die Sendetaste
PTT. Im Display wird „TX” angezeigt und Sie hören den Bestätigungston
über Ihren Lautsprecher.
Das G5 XT hat 3 wählbare RUFSIGNALE (aus, 1, 2 und 3).
Zur Auswahl drücken Sie MODE, bis „CA” mit der aktuellen Nummer des
RUFSIGNALS angezeigt wird.
Mit ▲▼ wählen Sie die RUFSIGNAL; für jede Auswahl gibt das Funkgerät
den entsprechenden Ton ab.
Bitte beachten Sie, dass Sie diese Funktion nur haben, wenn „BP on”
aktiviert ist.
Zur Bestätigung drücken Sie die Sendetaste PTT oder warten Sie 5
Sekunden ab.
Zur Deaktivierung dieser Funktion gehen Sie wie vorstehend vor, wählen
Sie jedoch „CA of”.
DOPPELÜBERWACHUNG
Die DOPPELÜBERWACHUNGS-Funktion ermöglicht die Überwachung,
allerdings nur im Empfangsmodus, von 2 Kanälen auf Aktivität.
Zur Aktivierung der DOPPELÜBERWACHUNGS-Funktion drücken Sie
MODE, bis im Display „of-TX/RX” angezeigt wird.
Wählen Sie den zweiten Kanal mit ▲▼. Wollen Sie ebenfalls einen der
38 CTCSS-Töne für den zweiten Kanal wählen, so drücken Sie erneut
MODE und wählen Sie den gewünschten Ton mit ▲▼.
Zur Bestätigung drücken Sie die Sendetaste PTT oder warten Sie 5
Sekunden ab.
Zur Deaktivierung der DOPPELÜBERWACHUNGS-Funktion drücken
Sie einfach MODE.
Empfängt das Funkgerät ein Signal auf einem der beiden gewählten
Kanäle, dann wird die DOPPELÜBERWACHUNGS-Funktion
vorübergehend unterbrochen und ermöglicht das Senden und den
Empfang des aktiven Signals auf dem benutzten Kanal.
Das G5 XT bleibt auf dem aktiven Kanal, solange das Signal anliegt.
5 Sekunden nach dem letzten Empfang wird die Überwachung fortgesetzt.
AUSSER REICHWEITE
Das G5 XT ist mit der Außer Reichweite-Funktion ausgestattet.
Mit dem MIDLAND G5 XT können Sie zwischen der automatischen und
manuellen Außer-Reichweite-Funktion wählen.
Aktivierung/Deaktivierung der Außer-Reichweite-Funktion:
Automatische Außer-Reichweite-Funktion
Drücken Sie MODE bis im Display „OU of” angezeigt wird, dann wählen
Sie mit ▲▼ „OU AU” (automatisch).
Zur Bestätigung drücken Sie die Sendetaste PTT oder warten Sie 5
Sekunden ab. Im Display wird
angezeigt.
Mit der Aktivierung dieser Funktion sendet ein Paar G5 XT alle 60
Sekunden einen Datenkontrollcode. Sobald der Kontakt zwischen
den beiden Geräten verloren geht und der Datenkontrollcode zweimal
nacheinander nicht empfangen wird, blinkt im Display „OU no” und Sie
hören einen Signalton.
Manuelle Außer-Reichweite-Funktion
Drücken Sie MODE bis im Display „OU of” angezeigt wird, dann wählen
Sie mit ▲▼ „OU PB” (manuell).
Zur Bestätigung drücken Sie die Sendetaste PTT oder warten Sie 5
Sekunden ab. Im Display wird
angezeigt.
Zur manuellen Aktivierung dieser Funktion drücken Sie (
/ ).
Sind die beiden Geräte in Kontakt, so hören Sie den zuvor eingestellten
„CA” Ton, anderenfalls hören Sie keinen Ton (was bedeutet, dass Ihr
Funkgerät außerhalb der Reichweite ist).
Zur Deaktivierung dieser Funktion drücken Sie MODE, bis „OU AU” oder
„OU PB” angezeigt wird, mit ▲▼ wählen Sie „OU of” (deaktiviert).
Zur Bestätigung drücken Sie die Sendetaste PTT oder warten Sie 5
Sekunden ab.
BABYSITTERFUNKTION
Das Midland G5 XT kann auf zwei unterschiedliche Arten betrieben
werden: als gewöhnliches Funkgerät mit allen herkömmlichen Funktionen
oder als Babymonitor zur Überwachung von Kleinkindern (oder
gebrechlichen oder behinderten Personen).
Im Babysittermodus sind die herkömmlichen Funktionen deaktiviert und
das Funkgerät arbeitet nur noch als Babymonitor.
Zum Einstellen des Geräts auf Babymodus im Kinderzimmer drücken
Sie mehrfach mode, bis im Display „bp of” (Babysitter aus) angezeigt
wird. Mit den Navigationstasten ▲▼ können Sie nun zwischen „b” und
„p” umschalten; wählen Sie „b” und drücken Sie zur Bestätigung die
Sendetaste PTT oder warten Sie 5 Sekunden ab. Im Display wird
angezeigt, damit ist die Funktion aktiviert. Gleichzeitig wird im Display
„b1” als Hinweis angezeigt, dass nun der „Babykanal” benutzt wird.
Nehmen Sie nun das andere Funkgerät (das „Elterngerät”) zur Hand und
folgen Sie wieder den obigen Anleitungen, jedoch wählen Sie als Option
„p” (Parent). Auch auf diesem Gerät wird
angezeigt. Weiterhin wird
„p1” als Hinweis angezeigt, dass nun der „Parentkanal” benutzt wird.
Haben Sie Störungen auf dem benutzten Kanal, so können Sie
WARTUNG UND PFLEGE
! Benutzen Sie zum Reinigen des Funkgeräts nur ein
weiches, feuchtes Tuch. Benutzen Sie keine Lösungs- oder
Reinigungsmittel.
! Tauchen Sie das Funkgerät nicht in Wasser ein.
! Bei längerer Nichtbenutzung entnehmen Sie bitte die Batterien/
Akkus.
WARNHINWEIS
! ÖFFNEN SIE KEINESFALLS DAS GERÄTEGEHÄUSE!
Zur Wartung von Funkgeräten werden neben Erfahrung auch besondere
Werkzeuge benötigt. Aus diesem Grunde nehmen Sie bitte auch keine
Einstellungen am Funkgerät vor, es ist bereits werksseitig für beste
Leistung kalibriert.
Unerlaubte Eingriffe führen zum Verlust Ihrer Garantieansprüche.
TABELLA DELLE SOLUZIONI
PROBLEMA POSSIBILE CAUSA SOLUZIONE
La radio non si accende Batterie scariche e/o non installate correttamente Vericate che le batterie siano cariche e installarle
correttamente
La radio si spegne subito
dopo l’accensione
Batterie scariche Caricare le batterie o cambiarle
Le batterie non si ricaricano Caricatore non connesso correttamente alla radio Vericate la connessione del caricatore e l’installazione
delle batterie
La radio si accende, ma non
riceve segnali
Radio collocata in un punto troppo schermato Spostatevi in un luogo più aperto
Livello del volume troppo basso Regolate il livello del volume
Errato CTCSS Vericate che il CTCSS sia lo stesso impostato dai
vostri corrispondenti
Non riuscite a mettervi in
contatto con la controparte
Errata selezione del canale radio Selezionate lo stesso canale radio della controparte
Radio collocata in un punto schermato o distante
rispetto la controparte
Spostatevi in un luogo più favorevole
Errato CTCSS Vericate che il CTCSS sia lo stesso impostato dai
vostri corrispondenti
La ricezione è spezzata e/o
disturbata
Corrispondente troppo lontano e/o ricetrasmettitore
schermato da ostacoli in direzione del corrispondente.
Avvicinatevi alla controparte e spostatevi in un luogo
più favorevole
Radio collocata troppo vicina ad apparati interferenti
(televisori, computer ecc.).
Allontanate la radio dagli apparecchi interferenti.
Il VOX fa trasmettere
accidentalmente la radio
Sensibilità eccessiva e/o rumore ambientale eccessivo Riducete la sensibilità del VOX
E’ necessario parlare a
volume alto per trasmettere
con il VOX
Sensibilità troppo bassa Se il rumore ambientale non è elevato aumentate la
sensibilità, oppure utilizzate un accessorio microfonico
opzionale
Malfunzionamenti della logica
(simboli incongruenti sul
display, blocco funzioni ecc.)
Impostazione errata indotta da qualche disturbo
nell’alimentazione
Ricaricare le batterie
SPECIFICHE TECNICHE
Canali ........................................................................................1~8 PMR
Generazione delle frequenze ...................................... sintetizzatore PLL
Copertura di frequenza .................................446.00625 - 446.09375MHz
Passo Canalizzazione ................................................................12.5 KHz
Alimentazione ................................................. 3x AAA type 4.5V(Alkaline)
............................................................... o 3.6V(Ricaricabili)+/- 10% VCC
Temperatura operativa........................................................da -20° a +55°
Dimensioni (senza antenna) ..............................................85x 50x25 mm
Peso (senza batterie). ................................................................ 0,074 Kg
Ciclo di funzionamento ..............................TX 5%, RX 5%, stand-by 90%
Trasmettitore
Potenza di uscita .................................................................500 mW ERP
Tipo di modulazione .............................................................................FM
Reiezione Spurie ............................................. rispetta le normative ETSI
Ricevitore
Sensibilità a 12dB Sinad............................................................... 0,35µV
Reiezione canali adiacenti ................................................................ 70dB
Potenza di uscita audio. ............................................300mW a 10% THD
Frequenze intermedie.......................................1°:21,4 MHz ; 2°:455 KHz
Presa per microfono esterno e ricarica...................... jack stereo 2,5 mm
Presa per altoparlante esterno .................................... jack mono 3.5 mm
Le speciche sono soggette a modica senza preavviso.
Channels ....................................................................................1~8 PMR
Frequency generation...................................................... PLL synthesizer
Frequency range ...............................446.00625 - 446.09375MHz (PMR)
Aerial .........................................................................................12.5 KHz
Rated power supply 3x AAA type 4,5 V (Alkaline) or 3,6 V (rechargeable)
+/- 10% VDC
Operating temperature .................................................. from -20° to +55°
Size (without antenna .....................................................85 x 50 x 25 mm
Weight (without batteries ............................................................ 0,075 kg
Operation cycle (% on 1 h .........................TX 5%, RX 5%, stand-by 90%
Transmitter
Output power (ERP .................................................................... 500 mW
Type of circuit ...................................................................................... FM
Suppression of spurious signals ........................ Compliant with ETSI law
Receiver
Sensitivity at 12dB Sinad ............................................................... 0,35μV
Spurious signals rejection................................................................. 70dB
Audio output power (10% THD ................................300mW @ 10% THD
Medium frequencies ........................................ 1°:21,4 MHz ; 2°:455 KHz
Connection for external microphone and recharge .... 2,5 mm jack stereo
Connector for external speaker ................................... 3.5 mm jack mono
Specications are subject to change without notice.
STÖRUNGSERKENNUNG
Problem Mögliche Ursache Lösungsvorschlag
Funkgerät schaltet sich nicht
ein.
Akkus erschöpft und/oder nicht korrekt eingesetzt. Vergewissern Sie sich, dass die Akkus frisch und
korrekt eingesetzt sind.
Funkgerät schaltet sich
aus, kurz nachdem es
eingeschaltet wurde.
Akkus erschöpft. Laden Sie die Akkus.
Akku wird nicht geladen. Ladegerät nicht korrekt angeschlossen oder Akkus
falsch installiert.
Überprüfen Sie den Anschluss des Ladegeräts und die
Installation der Akkus.
Funkgerät schaltet sich
ein, empfängt jedoch keine
Signale.
Standort ist zu sehr abgeschirmt. Begeben Sie sich zu einem anderen Standort.
Lautstärke zu gering eingestellt. Regeln Sie die Lautstärke hoch.
CTCSS falsch. Vergewissern Sie sich, dass der CTCSS-Ton der
Einstellung auf den anderen Geräten entspricht.
Kommunikation ist nicht
möglich.
Falscher Funkkanal gewählt. Wählen Sie den gleichen Kanal, wie auf den anderen
Geräten.
Standort ist zu sehr abgeschirmt oder zu weit von der
Gegenseite entfernt.
Begeben Sie sich zu einem anderen Standort.
CTCSS falsch. Vergewissern Sie sich, dass der CTCSS-Ton der
Einstellung auf den anderen Geräten entspricht.
Empfang unterbrochen und/
oder gestört.
Entfernung zu groß und/oder Hindernisse. Gehen Sie dichter an die Gegenseite heran oder
wechseln Sie Ihren Standort.
Funkgerät ist zu dicht an Störquellen installiert
(Fernseher, Computer usw.).
Entfernen Sie sich mit dem Funkgerät von diesen
Störquellen.
VOX-Funktion schaltet das
Funkgerät auf Senden.
Empndlichkeit und/oder Umweltgeräusche zu hoch. Verringern Sie die VOX-Empndlichkeit.
Für die VOX-Funktion muss
sehr laut gesprochen werden.
Empndlichkeit zu gering eingestellt. Sind die Umweltgeräusche zu hoch, so erhöhen Sie
die Empndlichkeit oder benutzen Sie ein anderes
Mikrofon.
Logische Fehler (unlesbare
Symbole, Funktionen).
Fehlfunktion durch Problem bei der
Spannungsversorgung.
Laden Sie die Akkus.
TECHNISCHE SPEZIFIKATIONEN
Kanäle ........................................................................................1~8 PMR
Frequenzerzeugung ....................................................... PLL-Synthesizer
Frequenzbereich................................446.00625 - 446.09375MHz (PMR)
Antenne ......................................................................................12.5 KHz
Spannungsversorgung ...........................3 x AAA 1,5 V (Alkali-) Batterien
.................................................................. oder 3,6 V Akku +/- 10 % VDC
Betriebstemperatur ..........................................................-20°C bis +55°C
Abmessungen (ohne Antenne) .......................................85 x 50 x 25 mm
Gewicht (ohne Batterien/Akkus) .................................................. 0,075 kg
Betriebszyklus (% in 1 Stunde)..............TX 5 %, RX 5 %, Stand-by 90 %
Sender
Ausgangsleistung (ERP) ............................................................. 500 mW
Frequenzband ......................................................................................FM
Rauschsignalunterdrückung. ............................................Entspricht ETSI
Empfänger
Empfindlichkeit bei 12dB Sinad ..................................................... 0,35μV
Rauschsignalunterdrückung ............................................................. 70dB
Audio-Ausgangsleistung (10% Klirrfaktor) .............300mW bei 10 % THD
Mittelfrequenzen .................................................1: 21,4 MHz; 2: 455 KHz
Anschluss externes Mikrofon und Ladegerät ......... 2,5 mm Stereo Klinke
Anschluss externer Lautsprecher ............................. 3,5 mm Mono Klinke
Änderung der Spezifikationen vorbehalten, auch ohne Vorankündigung.
MIDLAND G5 XT
Transceptor PMR446
¡Gracias por elegir MIDLAND! MIDLAND G5XT es un transceptor
portátil que se puede usar, en casi todos los países Europeos.
Para más informaciones revise la tabla “Restricciones de uso”.
Combinando la última tecnología en radio comunicación junto con una
robusta mecánica, el MIDLAND G5XT hace que sea la solución ideal
y ecaz para los profesionales que necesiten mantenerse en contacto
con sus colegas (construcción, edicios, hoteles, ferias, salones) o para
el ocio a los usuarios que sólo quieren mantenerse en contacto con los
amigos y la familia.
Su chasis y el diseño sencillo lo hacen ideal para cualquier actividad.
DOTACIÓN
• 2 transceptores MIDLAND G5 XT
• 2 clips de cinturón
• 2 cargadores de pared
• 6 Baterías recargables Ni-MH
COBERTURA
Las prestaciones óptimas se obtendrán en campo abierto y sin obstáculos.
Factores ambientales como la altura, edicios, árboles, etc..pueden
disminuir el alcance.. En el interior de un automóvil o de una construcción
metálica, la cobertura puede reducirse sensiblemente.
Normalmente la cobertura en la ciudad, con edicios u otros obstáculos
es de 1 ó 2 Km. En espacios abiertos pero con obstáculos como árboles
ó casas la máxima cobertura posible es de 4-6 Km. En espacios abiertos,
sin obstáculos, como por ejemplo en la montaña, la cobertura puede ser
superior a 12 Km.
DESCRIPCIÓN DE LOS CONTROLES Y
FUNCIONES
DISPLAY
El Midland G5XT le mantendrá constantemente informado sobre el
estado de operación a través de una pantalla de cristal líquido (LCD). Los
iconos y sus correspondientes parámetros que aparecen dependiendo
del estado operativo del equipo, se describen de la siguiente manera:
TX Aparece mientras esta transmitiendo una señal (tecla PTT
presionada)
RX Signica que la radio esta recibiendo una señal.
Indica el canal seleccionado.
Indica el subtono CTCSS seleccionado.
VOX Indica si el modo VOX esta activado.
Indica el nivel de batería.
Indica si la función “fuera de cobertura” esta activada.
Indica si la función Baby Sitter esta activada.
DESCRIPCIÓN DE LOS CONTROLES
La siguiente servirá de guía para localizar las
diferentes partes del equipo y familiarizarse con
él.
ANTENA
ALTAVOZ - Tiene un altavoz interno.
- Aquí se encuentra el micrófono para la
transmisión.
PTT (pulsar para hablar) Pulsando esta tecla se
activa la transmisión del equipo.
▲▼. Sirven para cambiar los ajustes del Menu
/ - Pulsando este botón podrá usar la función
fuera de cobertura. Si apreta esta tecla durante 5 segundos, el bloqueo
del teclado se activará.
MODE/
- Pulse esta tecla para entrar en el menú de la radio. Si lo
mantiene presionado durante 3 segundos, apagará o encenderá la
radio.
TOMA ALTAVOZ EXTERNO/MIC/CHG - Permite la conexión con
accesorios externos como auriculares, micrófonos, cargadores, etc...
OPERACIONES Y FUNCIONES
ENCENDIDO/APAGADO
Mantenga pulsada la tecla durante aproximadamente 3 segundos. El
equipo emitirá 3 beep de diversa tonalidad; el display mostrará un auto-
test durante un segundo y visualizará el último canal utilizado.
AJUSTE DEL VOLUMEN
Para regular el volumen a un nivel óptimo, pulse las teclas ▲▼ hasta que
obtenga el nivel deseado.
SELECCIÓN DEL CANAL
Pulse la tecla MODE. El número de canal estará parpadeando en el display.
Pulse las teclas ▼▲ hasta obtener el canal deseado. Pulse PTT para
conrmar, o bien espere unos 5 segundos.
Canal FRECUENCIA RX/TX (MHz) Canal FRECUENCIA RX/TX (MHz)
01 446.00625 05 446.05625
02 446.01875 06 446.06875
03 446.03125 07 446.08125
04 446.04375 08 446.09375
(como las indicaciones siguientes)
Canal CTCSS Canales y tonos Canales CTCSS Canales y tonos
09 corresponde al canal 01 16 17 corresponde al canal 01 31
10 corresponde al canal 02 16 18 corresponde al canal 03 31
11 corresponde al canal 03 16 19 corresponde al canal 05 31
12 corresponde al canal 04 16 20 corresponde al canal 07 31
13 corresponde al canal 05 16 21 corresponde al canal 02 31
14 corresponde al canal 06 16 22 corresponde al canal 04 31
15 corresponde al canal 07 16 23 corresponde al canal 06 31
16 corresponde al canal 08 16 24 corresponde al canal 08 31
Para que aparezca en el display el canal/sub tono de audio
Para mostrar el canal PMR446 y el tono subadio CTCSS utilizado en
los canales pre-establecidos, vaya al canal deseado (desde 9 a 24) y
mantenga presionadas las teclas ▲▼ durante 5 segundos.
TRANSMISIÓN Y RECEPCIÓN
Para comunicar, todas las radios en su grupo debe establecer el mismo
canal.
Para transmitir, pulse y sostenga pulsada la tecla PTT y hable normalmente
en el micrófono
. El icono “TX” aparecerá constantemente en el display
LCD mientras transmite.
También puede comunicarse usando un accesorio externo ó un micrófono
de mano, pulsando y manteniendo sostenida la tecla PTT en el micrófono
de mano. Para una máxima claridad, hable a una distancia de 2/3 cm.
Para recibir una llamada CALL, suelte la tecla PTT. El icono “RX” aparecerá
en el display mientras la radio este recibiendo o transmitiendo.
SQUELCH
Con la función SQUELCH, puede suprimirse el ruido de fondo. En el
MIDLAND G5 XT esta función esta siempre activa.
BLOQUEO DE TECLADO
Sostenga pulsada la tecla durante 5 segundos y la función de bloqueo
se activará. “Lc on” aparecerá en el display.
Para desactivar esta función, sostenga pulsada otra vez la tecla
durante 5 segundos aprox. En el display aparecerá “Lc of”.
TONOS CTCSS
Los tonos CTCSS son códigos que pueden añadirse a los canales para la
creación de nuevos canales privados. Para cada canal puede seleccionar
hasta 38 CTCSS.
La adicción de estos códigos se podrá realizar en los principales canales
dos posibilidades: “b” o “p”; seleccione “b” y luego pulse la tecla PTT
para conrmar o espere 5 segundos. La radio mostrará
en el display,
signicando que la función esta activa. Al mismo tiempo, en el display
podrá ver “b1”, que es el canal “baby” en uso.
Ahora coja la otra radio, la usada por los padres (“parent”), y siga el
mismo prodecimiento pero con la opción “p”. También en este caso, el
icono
aparecerá en la pantalla junto con “p1”, que es el canal “parent”
en uso.
Si el canal que esta utilizando es ruidoso, puede elegir otro canal baby
sitter. Hay 9 canales baby sitter disponibles: desde el “p1” al “p9” para
los padres y del “b1” al “b9” para los bebes. Pulse la tecla MODE para
cambiar el canal a través de las teclas de desplazamiento ▲▼ en ambas
radios.
Recuerde que las dos radios deben operar en el mismo canal.
Ejemplo: Si la radio que esta cerca del bebe esta en el canal “b4”, la otra
debe estar en el canal “p4”.
El modo baby sitter permite algunas funciones especícas para
monitorizar al bebe.
• La transmisión automática de la radio del bebe (VOX): la radio del
bebe automáticamente transmitirá cuando recoja un ruido. Ej. Cuando
el bebe empiece a llorar.
• Fuera de cobertura automático: si la radio de los padres se mueve
demasiado lejos de la radio del bebe, despues de 2 minutos la radio
de los padres emitirá un beep de alerta avisando que las dos radios
han perdido cobertura. Deberá reducir la distancia entre las dos rados
para detener el sonido de alerta.
• Fuera de cobertura manual: también puede comprobar manualmente
si las radios tienen cobertura de manera manual. Pulse brevemente
la tecla
/ en la radio de los “padres”. Si las dos radios estan
dentro de cobertura, oirá un tono “CA” previamente establecido, de lo
contrario si no escucha ningún tono, signica que la radio esta fuera
de cobertura.
• Hable con el bebe: en cualquier momento podrá hablar con el bebe
pulsando la tecla PTT. Pero si el bebe esta llorando (signica que la
radio esta transmitiendo) debería esperar que el bebe pare de llorar.
Gracias a la función Talk back, si escucha al bebe llorar durante más
de 20 segundos, el VOX Talback parará la transmisión durante 10
segundos, permitiendole hablar y calmarlo.
Para desactivar la función baby sitter, pulse la tecla MODE varias veces,
hasta que aparezca en el display “bp b” o “bp p”. Conrme la selección
pulsando la tecla PTT o esperando 5 segundos.
Cuando tiene la función baby sitter desactivada se restablecen todas las
funciones estándard.
Canal Frecuencia CTCSS Ch Nivel Vox
Fuera de
Cobertura
Canal
Correspon-
diente
b1 446.00625 156.7 (25) On Lv 4 Of 01 25
b2 446.01875 156.7 (25) On Lv 4 Of 02 25
b3 446.03125 156.7 (25) On Lv 4 Of 03 25
b4 446.04375 156.7 (25) On Lv 4 Of 04 25
b5 446.05625 156.7 (25) On Lv 4 Of 05 25
b6 446.06875 156.7 (25) On Lv 4 Of 06 25
b7 446.08125 156.7 (25) On Lv 4 Of 07 25
b8 446.09375 156.7 (25) On Lv 4 Of 08 25
b9 446.09375 Of On Lv 4 Of 08
p1 446.00625 156.7 (25) Of On AU 01 25
p2 446.01875 156.7 (25) Of On AU 02 25
p3 446.03125 156.7 (25) Of On AU 03 25
p4 446.04375 156.7 (25) Of On AU 04 25
p5 446.05625 156.7 (25) Of On AU 05 25
p6 446.06875 156.7 (25) Of On AU 06 25
p7 446.08125 156.7 (25) Of On AU 07 25
p8 446.09375 156.7 (25) Of On AU 08 25
p9 446.09375 Of Of On AU 08
Para mostrar momentaneamente el canal PMR446 utilizado y el sub-
tono de audio, ir al canal deseado y mantenga pulsadas las teclas ▲ ▼
durante 5 segundos.
EL COMPARTIMENTO DE LA BATERÍA Y CLIP DE
CINTURÓN
Con el clip de cinturón puede fácilmente
jar el transceptor a su cinturón.
El clip sin embargo, debe quitarse cuando
ponga o cambie las baterías. Para quitar
el clip de cinturón, subir la leva central y
hacer deslizar el clip hasta abajo.
Para jar el clip otra vez al dispositivo en
la ranura de las guías en la parte posterior
del transceptor hasta que encaje en su
lugar.
Instalación de las baterías
1) Quitar el clip de cinturón
2) Poner las baterías alcalinas AAA o
las baterías recargables dentro del
compartimento.
3) Vuelva a colocar la cubierta de la
batería y je el clip de cinturón.
CARGANDO LAS BATERÍAS Y AHORRO DE ENERGIA
Si el equipo no recibe ninguna señal durante 7 segundos o más, entra
en funcionamiento un circuito automático de ahorro de baterías el cual
puede incrementar la autonomía de las baterías un 50%.
Para recargar las baterías necesita conectar la toma del cargador de
pared a la toma de corriente e insertar el jack del cargador de pared en
la toma del G5 XT.
Se tarda 8/10 horas para recargarlas completamente.
Para alargar al máximo la capacidad de las baterías,
recomendamos recargar las baterías mientras el G5 XT este
apagado y cuando aparezca el icono de bajo nivel de baterías.
Cuando las baterías estan descargadas, aparece en el display el icono
“bt lo”
.
ADVERTENCIAS:
! No sobrecargue las baterías! Cuando estas están completamente
cargadas el proceso de carga no se detiene automáticamente.
No olvide, por lo tanto, sacar el transceptor del cargador tan
pronto como se hayan cargado las pilas.
! No intente recargar pilas alcalinas o cualquier pila no recargable.
Asegúrese de recargar la radio, solo con baterías NI-MH . Es muy
peligroso intentar recargar la radio con otro tipo de baterías (por
ejemplo alcalinas o baterías de magneso)¡Las pilas no aptas
pueden perder líquido, explotar o también quemar y causar
graves daños!
! El uso de un cargador no original puede causar daños al equipo
o causar explosiones y lesiones personales.
! No tire nunca las pilas al fuego, ni las acerque a fuentes de calor:
pueden causar explosiones y lesiones personales. Deseche las
pilas siguiendo la normativa medioambiental vigente.
! No mezcle pilas viejas y nuevas y/o de tipo diverso y/o
usadas de forma diferente. Cada juego de pilas usado
debe estar compuesto siempre de los mismos elementos.
EFECTO MEMORIA DE LAS PILAS RECARGABLES
Las pilas recargables NiMH (Niquel Metal Hidruro) pueden ser afectadas
por lo que se conoce como el “efecto memoria”. Este fenómeno se
asocia a una reducción drástica de la autonomía de la batería y se activa
si las baterías se recargan regularmente antes de ser descargadas
completamente y/o no estan recargadas completamente.
Para evitar el efecto memoria:
• Cuando sea posible, recargue las baterías solo cuando esten
completamente descargadas (hasta que el dispositivo se apage solo
durante el uso normal).
• No desconecte el cargador antes del tiempo indicado para una carga
de batería total.
• Descargue y cargue sus baterías completamente al menos dos veces
al mes.
En cualquier caso, la mejor solución para evitar el “efecto memoria” es
ir turnando dos juegos de baterías: una en uso, y la otra como un juego
a parte.
Puede eliminarse fácilmente el efecto memoria realizando un ciclo
completo de carga/descarga de la batería 3 ó 4 veces.
El efecto memoria no debería confundirse con la duración de la vida normal
de la batería que es un promedio de 300-400 ciclos de carga/descarga.
Es completamente normal que la operación de las baterías disminuya
PMR (desde 01 a 08).
Los canales pre-seleccionados desde 9 a 24 no pueden modicarse.
Para seleccionar un código privado para el canal actual pulse dos
veces la tecla MODE, despues con las teclas de desplazamiento ▲▼
seleccione el código deseado.
Para conrmar la selección, pulse la tecla PTT o espere durante 5 segundos
El código privado aparecerá en el display.
Para desactivar la función CTCSS, seleccione el código privado y pulse
la tecla MODE, hasta que visualice parpadeando el código privado
CTCSS en el display. Seleccione entonces “off” usando las teclas de
desplazamiento ▲▼.
Para conrmar, pulse PTT.
Nota: Para comunicar con otras radios, deben estar en el mismo canal y
con el mismo código privado.
TABLA TONOS CTCSS
Numero
visualizado
Tono
Frecuencia Hz
Numero
visualizado
Tono
Frecuencia Hz
Numero
visualizado
Tono
Frecuencia Hz
01 67.0 14 107.2 27 167.9
02 71.9 15 110.9 28 173.8
03 74.4 16 114.8 29 179.9
04 77.0 17 118.8 30 186.2
05 79.7 18 123.0 31 192.8
06 82.5 19 127.3 32 203.5
07 85.4 20 131.8 33 210.7
08 88.5 21 136.5 34 218.1
09 91.5 22 141.3 35 225.7
10 94.8 23 146.2 36 233.6
11 97.4 24 151.4 37 241.8
12 100.0 25 156.7 38 250.3
13 103.5 26 162.2
VOX
Su G5 XT tiene 4 niveles de VOX (de, 1, 2, 3, y 4). Esta función permite
al usuario activar la comunicación sin pulsar la tecla PTT. Sólo tendrá que
hablar y la comunicación se activará.
Podrá seleccionar 3 niveles de VOX, con o sin accesorios.
El cuarto nivel activará el VOX con la función Talkback: cuando uno
de los dos mecanismos transmite durante más de 20 segundos, el VOX
Talkback parará la transmisión durante 10 segundos; así el otro usuario
tiene la oportunidad de hablar por si mismo.
Para seleccionar el nivel de VOX, pulse la tecla MODE, hasta que en el
display aparezca “Vo of” y “VOX” parpadeando en la parte superior del
display.
Después, con las teclas de desplazamiento ▲▼, selecione “1”,”2”,”3”
o “4”.
Para conrmar, pulse la tecla PTT o espere durante 5 segundos.
Para desactivar la función VOX, siga las intrucciones anteriores, pero
seleccione “oF” y entonces pulse la tecla PTT para conrmar.
TONO BEEP
Esta función permite producir un tono beep cada vez que pulse una
tecla.
Si quiere desactivar esta función, pulse la tecla MODE hasta que en
el display aparezca “bp on”, entonces seleccione con las teclas de
desplazamiento ▲▼ “bp of”.
Para conrmar, pulse la tecla PTT o espere durante 5 segundos
De esta manera, todos los “beeps” y “tonos” estan desactivados.
Para reactivar esta función, repita el procedimiento selecionando el “bp
on” usando las teclas de desplazamiento ▲▼ y conrme pulsando la
tecla PTT o esperando 5 segundos.
ROGERBEEP(tonondetransmisión)
Al soltar la tecla PTT, emitirá una tonalidad que indicará a su interlocutor
que ha nalizado su transmisión y que puede comenzar a hablar.
Para activar la función ROGER BEEP, pulse la tecla MODE hasta que
en el display aparezca “rb of”; entonces desplacese con las teclas ▲▼,
seleccione “rb on”.
Para conrmar, pulse la tecla PTT o espere durante 5 segundos.
Para desactivar esta función, repita el procedimiento seleccionando “rb
of”.
SELECCIÓN LLAMADA ALERTA
G5 XT permite emitir una señal de llamada de alerta CALL a todos los
usuarios del mismo canal.
Para activar la función CALL, pulse dos veces la tecla PTT. En el display
aparecerá el icono “TX” y el tono de conrmación se puede escuchar en
su propio altavoz.
G5 XT tiene 3 tipos de alerta seleccionables CALL (de, 1, 2 y 3).
Para seleccionar, pulse la tecla MODE hasta que aparezca en el display
el icono “CA” con el número de alerta CALL ALERT actual.
Utilice las teclas de desplazamiento ▲▼ para hacer la selección de CALL
alert; la radio emetirá el tono correspondiente para cada selección.
Esta función esta solo disponible si la radio esta en “BP on”.
Para conrmar, pulse la tecla PTT o espere 5 segundos.
Para desactivar esta función repita este procedimiento seleccionando
“CA of”.
DUAL WATCH
La función DUAL WATCH permite a los usuarios monitorizar, solo durante
la recepción, 2 canales seleccionados para alguna actividad.
Para activar la función DUAL WATCH, pulse la tecla MODE hasta que en
el display aparezca “of-TX/RX”.
Seleccione el segundo canal con las teclas de desplazamiento ▲▼.
Si quiere seleccionar uno de los 38 tonos CTCSS para el segundo
canal pulse otra vez la tecla MODE y seleccione con las teclas de
desplazamiento ▲▼ el tono deseado.
Para conrmar pulse la tecla PTT o espere durante 5 segundos.
Para desconectar la función DUAL WATCH, tendrá solo que pulsar la
tecla MODE.
Cuando la radio recibe una señal en uno de los dos canales seleccionados,
la función “DUAL WATCH” se detendrá temporalmente, permitiendo la
transmisión y la recepción de la señal activa en el canal utilizado.
G5 XT permanecerá en el canal activo, siempre y cuando la señal este
presente y se reanudará la exploración 5 segundos después de la señal
ya no está presente.
FUERA DE COBERTURA
El G5 XT esta equipado con la función “fuera de cobertura” (out of
range”).
Con el MIDLAND G5 XT podrá elegir entre la función automática de fuera
de cobertura” y la manual.
Para activar/desactivar la función fuera de cobertura:
“Fuera de cobertura” automático
Pulse MODE hasta que en el display aparezca “OU of”, seleccione “OU
AU” (automático) con las teclas de desplazamiento ▲▼.
Conrme con la tecla PTT o espere durante 5 segundos. En el display
aparecerá
.
Mediante el establecimiento de este modo un par de G5 XT estará
transmitiendo cada 60 segundos un código de control de datos. Tan
pronto como el contacto entre ambas unidades se este perdiendo
y una estación no recibe este código de control de datos dos veces
consecutivas, el icono “ou no” empezará a parpadear en la pantalla y se
oirá un beep de tono
“Fuera de cobertura” manual:
Pulse MODE hasta que en el display aparezca “OU of”, seleccione “OU
PB” (manual) con las teclas de desplazamiento ▲▼.
Conrme pulsando la tecla PTT o espere durante 5 segundos. En el
display aparecerá el icono
.
Para cambiar esta función manualmente, pulse la tecla (
/ ).
Si hay contacto entre las dos unidades, escuchará el tono “CA”
previamente elegido, de otra manera si no escucha ningún tono, signica
que la radio esta fuera de cobertura.
Para desactivar esta función, pulse MODE hasta que “OU AU” ó “OU PB”
aparezca en el display; seleccione“OU of” (desactivado) con las teclas
de desplazamiento ▲▼.
Conrme su selección pulsando la tecla PTT ó espere durante 5
segundos.
CANALES BABY SITTER
Midland G5 XT puede operar de dos maneras : como radio estandard
con todas las funciones tradicionales, o como vigila bebes.
Si la radio esta en modo baby sitter, todas las funciones tradicionales
estan desactivadas y el transceptor opera solo como monitor.
Para poner la radio del bebe, póngala cerca de la cuna, pulse la tecla
MODE varias veces, hasta que en el display aparezca “bp of” (baby
sitter off). Usando las teclas de desplazamiento ▲▼, podrá elegir entre
cuando estan llegando al nal de su duración normal de vida, llegado a
este punto necesitará sustituir las baterías.
INDICADOR NIVEL DE BATERÍA
El G5 XT tiene un CONTADOR DEL NIVEL DE BATERÍA que muestra
el nivel de batería.
A mayor número de barras visibles, más fuerte será el nivel de la batería.
Cuando el nivel de batería es bajo, el icono parpareará en el display
indicando que sus baterías deben ser reemplazadas o recargadas si
utiliza unas baterías recargables.
CUIDADOS Y MANTENIMIENTO
! Utilice un paño suave para limpiar la radio. No utilice detergentes,
alcohol o productos abrasivos.
! No sumerja la radio en el agua
! Apague la radio y quite las baterías si no va a utilizarla durante un
largo periodo de tiempo.
CUIDADOS
! NO ABRA LA RADIO BAJO NINGÚN MOTIVO!
Han sido ajustados en fábrica para las máximas prestaciones. La
mecánica y electrónica de precisión del equipo, requieren experiencia e
instrumentación adecuadas. La aperture de la radio o de los accesorios
por parte de personal no autorizado, supondrá la anulación inmediata de
la garantia. Las intervenciones de asistencia deberán ser efectuadas por
personal autorizado.
TABLA DE PROBLEMAS Y SOLUCIONES
Problema Posible causa Solución
La radio no se enciende Las baterías estan descargadas o no se han colocadas
correctamente.
Verique que las baterías están cargadas y colocadas
correctamente.
La radio se apaga al poco de
encenderla
Las baterías estan descargadas. Si usa baterías alcalinas (no recargables), cambielas y
si usa baterías recargables, cárguelas.
Las baterías no se recargan El cargador no esta correctamente conectado o las
baterías estan mal colocadas..
Verique las conexiones de las baterías y/o si están
bien colocadas.
La radio se enciende pero no
recibe nada
La radio esta en una zona de sombra. Muévase a otro espacio más abierto.
El volumen es demasiado bajo Regule el volumen.
Incorrecto CTCSS Verique que usa el mismo subtono CTCSS que su
interlocutor.
No es posible comunicar con
otros
Ha seleccionado un canal incorrecto de radio Seleccione el mismo canal que su interlocutor.
La radio esta en una zona de sombra o su
intercomunicador esta muy lejos
Muévase a un espacio más favorable.
Incorrecto CTCSS Verique que usa el mismo subtono CTCSS que su
interlocutor.
Recepción defectuosa Su interlocutor está muy lejos y/o la radio está fuera de
cobertura debido a obstáculos en su dirección.
Muévase más cerca de su interlocutor hacia un espacio
más favorable.
La radio esta situada cerca de dispositivos que pueden
causar interferencias, como un televisor, un ordenador,
etc.
Mueva la radio lejos de tales dispositivos.
El VOX hace a la radio
transmitir accidentalmente
Excesiva sensibilidad o ambiente muy ruidoso.
Baje la sensibilidad del VOX
Hay que hablar muy alto con
el VOX activado La sensibilidad es muy baja.
Si el ruido ambiental no es muy alto, ajuste el nivel de
sensibilidad más alto o use un micrófono adicional
Mal funcionamiento de la
lógica de la radio (símbolos
extraños en el display,
funciones bloqueadas, etc)
Ajustes defectuosos causados por alguna anomalía en
la alimentación .
Recargue o cambie las baterías.
ESPECIFICACIONES TÉCNICAS
Canales ......................................................................................1~8 PMR
Generación de frecuencia ............................................... PLL synthesizer
Rango de frecuencias........................446.00625 - 446.09375MHz (PMR)
Aerial .........................................................................................12.5 KHz
Alimentación .3x AAA tipo 4,5 V (Alkaline) o 3,6 V (recargables) +/- 10%
VDC
Temperatura .......................................................................de -20° a +55°
Dimensiones (sin antena) ...............................................85 x 50 x 25 mm
Peso (sin baterias)...................................................................... 0,075 kg
Ciclo de trabajo (% on 1 h .........................TX 5%, RX 5%, stand-by 90%
Transmisor
Potencia de salida(ERP .............................................................. 500 mW
Modulación .......................................................................................... FM
Rechazo de espurias ...................................................... Según ETSI law
Receptor
Sensibilidad 12dB Sinad................................................................ 0,35μV
Rechazo canal adyacente ................................................................ 70dB
Potencia de salida de audio (10% THD .....................300mW a 10% THD
Frecuencias intermedias ................................. 1°:21,4 MHz ; 2°:455 KHz
Toma para micrófono exterior y carga ........................ 2,5 mm jack stereo
Toma para altavoz externo ................................................. 3,5 mm mono
Las especicaciones pueden estar sujetas a cambios sin previo aviso.
ATTENZIONE
L’adattatore di alimentazione è il dispositivo di disconnessione dell’apparato; la base di carica della corrente deve restare
vicino all’apparato e facilmente accessibile.
WARNING
Direct plug-in ac/dc power supply must be used for disconnecting the transceiver from the mains; the desktop charger must
be positioned close to the unit and easily accessible.
WARNUNG
Um im Bedarfsfall die Funkanlage sicher vom Stromnetz trennen zu können, ziehen Sie bitte - falls notwendig- den Stecker
des Ladeadapters hinaus. Das Ladegerät muss sich in der Nähe der Funkanlage benden und jederzeit leicht zugänglich
sein.
ATENCIÓN
El adaptador de alimentación es el dispositivo de desconexión del equipo; la base de carga debe quedar cerca del equipo
y ser fácilmente accesible.