30
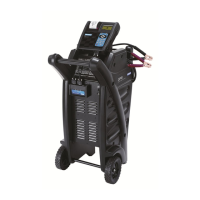
Chapter 7: Software Update (MUW) GR8
Power On Procedure
When the STATUS indicator is o, the printer is o. A brief
press of the MODE button turns on the printer and turns on
the STATUS light (green). A brief press of the MODE button
turns the printer o. When charging the printer batteries,
make sure that the printer is o.
Installing the Batteries
The printer uses four AA, NiMH (Nickel Metal Hydride)
rechargeable batteries rated at 1.2 volt, 1600 mAH. (One set
of batteries is included with the kit.)
NOTE: Be sure to purchase rechargeable batteries
as specied. Using the printer charger with regular
alkaline batteries will damage the batteries and the
printer and will void your warranty.
3. Turn the printer face down.
4. Lift the latch on the battery compartment door and re-
move the door.
5. Insert new batteries, making sure the positive and nega-
tive terminals are positioned correctly.
6. Insert the door’s tabs into the slots on the printer and
close the door, making sure the latch locks.
Charging The Batteries
Before using the printer for the rst time, fully charge the
batteries overnight for 16 hours.
1. Make sure the printer is OFF (the green status light is o).
2. Connect the charger to the printer, then plug the charger
into a standard AC power outlet.
3. After a few seconds, the printer’s green LED will ash about
once per second while the batteries are charging. When
the batteries are fully charged, the LED will stop ashing.
Power On Self-Test
Once the printer batteries are charged, a printer self-test can
be performed. The self test will check most of the printer
functions (printer mechanism, control circuitry, firmware
version).
With the printer LED o, hold down the MODE button for
approximately two seconds, then release. The printer will turn
on and print a self-test report. The printer is now ready for use.
Printing Data And Screen Images
In addition to the option of printing data whenever the
PRINT command appears, you can print screen images by
simultaneously pressing the 7 and 9 buttons on the tester.
IMPORTANT: When starting a new test, the last bat-
tery test in memory is overwritten. Record or print
the results to retain them.
Printing Data
1. Aim the Control Module’s IR data transmitter directly at
the printer’s IR receiver (below the MODE button). If the
Control Module is moved away from the printer or aimed
in the wrong direction, partial data or gibberish may print.
The maximum distance for reliable transmission between
the ports is 17” (45 cm).
2. Press PRINT. Keep the Control Module’s IR data transmitter
aligned with the printer’s IR receiver until printing is com-
plete.
Printing Screen Images
1. Align the IR data transmitter and receivers as described in
step 1 above.
2. Simultaneously press the 7 and 9 keys. Be sure to keep
the Control Module’s IR data transmitter aligned with the
printer’s IR receiver until printing is complete.
Paper Feed and Tear Procedure
When the printer is on, you can manually feed paper by pressing
and holding the MODE button for more than one second.
When removing the printout from the printer, pull the printout
toward the front of the printer and tear from one side to the
other across the serrated edge.
Replacing The Paper Roll
The IR printer uses thermal paper in a roll with the dimensions
2.25 in x 85 ft (57 mm x 25.9 m). Replacement rolls can be
purchased at most oce supply stores.
1. Open the paper cup lid, and when the printer is turned on,
remove the remaining paper using the MODE button. Do
not pull the paper through the printer mechanism.
2. Reel o a few inches from a new roll of paper and check
that the end has a clean, straight edge.
3. Slide the leading edge of the paper into the entry point
of the mechanism just below the roller, with the leading
edge of the paper feeding forward from the bottom of the
roll.
4. The printer will detect the paper and will feed it through
to the correct position for printing.
If the paper becomes creased or out of alignment, cut the end
of the paper roll and feed out the creased paper using the
MODE button. Reload the paper, ensuring that the paper has
a clean straight edge.
Printer Storage
If the printer is frequently used, the charger can be plugged
in at all times. If the printer is used infrequently, make sure to
charge the batteries at least every two to three weeks. If the
batteries are uncharged for long periods of time, they will need
charging before use. Eventually, the batteries may no longer
accept a charge and will need to be replaced.
 Loading...