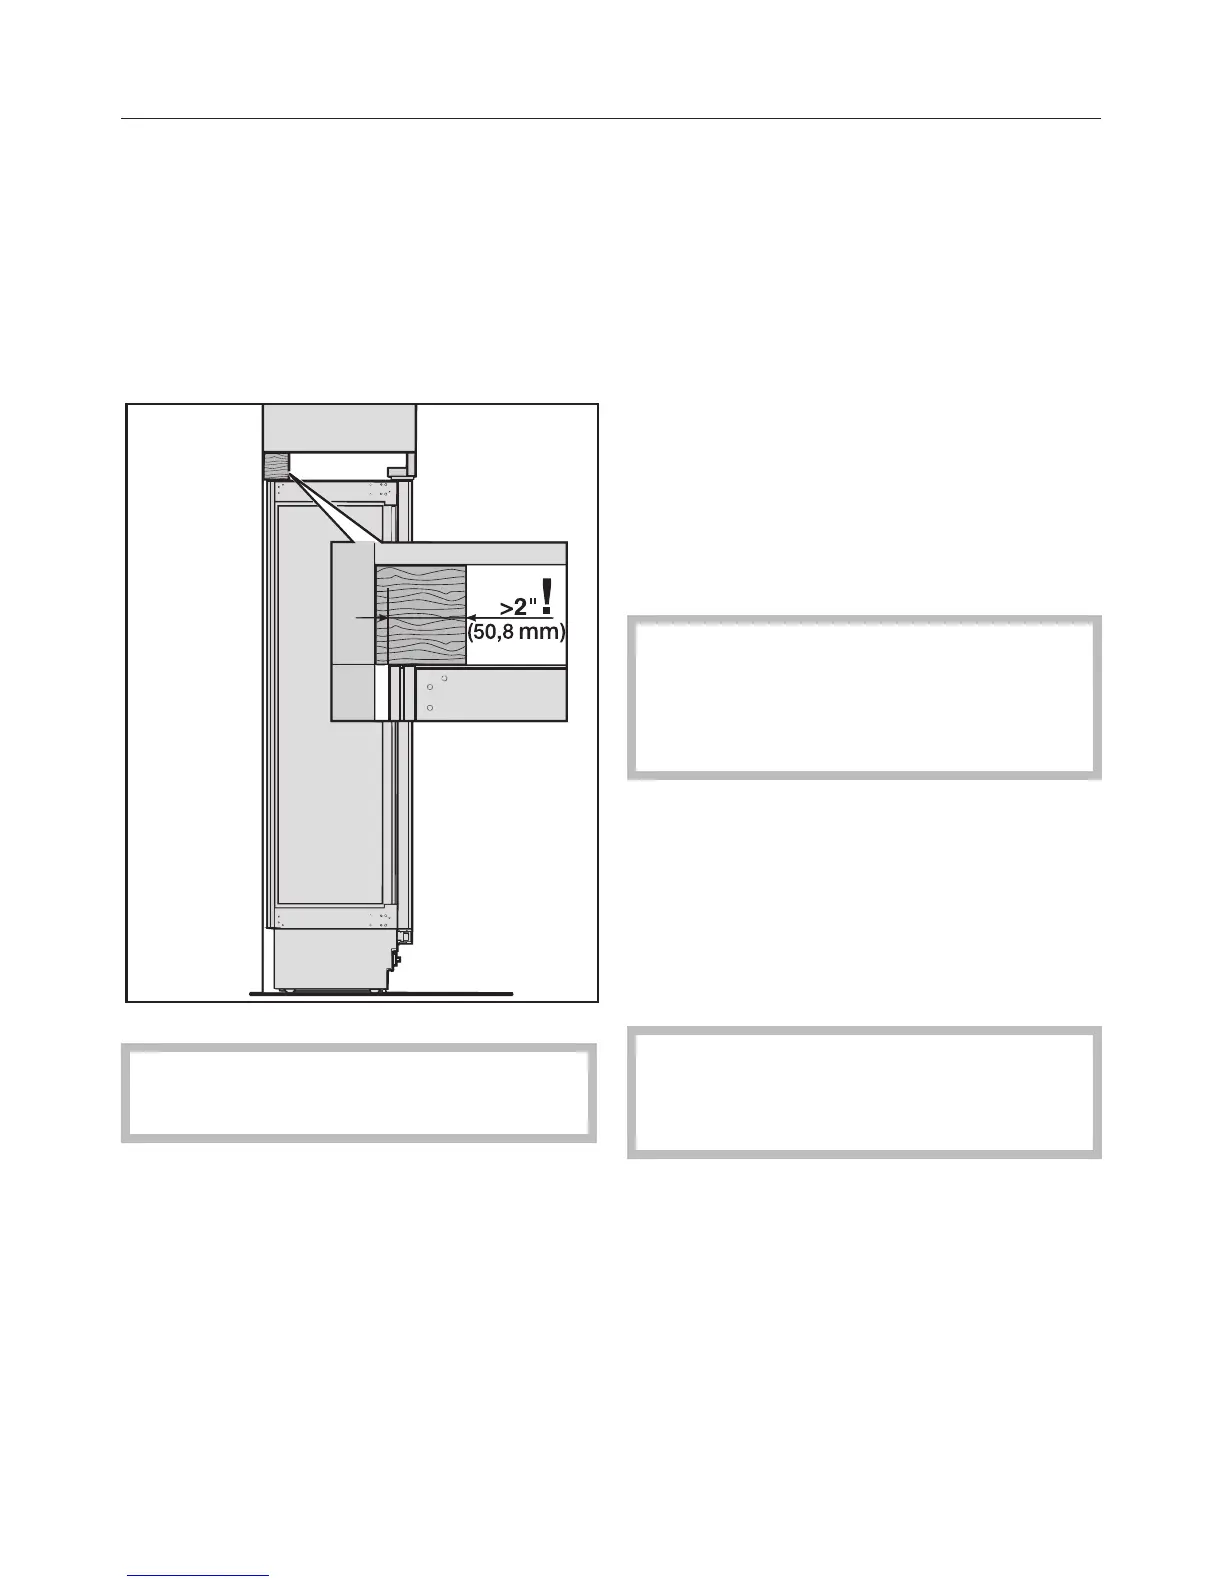
Securing an alternative anti-tip
device
If the anti-tip brackets cannot be
attached securely, an alternative
anti-tip device can be used.
Ensure that there is no "give" between
the appliance and the anti-tip device.
If possible, always screw the
wooden beam to existing studs.
^ Cut a wooden beam
(cross section min. 3" x 4"
[75 mm x 100 mm]) to the required
length.
– The length is equal to the width of
the installation niche.
– If the installation niche is deeper than
the appliance, select a beam with a
larger cross section, or attach two
beams.
– The beam must cover the appliance
by at least 2" (50.8 mm).
^ Mark the installation height (lower
edge of the beam) on the rear wall of
the niche.
^ Select screws according to the
thickness of the wooden beam.
Example: 3 ½" (89 mm) screw for 2x4
beam.
Determine the number of screws
based on the cavity width, to ensure
that the beam will be attached
securely.
^ Locate wall studs near the rear wall
of the cavity and mark drill holes in
the beam.
^ Pre-drill the wooden beam.
^ Attach the wooden beam to the rear
wall of the niche.
Now prepare the water connection
from the appliance to the main
supply line (see "Plumbing").
Installing the appliance
69
 Loading...