EN - English -Quick Guide:
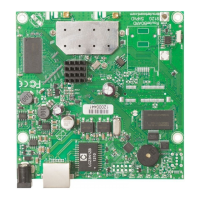
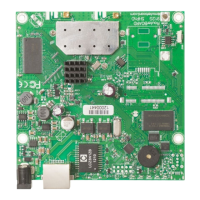
This "RB912UAG-2HPnD" series Quick Guide covers models:RB912UAG-2HPnD.
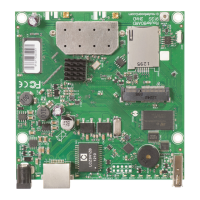
This is a wireless network device. You can find the product model name on the case label (ID).
Please visit the user manual page on for the full up-to-date user manual. Or scan the QR code with your mobile phone.https://mt.lv/um
The most important technical specifications for this product can be found on the last page of this Quick Guide.
Technical specifications, brochures, and more info about products athttps://mikrotik.com/products
Configuration manual for software in your language with additional information can be found athttps://mt.lv/help
MikroTik devices are for professional use. If you do not have qualifications please seek a consultanthttps://mikrotik.com/consultants
Depending on the antenna used, you must set its gain. This is to ensure that EIRP meets the limit set by the local authorities. This is performed in the Quickset
menu.
First steps:
This product comes without enclosure and is designed to be installed into the users' end products or enclosures. Compatible MikroTik enclosure for this
product can be found athttps://mikrotik.com/products/group/enclosures
The device comes in ESD protective packaging. When handling electrical equipment please observe the following safety precautions:
Use a wrist grounding strap when unpacking and working with electrical components to avoid electrical discharge (ESD) damage;
After unpacking please place the router on the anti-static mat;
When mounting the unit make sure there are no objects that can damage or touch the PCB plate;
The device can be mounted in your desired location using the factory-provided holes in a PCB plate, located on each side of the device;
Before connecting the device to the power source, please attach the antennas to the connectors;
Connect the device to the power source;
Connect your PC to the Ethernet port;
Configuration should be made using the WinBox configuration tool ;https://mt.lv/winbox
Download and open " ,
WinBox"
andchoose the " tab to find the device;
Neighbors"
Click on the MAC address.The usernameis " and there is no password
admin"
(or, for some models, check user and wireless passwords on the sticker);
For a manual update of the device, visit the products page at to find your product. The required packages are accessible under https://mikrotik.com/products
the "Support&Downloads" menu;
Upload downloaded packages to the " menu and reboot the device. By upgrading your RouterOS software to the latest version, you can ensure
WinBox
Files"
optimal performance, stability, and security updates;
In the " menu set up the mode and choose your country, to apply country regulation settings;
QuickSet"
"PTP Bridge AP"
Set the antenna gain, depending on the antenna used;
Set up your router password in the bottom field.
Safety Information:
Before you work on any MikroTik equipment, be aware of the hazards involved with electrical circuitry, and be familiar with standard practices for preventing
accidents. The installer should be familiar with network structures, terms, and concepts.
The product comes without enclosure and is meant to be installed into the enclosure by trained and qualified personnel. The installer is responsible for making
sure, that the Installation of the equipment is compliant with local and national electrical codes. Do not attempt to disassemble, repair, or modify the device.
Please read the mounting instructions carefully before beginning installation. Failure to use the correct hardware and configuration or to follow the correct
procedures could result in a hazardous situation for people and damage to the system.
Keep this device away from water, fire, humidity, or hot environments.
Use a wrist grounding strap when unpacking and working with electrical components to avoid electrical discharge (ESD) damage. After unpacking please
place the router on the anti-static mat. When a mounting unit makes sure there are no objects that can damage or touch the PCB plate.
We cannot guarantee that no accidents or damage will occur due to the improper use of the device. Please use this product with care and operate at your own
risk!
In the case of device failure, please disconnect it from power. The fastest way to do so is by unplugging the power adapter from the power outlet.
This is a Class A product. In a domestic environment, this product might cause radio interference in which case the user might be required to take adequate
measures.
This MikroTik equipment complies with the FCC, IC, and European Union radiation exposure limits set forth for anExposure to Radio Frequency Radiation:
uncontrolled environment. This MikroTik device should be installed and operated no closer than 142 centimeters from your body, occupational user, or the general
public.
Manufacturer: Mikrotikls SIA, Unijas 2, Riga, Latvia, LV1039.
BG - Български. Бързо ръководство:
This device needs to be upgraded to RouterOS v7.6 or the latest version to ensure compliance with local authority regulations!
It is the end users' responsibility to follow local country regulations, including operation within legal frequency channels, output power, cabling
requirements, and Dynamic Frequency Selection (DFS) requirements. All MikroTik radio devices must be professionally installed.
Това устройство трябва да бъде надстроено до RouterOS v7.6 или най-новата версия, за да се гарантира спазването на местните регулаторни
разпоредби.
Крайните потребители са отговорни за спазването на местните разпоредби, включително работата в рамките на законни честотни канали,
извеждане на продукцияизисквания за захранване, окабеляване и изисквания за динамичен избор на честота (DFS). Всички радиоустройства
на MikroTik трябва да бъдатпрофесионално инсталиран.