EasyManua.ls Logo

MikroTik RBMetalG-52SHPacn - User Manual

MikroTik RBMetalG-52SHPacn
8 pages
Print Icon
To Next Page IconTo Next Page
Loading...
1.
2.
3.
4.
5.
6.
7.
8.
9.
10.
11.
12.
13.
14.
15.
1.
2.
3.
4.
Metal 52 ac
The RBMetalG-52SHPacn Metal comes preinstalled in an outdoor case, with a built-in wireless interface, an N-Male antenna connector, and one 10/100
/1000 Ethernet connector which supports MDI-X auto-detection. The device is packaged with a 24 V power adapter, a PoE injector, and two mounting
loops. Several models are available (dual-band, single band, AP and CPE variants).
Safety Warnings
Before you work on any equipment, be aware of the hazards involved with electrical circuitry, and be familiar with standard practices for preventing
accidents.
Ultimate disposal of this product should be handled according to all national laws and regulations.
The Installation of the equipment must comply with local and national electrical codes.
This product is intended to be mounted outdoors on a pole. Please read the mounting instructions carefully before beginning installation. Failure to use the
correct hardware and configuration or to follow the correct procedures could result in a hazardous situation for people and damage to the system.
Use only the power supply and accessories approved by the manufacturer, and which can be found in the original packaging of this product.
Read the installation instructions before connecting the system to the power source.
We cannot guarantee that no accidents or damage will occur due to the improper use of the device. Please use this product with care and operate at your
own risk!
In the case of device failure, please disconnect it from power. The fastest way to do so is by unplugging the power plug from the power outlet.
Exposure to Radio Frequency Radiation:This MikroTik equipment complies with the FCC, IC, and European Union radiation exposure limits set forth for an
uncontrolled environment.This MikroTik device should be installed and operated no closer than 20 centimeters from your body, occupational user, or the
general public.
Connecting
Connect the antenna to the N-Male connector (see " ");Antenna usage
Open the cover of the Ethernet port (see " ");Opening Ethernet cover
Guide your cable through the cover and connect to the Ethernet port. (see " ");Opening Ethernet cover
The device accepts 10-30 V Passive PoE from a PoE injector. The included injector should be connected with the "Data" end into a PC, the "Data
+ Power" port should be connected to the device, by using an Ethernet cable of the desired length (not included);
Use the provided rubber insulator to put on the Ethernet cable, and push it into the case opening, so that the opening is tightly closed;
Download the configuration tool ;https://mt.lv/winbox
Open WinBox Neighbors tab;
Search for the device and connect using MAC address;
Default IP: 192.168.88.1, user name: , no password;
admin
Download the latest RouterOS software from ;https://mikrotik.com/download
Choose MIPSBE packages, and save them to your PC;
Open WinBox and upload downloaded packages, drag and drop into any windows;
Restart the device;
Connect again and in menu set your Country, to apply country regulation settings;
QuickSet
Secure your device and set a strong password;
MikroTik mobile app
Use the MikroTik smartphone app to configure your router in the field, or to apply the most basic initial settings for your MikroTik home access point.
Scan QR code and choose your preferred OS.
Install and open applications.
By default, the IP address and user name will be already entered.
Question and Answer IconNeed help?

Do you have a question about the MikroTik RBMetalG-52SHPacn and is the answer not in the manual?

Overview

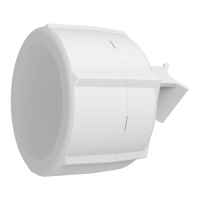
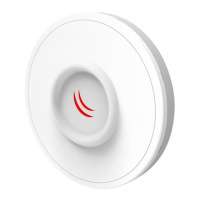
The MikroTik RBMetalG-52SHPacn Metal is a robust outdoor wireless device designed for various networking applications, including AP and CPE variants. It comes preinstalled in a durable outdoor case, featuring a built-in wireless interface, an N-Male antenna connector, and a 10/100/1000 Ethernet connector with MDI-X auto-detection. The device is packaged with a 24 V power adapter, a PoE injector, and two mounting loops, offering flexibility for different installation scenarios. Several models are available, supporting dual-band or single-band operation.

Safety Warnings and Installation Guidelines:

Before any work on the equipment, users must be aware of electrical circuitry hazards and adhere to standard accident prevention practices. Proper disposal of the product must follow all national laws and regulations. The installation must comply with local and national electrical codes. The device is designed for outdoor pole mounting, and users must carefully read and follow the mounting instructions to avoid hazardous situations or system damage. Only manufacturer-approved power supplies and accessories, found in the original packaging, should be used. It is crucial to read installation instructions before connecting to the power source. MikroTik emphasizes that it cannot guarantee against accidents or damage from improper device use, urging users to operate the product with care and at their own risk. In case of device failure, immediate disconnection from power by unplugging the power plug from the outlet is required.

Radio Frequency Radiation Exposure:

This MikroTik equipment adheres to FCC, IC, and European Union radiation exposure limits for uncontrolled environments. It must be installed and operated with a minimum distance of 20 centimeters from the body of occupational users or the general public to ensure compliance.

Connecting the Device:

  1. Antenna Connection: Connect the antenna to the N-Male connector.
  2. Ethernet Port Access: Open the cover of the Ethernet port.
  3. Cable Routing: Guide the Ethernet cable through the cover and connect it to the Ethernet port.
  4. PoE Powering: The device supports 10-30 V Passive PoE from a PoE injector. The included injector's "Data" end connects to a PC, while the "Data + Power" port connects to the device via an Ethernet cable of the desired length (not included).
  5. Sealing: Use the provided rubber insulator on the Ethernet cable and push it into the case opening to ensure a tight seal.
  6. Configuration Tool: Download the WinBox configuration tool from https://mt.lv/winbox.
  7. Device Discovery: Open the WinBox Neighbors tab to search for the device and connect using its MAC address.
  8. Default Access: The default IP address is 192.168.88.1, with the username admin and no password.
  9. Software Update: Download the latest RouterOS software (MIPSBE packages) from https://mikrotik.com/download and save them to your PC.
  10. Upload Packages: Open WinBox, drag and drop the downloaded packages into any window.
  11. Restart: Restart the device.
  12. Initial Setup: Reconnect and use the QuickSet menu to set your country for regulation settings.
  13. Security: Secure your device by setting a strong password.

MikroTik Mobile App:

The MikroTik smartphone app allows for field configuration of the router or basic initial settings for MikroTik home access points. Users can scan a QR code to choose their preferred OS, install and open the application, and by default, the IP address and username will be pre-entered.

Powering:

The device receives power via an Ethernet port (Passive PoE). Under maximum load, its power consumption is 11 W.

Connecting to a PoE Adapter:

  1. Connect the Ethernet cable from the device to the PoE+DATA port of the PoE adapter.
  2. Connect an Ethernet cable from your local network (LAN) to the PoE adapter.
  3. Connect the power cord to the adapter, and then plug the power cord into a power outlet.

Configuration:

RouterOS offers extensive configuration options beyond those detailed in the manual. Users are encouraged to explore https://mt.lv/help for more possibilities. If an IP connection is unavailable, the WinBox tool (https://mt.lv/winbox) can connect to the device's MAC address from the LAN side (note: all access is blocked from the internet port by default).

Mounting:

The device must be mounted vertically with the Ethernet cable pointing downwards. Mounting and configuration should be performed by a qualified person. For pole mounting, the provided mounting loops should be guided around the device through the edge markings and around the pole. Electric tape can be used to increase friction between materials, and a mounting hose clamp is included.

Mounting Steps:

  1. Guide the hose clamp through the opening on the back of the device.
  2. Attach the device to the pole or mast.
  3. Align and secure with a PH2 screwdriver. The device should be positioned with the antenna facing upwards. Avoid connecting a loose Ethernet cable; secure it to a wall or pole within 2m of the device to prevent strain on the port.

Important Mounting Notes:

  • Ensure the cable feed points downwards.
  • The device has an IP54 rating; Cat6 shielded cables are recommended.
  • Maintain a minimum distance of 20 cm between the device and your body during operation. Operation in residential environments may cause radio interference.

Opening Ethernet Cover:

  1. Release clips for both fasteners to open the cover.
  2. Guide the Ethernet cable through the rubber seal in the cover opening.
  3. Crimp an RJ-45 connector onto the cable and connect to the Ethernet port.

Antenna Usage:

Attach the antenna by screwing it to the connector on the device. Always connect and disconnect the antenna when the device is turned off.

Reset Button Functions:

The reset button has three functions:

  • Reset RouterOS Configuration: Hold during boot until the LED light flashes (approx. 5 seconds). Release to reset the configuration.
  • CAP Mode: Continue holding for 5 more seconds until the LED turns solid (total 10 seconds). Release to enable CAP mode, where the device searches for a CAPSMAN server.
  • Netinstall Servers: Continue holding for 5 more seconds until the LED turns off (total 15 seconds). Release to make the device search for Netinstall servers. If the button is pressed before power is applied, the system will load the backup RouterBOOT loader, useful for debugging and recovery.

Specifications:

For detailed product information, specifications, and pictures, visit https://mikrotik.com/product/RBMetalG-52SHPacn.

  • RBMetalG-52SHPacn-US (USA): Factory locked for 2412-2462MHz, 5170-5250MHz, and 5725-5835MHz frequencies. This lock cannot be removed.
  • RBMetalG-52SHPacn (International): Supports 2412-2484MHz and 5150MHz-5875MHz range (specific frequency range may be limited by country regulations).

Accessories:

The package includes:

  • EU/US Switching Power Supply 24 V 0.8A, 19.2 W.
  • 2.4Ghz/5Ghz Dual Band OMNI Antenna 6 dBi for N FEMALE, Grey color, PVC housing, 285 mm length.
  • Gigabit PoE injector.
  • Plastic tie strap fastener 2 pcs.
  • Hose clamp 50/70 2 pcs.
  • N-Male to N-Female Right Angle Adapter.

Operating System Support:

The device runs RouterOS software version 6.46. The specific factory-installed version number is indicated in the RouterOS menu /system resource. Other operating systems have not been tested. Environmental Note: To prevent environmental pollution, dispose of the device as household waste in designated waste disposal sites. Familiarize yourself with proper transportation procedures to these sites.

Federal Communication Commission Interference Statement (FCC ID: TV7MTLG52SHPN):

This equipment has been tested and complies with Class B digital device limits under Part 15 of the FCC Rules. It generates, uses, and can radiate radio frequency energy. If not installed and used according to instructions, it may cause harmful interference to radio communications. There is no guarantee that interference will not occur in a particular installation. If interference occurs, users are encouraged to:

  • Reorient or relocate the receiving antenna.
  • Increase separation between equipment and receiver.
  • Connect equipment to an outlet on a different circuit.
  • Consult a dealer or experienced radio/TV technician. FCC Caution: Any unauthorized changes or modifications could void the user's authority to operate the equipment. The device complies with Part 15 of the FCC Rules, subject to two conditions: (1) it may not cause harmful interference, and (2) it must accept any interference received. The device and its antenna must not be co-located or operated with any other antenna or transmitter.

Antenna Installation (WARNING):

It is the installer's responsibility to ensure that only authorized antennas certified with the product are used in the United States (or where FCC rules apply). Using other antennas is expressly forbidden. The installer must configure output power levels according to country regulations and antenna type. Professional installation is required to ensure compliance with health and safety issues.

Approved 2.4 GHz Antennas:

  • 24 dBi Dish DC 24-HD-PFIP
  • 20 dBi Panel WLP-2450-20
  • 17 dBi Sector SA 24-90-17-WB
  • 15 dBi Omni Directional (pole) WL0-2450-15
  • 13 dBi Omni Directional (hor. Polarization) HP, 0DH 24-13

Approved 5GHz Antennas:

  • 8.5 dBi Omni MTI Wireless MT-482016NA
  • 24 dBi Panel Pacific Wireless PA58-24
  • 32 dBi Dish Pacific Wireless HDDA5W-32-DP Antennas of the same type and lower gain than those listed may be used in compliance with certification.

Innovation, Science and Economic Development Canada (IC: 7442A-MG52SHPAC):

This device complies with Industry Canada licence-exempt RSS standard(s). Operation is subject to two conditions: (1) it may not cause interference, and (2) it must accept any interference, including interference that may cause undesired operation. This Class B digital apparatus complies with Canadian ICES-003. The device for operation in the band 5150-5250 MHz is for indoor use only to reduce potential for harmful interference to co-channel mobile satellite systems.

UKCA Marking:

The device bears the UKCA marking.

Eurasian Conformity Mark (EAC):

The device bears the EAC mark.

Frequency Range (Maximum Output Power):

  • 2400-2483.5 MHz (30 dBm)
  • 5150-5350 MHz (23 dBm)
  • 5650-5850 MHz (30 dBm) Available frequency channels may vary by product model and certification. Manufacturing date is indicated at the end of the serial number (first digit is year, next two are week number).

Norma Oficial Mexicana:

Frequency Range (Maximum Output Power):

  • 2400-2483.5 MHz (30 dBm)
  • 5725-5850 MHz (30 dBm) Available frequency channels may vary by product model and certification. Energy Efficiency: Complies with NOM-029-ENER-2017.

Operation Conditions:

  • May not cause harmful interference.
  • Must accept any interference, including undesired operation. Manufacturer: Mikrotikls SIA, Brivibas gatve 214i, Riga, LV-1039, Latvia. Country of Origin: Latvia; Lithuania; China (Republica Popular); United States Of America; Mexico. Contact local distributor for regional questions. Importer list at https://mikrotik.com/buy/latinamerica/mexico.

The National Commission for the State Regulation of Communications and Informatization by Ukraine:

Manufacturer: Mikrotikls SIA, Brivibas gatve 214і Riga, Latvia, LV1039.

Operating Frequency (Maximum Output Power):

  • 2400-2483.5 MHz (30 dBm)
  • 5150-5250 MHz (23 dBm)
  • 5250-5350 MHz (20 dBm)
  • 5470-5725 MHz (27 dBm) Mikrotikls SIA declares that the router complies with Directive 2014/53/EU and Technical Regulations for Radio Equipment (Cabinet of Ministers of Ukraine, May 24, 2017, No. 355). Operation in Ukraine requires a permit issued by NKRZI (November 1, 2012, No. 559, registered January 3, 2013, No. 57/22589).

CE Declaration of Conformity:

Manufacturer: Mikrotikls SIA, Brivibas gatve 214i Riga, Latvia, LV1039. Mikrotīkls SIA declares that the radio equipment type RBMetalG-52SHPacn complies with Directive 2014/53/EU. The full text of the EU declaration of conformity is available at https://mikrotik.com/products.

Frequency Bands Terms of Use:

Frequency range (for applicable models) Channels used Maximum Output Power (EIRP) Restriction
2412-2472 MHz 1 - 13 20 dBm Without any restriction to use in all EU Member States
5150-5250 MHz 26 - 48 23 dBm Restricted to indoor use only*
5250-5350 MHz 52 - 64 20 dBm Restricted to indoor use only*
5470-5725 MHz 100 - 140 27 dBm Without any restriction to use in all EU Member States

*It is the customer's responsibility to follow local country regulations, including operation within legal frequency channels, output power, cabling requirements, and Dynamic Frequency Selection (DFS) requirements. All MikroTik radio devices must be professionally installed! This MikroTik device meets Maximum WLAN transmit power limits per ETSI regulations. For more detailed information, refer to the Declaration of Conformity. The WLAN function for this device is restricted to indoor use only when operating in the 5150 to 5350 MHz frequency range. Note: The information provided is subject to change. Visit www.mikrotik.com for the most up-to-date version of this document.

MikroTik RBMetalG-52SHPacn Specifications

General IconGeneral
BrandMikroTik
ModelRBMetalG-52SHPacn
CategoryNetwork Hardware
LanguageEnglish

Related product manuals