5
EN
Parts
See gure 2 on separate illustration sheet
Mechanical thermostat
•
• 2 foot brackets
• 2 rails for the feet
Electronic thermostat
• 8 screws (pre-mounted)
• 2 foot brackets
• 2 rails for the feet
WARNING! The heater must not be used if the glass panels are
damaged (applies to SG2000GLASS only).
ATTENTION! This heater is only meant to be used as a supplementary heating source,
and must not be used without supervision
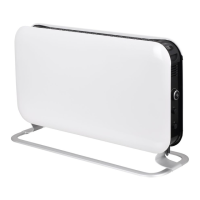
Assembly
See gure 3 on separate illustration sheet
Mechanical Thermostat
1. Insert both legs into the brackets so you get a stable foot.
2. Remove the pre-mounted screws from the bottom of the heater and place the heat-
er gently on its head to mount the feet.
3. Two screws must be fastened on each foot bracket.
NEVER USE THE HEATER BEFORE THE LEGS HAVE BEEN TIGHTLY SCREWED.
Electronic Thermostat
1. Remove the pre-mounted screws on both legs before you insert them into the
brackets, so that you get a stable foot.
2. Attach the legs to the brackets by tightening 2 screws into each bracket.
3. Remove the pre-mounted screws from the bottom of the heater and place the heat-
er gently on its head to mount the feet.
Two screws must be fastened on each foot bracket.
5. NEVER USE THE HEATER BEFORE THE LEGS HAVE BEEN TIGHTLY SCREWED.
Instructions mechanical thermostat
Control Panel
See gure 4 on separate illustration sheet
1. Thermostat: Adjust the desired heat settingt
2. Output selector:
SG2000MEC
0. OFF
I. 750W
II. 1250W
III. 2000W
CO2200MECMAX
0. OFF
I. 1000W
II. 1200W
III. 2200W