5
Step-11: Glue LE-B top and bottom in place.
Keep trailing edge straight while gluing with
thin CA. Tip! Scotch Tape and Packing tape are
great for keeping the parts from gluing to the
work surface.
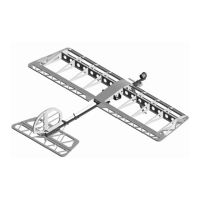
Step-12: Glue 1/8” X ¼” stringers and 3/16”
square leading edge as shown.
Step-13: Glue 1/16” sheeting as shown. Take
note of servo wire hole location in bottom
sheeting.
Step-14: Glue wing hinge sockets in place. Be
sure to align the center markings with the edge
of TE-A. Sand hinge sockets flush with TE-B
on both top and bottom of wing.
Step-15: Glue with medium CA, WT3, WT6,
WT9, WT10, WT11 (wing tip) and hinge block
as shown. Slot for hinge should face the trailing
edge of wing tip.