OM-1593 Page 12
out bottom of cut.
161 698-A
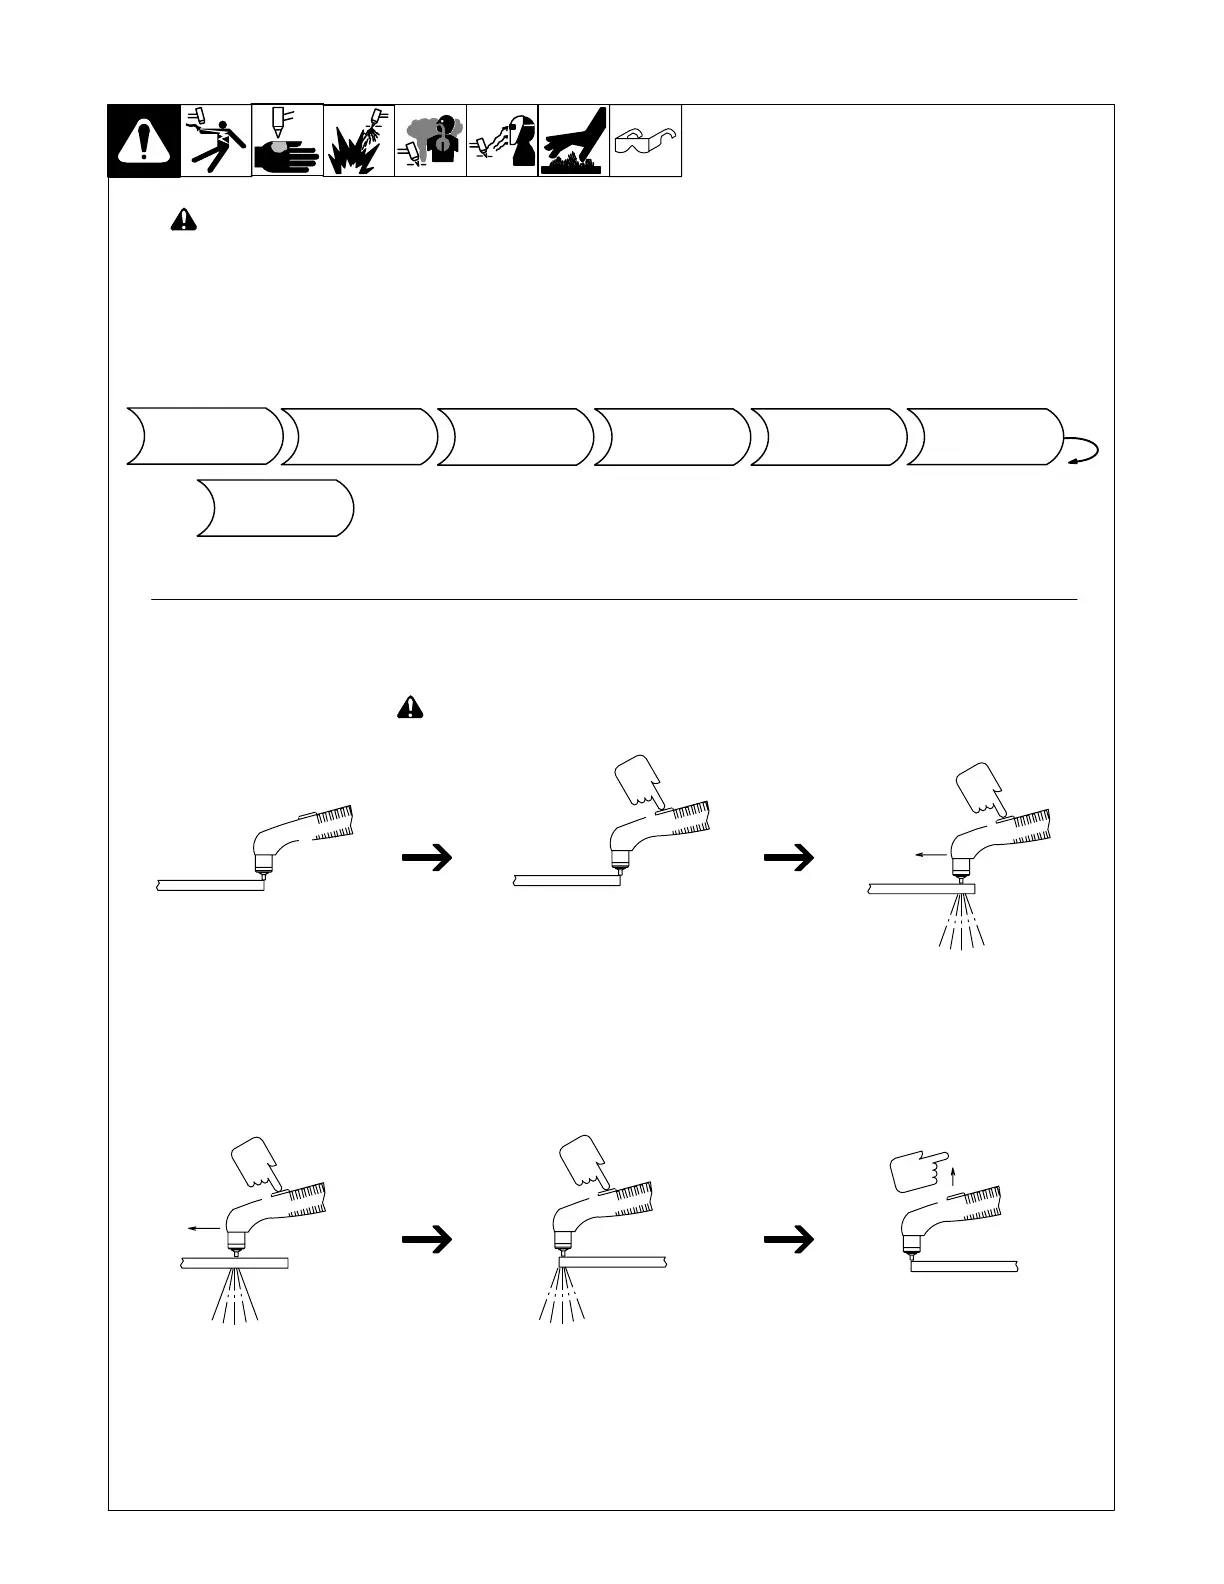
13. Sequence Of Operation For 25, 40, 50, 55, 80, And 100 Ampere Torches
Put On Personal
Safety
Equipment
After cutting arc starts, slowly
start moving torch across metal.
Adjust torch speed so
sparks go thru metal and
Pause briefly at end of
cut before releasing trigger.
Install &
Connect
Equipment
EXAMPLE Of Cutting Operation
Press trigger. Pilot arc starts.
Postflow continues for approx. 20 to
30 seconds after releasing trigger;
cutting arc can be instantly re-
started during postflow by pressing
trigger.
Check Torch Tip,
Electrode, And
Retaining Cup
Check Gas/Air
Pressure
Set
Controls
Begin
Cutting
Turn On
Power Source
! The pilot arc starts immediately when trigger is pressed.
For 25 ampere torch, place tip on
edge of metal.
For 40, 50, 80 and 100 ampere
hand-held torches, place drag
shield on edge of metal, or allow
correct standoff distance −
approximately
1/8 in (3.2 mm).
! Inspect shield cup, tip, and electrode for wear be-
fore cutting or whenever cutting speed has been
significantly reduced (see Section 17). Do not op-
erate torch without a tip or electrode in place.
NOTICE − Do not clean torch by hitting it against a hard
surface. Hitting hard surfaces can damage torch parts
and stop proper operation.
NOTICE − Having pilot arc turn On and Off repeatedly,
such as during the cutting of chain fence, will shorten tip,
electrode and torch life. Put a continuous piece of sheet
metal under the fence to prevent pilot arc from cycling On
and Off. Avoid constant starting and restarting of arc.
 Loading...