Do you have a question about the Milnor 42032X7J and is the answer not in the manual?
Procedures for floor preparation, anchor bolts, and grouting for stability.
Steps to prepare the machine for operation, including removing restraints.
Procedures for mounting and installing the drive motor.
Steps for installing the bearing housing and its associated parts.
Identification and installation of suspension system parts, including rods and bushings.
Components and installation procedures for water inlet connections.
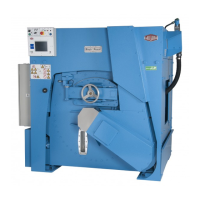
Mechanical drawings with dimensions for the 4226X7J,X7W model.
Mechanical drawings with dimensions for model options.
Mechanical drawings with dimensions for the pedestal base.
Mechanical drawings with dimensions for the 4232X7J,X7W model.
Mechanical drawings with dimensions for model options.
Mechanical drawings with dimensions for the pedestal base.
| Model | 42032X7J |
|---|---|
| Category | Washer |
| Brand | Milnor |
| Phase | 3 |
| Frequency | 60 Hz |
| Extract G-Force | 300 G |
| Control System | E-P Plus® Control |
| Type | Industrial Washer |