6
7
WARNING To reduce the risk of injury,
wear safety goggles or glasses with side
shields.
WARNING To reduce the risk of injury,
always unplug tool before attaching or remov-
ing accessories or making adjustments. Use
only specifi cally recommended accessories.
Others may be hazardous.
OPERATION
WARNING When sander is not con-
nected to vacuum, always reinstall dust bag
assembly back onto sander. Fail ure to do so
could cause sanding dust or foreign objects to
be thrown into your face or eyes which could
result in possible serious injury.
WARNING Finish sanding can produce
clouds of fi ne dust that could ignite in the
presence of sparks or open fl ame. Always
wear a suitable dust mask or respirator and
use your sander in a well-ventilated area.
WARNING To reduce the risk of injury,
inspect for and remove all raised nails and
fasteners from workpiece before sanding.
Striking a fastener while sanding could cause
loss of control.
3. Remove the hook-and-loop pad.
4. Clean dust particles from the pad brake.
5. Apply a thin layer of lightweight grease to the
back of the pad.
6. Align the holes in the pressure sensitive adhe-
sive (PSA) pad with the four screw holes in the
sander.
7. Replace the four screws securely.
Attaching PSA Sanding Discs
1. Unplug the sander.
2. Carefully peel paper backing from the pressure
sensitive adhesive type sanding disc.
3. Align holes in sanding disc with holes in back-
ing pad, then carefully press sticky side of disc
against pad as tightly as possible.
NOTE: Holes in sanding disc must line up with
holes in the backing pad in order for the dustless
feature of the sander to function properly.
NOTE: It is recommended that you clean back-
ing pad occasionally by brushing lightly with a
small brush. Dust buildup on backing pad could
cause sanding disc not to stick properly.
Remove PSA Sanding Disc Before Storage
Do not store the sander with the sanding disc in-
stalled. Heat generated from sanding causes the
pressure sensitive adhesive to fl ow and form a tight
bond between the backing pad and sanding disc.
Removing the sanding disc soon after you have
fi nished a sanding operation avoids letting the
adhesive set up. If the sanding disc is left on the
backing pad for an extended period of time after
use, the adhesive will set up and cause the sanding
disc to become diffi cult to remove.
It may also tear when removing. When this situation
occurs, it becomes diffi cult to clean the backing pad
for the next sanding disc.
NOTE: If you forget to remove the sanding disc
after a sanding operation, sand for a few minutes
to soften the adhesive backing before attempting
to remove sanding disc.
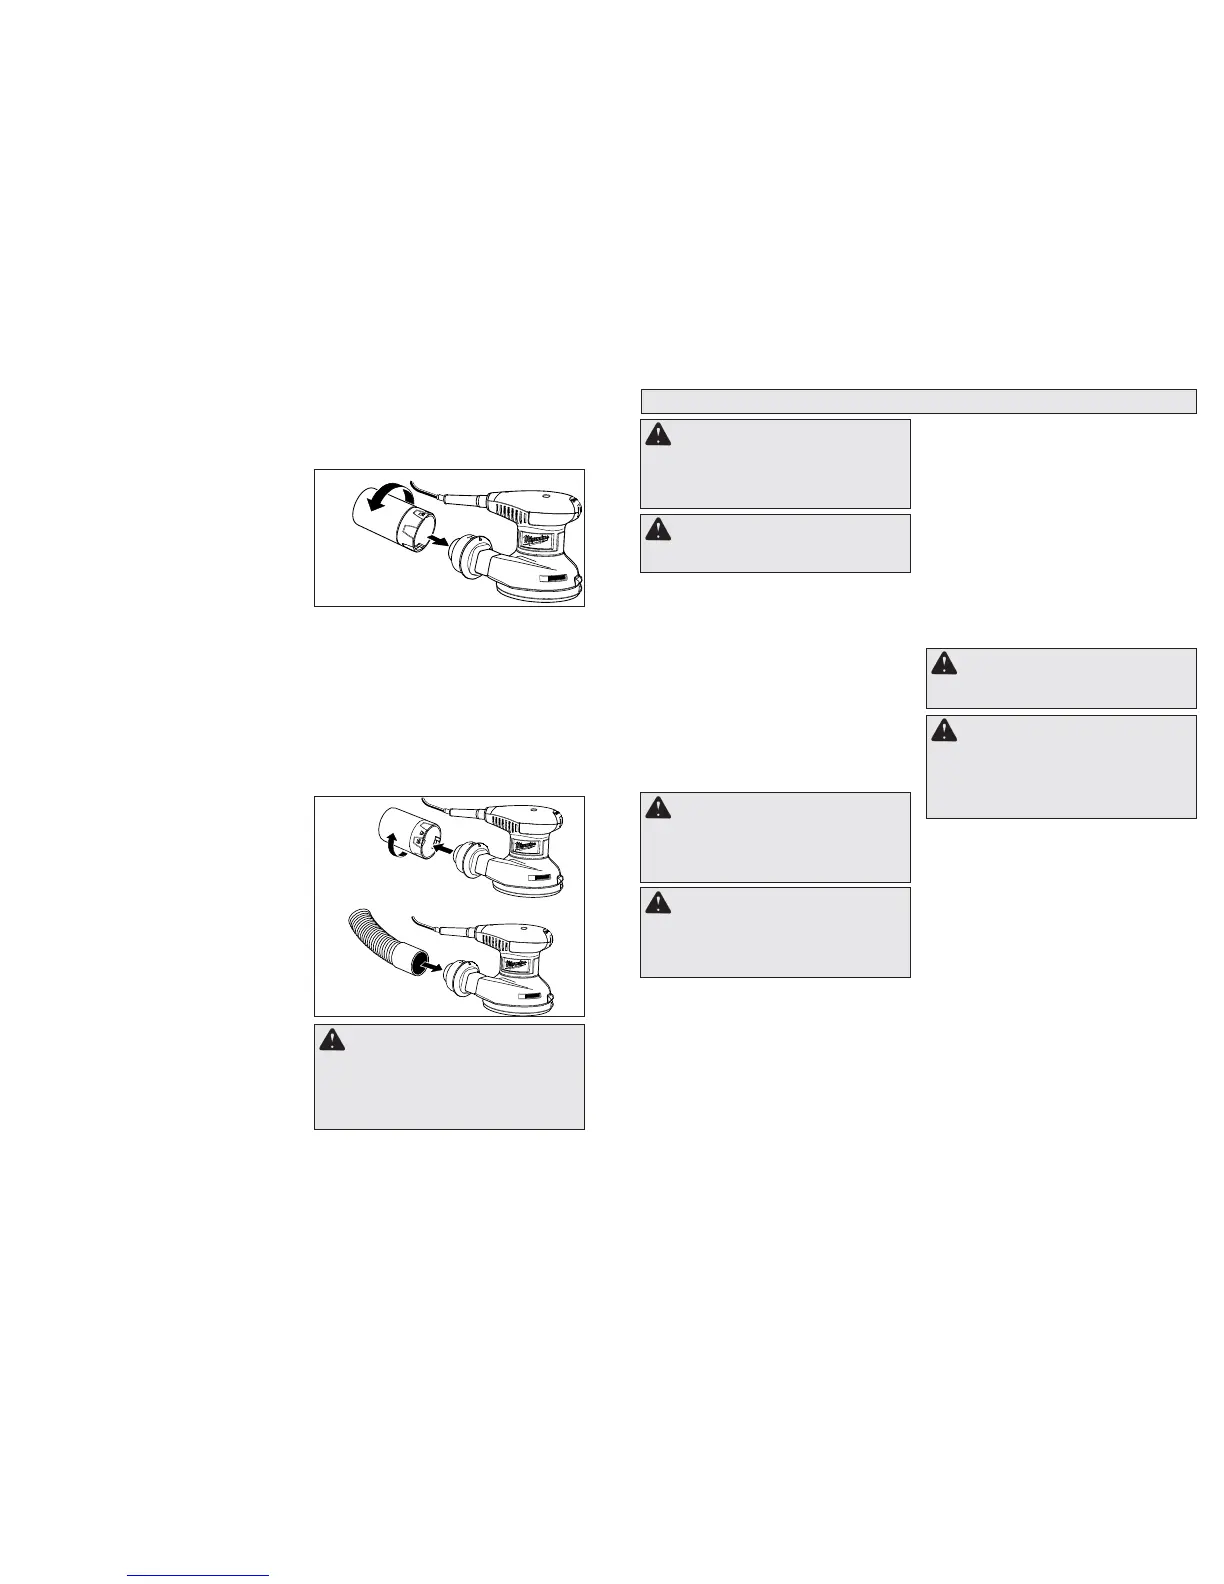
Fig. 3
2. Line up the “unlock” symbol on the dust bag with
the arrow on the dust collection port and slide
the bag assembly onto the port. To lock in place,
rotate the bag until the arrow on the port aligns
with the “lock” symbol on the bag.
Fig. 4
Attaching the Sander to a Vacuum
You can easily attach the dust collection system of
the sander to a vacuum.
1. Unplug the sander.
2. Remove the dust bag from the sander.
3. Attach vacuum hose to blower exhaust.
NOTE: Smaller vacuum hoses fi t inside blower
exhaust. Larger vacuum hoses fi t outside blower
exhaust.
4. Connect sander and vacuum to power supply.
Attaching The Dust Bag
The dust bag provides a dust collection system for
the sander. Sanding dust is drawn up through the
holes of the sanding disc and collected in the dust
bag during sanding. To attach the dust bag:
1. Unplug the sander.
Starting and Stopping the Tool
To start the sander, switch ON/OFF Switch to ON.
To stop sander, switch ON/OFF Switch to OFF.
Variable Speed Switch
The variable speed feature allows the sander to op-
erate at speeds that can be adjusted by rotating the
dial on the variable speed switch from 1 to 6. The
dial is conveniently located on the motor housing,
allowing operator control of disc speed. To increase
sanding disc speed, turn the dial on the variable
speed switch to a higher setting. Turn dial to a lower
setting to decrease sanding disc speed.
• Varying pressure applied to the sander will affect
its rotating speed. A light pressure is recom-
mended for fi ne work, moderate pressure for
rough work. Excessive pressure does not allow
the pad to rotate enough.
• Keep sanding pad fl at on the workpiece. Tipping
the sander or using the edges of the pad may
produce an uneven fi nish, and reduce pad life.
• Keep sander moving in broad even strokes
across the workpiece. Sanding in one spot too
long can cause gouging and uneven results.
• Check the workpiece frequently, random orbit
sanders work more aggressively than simple
orbital sanders.
General Sanding with Random Orbit Sanders
When using random orbit sanders there are a few
things to keep in mind:
• Unlike most sanders, random orbit sanders
should be placed on the workpiece BEFORE
the tool is started. If the sander is started before
it is placed on the workpiece, the free fl oating
pad may be spinning at a speed that can cause
scratches when it is fi nally placed on work-
piece.
• Unlike most sanders, random orbit sanders can
be moved across the workpiece in any direction
(in the case of wood, regardless of the direction
of the grain).
WARNING Properly secure workpiece
before sanding. Unsecured work could be
thrown towards the operator causing injury.
WARNING Do not wear loose cloth-
ing or jewelry when operating sander. They
could get caught in moving parts causing
serious injury. Keep head away from sander
and sanding area. Hair could be drawn into
sander causing serious injury.
1. Place sander on the workpiece and turn on
the sander.
2. Keep the sanding disc fl at against the workpiece,
keep the sander moving across the workpiece,
and use long, sweeping strokes.
3. Begin sanding with a coarse grit sandpaper and
gradually use fi ner and fi ner grits of sandpaper
until the desired fi nish is reached. For example
when using the sander on wood, begin with an
80 grit followed by a 120 grit, then a 180 grit and
so on.
Removing Paint or Varnish
1. When removing several layers of paint or var-
nish, remove as much as possible with a paint
solvent or varnish remover.
2. Scrape away the residue with a putty knife
or other scraping tool and allow the surface
to cool and dry before applying sander to the
workpiece.
 Loading...