6
ACCESSORIES
For a complete listing of accessories refer to your
MILWAUKEE Electric Tool
To obtain a catalog, contact your local authorised
catalog.
WARNING $OZD\VUHPRYHEDWWHU\
SDFNEHIRUHFKDQJLQJRUUHPRYLQJDF-
FHVVRULHV2QO\XVHDFFHVVRULHVVSHFL¿FDOO\
UHFRPPHQGHGIRUWKLVWRRO2WKHUVPD\EH
KD]DUGRXV
0DLQWDLQLQJ7RRO
Keep your tool, battery pack and charger in good re-
pair by adopting a regular maintenance program.
After six months to one year, depending on use,
return the tool, battery pack and charger to
/XEULFDWLRQ
0HFKDQLFDO LQVSHFWLRQ DQG FOHDQLQJ JHDUV
spindles, bearings, housing, etc.)
(OHFWULFDO LQVSHFWLRQ EDWWHU\ SDFN FKDUJHU
motor)
7HVWLQJ WR DVVXUH SURSHU PHFKDQLFDO DQG
electrical operation
If the tool does not start or operate at full power
with a fully charged battery pack, clean the contacts
on the battery pack. If the tool still does not work
properly, return the tool, charger and battery pack,
to
MILWAUKEE dealer for:
an
an MILWAUKEE dealer.authorised
MAINTENANCE
&OHDQLQJ
Clean dust and debris from charger and tool vents.
Keep tool handles clean, dry and free of oil or grease.
Use only mild soap and a damp cloth to clean the
tool, battery pack and charger since certain cleaning
agents and solvents are harmful to plastics and other
insulated parts. Some of these include gasoline,
turpentine, lacquer thinner, paint thinner, chlorinated
cleaning solvents, ammonia and household deter-
JHQWVFRQWDLQLQJDPPRQLD1HYHUXVHÀDPPDEOHRU
combustible solvents around tools.
5HSDLUV
For repairs, return the tool, battery pack and char-
ger to the nearest service center.
WARNING 7RUHGXFHWKHULVNRISHU-
VRQDOLQMXU\DQGGDPDJHQHYHULPPHUVH\RXU
WRROEDWWHU\SDFNRUFKDUJHULQOLTXLGRUDOORZ
DOLTXLGWRÀRZLQVLGHWKHP
WARNING 7RUHGXFHWKHULVNRILQMXU\
DOZD\VXQSOXJWKHFKDUJHUDQGUHPRYH
WKHEDWWHU\SDFNIURPWKHFKDUJHURU WRRO
EHIRUHSHUIRUPLQJDQ\PDLQWHQDQFH1HYHU
GLVDVVHPEOHWKHWRROEDWWHU\SDFNRUFKDUJHU
&RQWDFW
for ALL UHSDLUV
Dn authorisedMILWAUKEEdealer
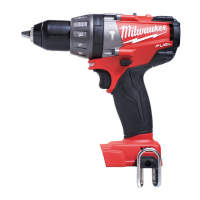
APPLICATIONS
WARNING 7RUHGXFHWKHULVNRIHOHF-
WULFVKRFNFKHFNZRUNDUHDIRUKLGGHQSLSHV
DQGZLUHVEHIRUHGULOOLQJRUGULYLQJVFUHZV
'ULOOLQJLQ:RRG&RPSRVLWLRQ 0DWHULDOV DQG
3ODVWLF
When drilling in wood, composition materials and
plastic, select the
drill-only operating mode.
Start the drill gradually increasing speed as slowly,
you drill. When drilling into wood, use wood augers
or twist drill bits. Always use sharp bits. When using
twist drill bits, pull the bit out of the hole frequently
WR FOHDU FKLSV IURP WKH ELW ÀXWHV 7R UHGXFH WKH
chance of splintering, back work with a piece of
scrap wood. Select low speeds for plastics with a
low melting point.
'ULOOLQJLQ0HWDO
When drilling in metal, select the
drill-only
operating mode. Use high speed steel twist drills
or hole saws. Use a center punch to start the hole.
Lubricate drill bits with cutting oil when drilling in
iron or steel. Use a coolant when drilling in nonfer-
rous metals such as copper brass or aluminum.
Back the material to prevent binding and distortion
on breakthrough.
'ULOOLQJLQ0DVRQU\
When drilling in masonry, select the
,
hammer
drill operating mode. Use high speed carbide-tipped
bits. Drilling soft masonry materials such as cinder
block requires little pressure. Hard materials like
concrete require more pressure. A smooth, even
ÀRZRIGXVWLQGLFDWHVWKHSURSHUGULOOLQJUDWH'RQRW
let the bit spin in the hole without cutting. Do not
use water to settle dust or to cool bit. Both actions
will damage the carbide.
'ULYLQJ6FUHZVDQG1XW5XQQLQJ
Drill a pilot hole when driving screws into thick or
hard materials. Select the
driving screws mode.
Set the torque selector collar to the proper position
and set the speed Use the proper style and
size screwdriver bit for the type of screw you are
using. With the screwdriver bit in the screw, place
WKHWLSRIWKHVFUHZRQWKHZRUNSLHFHDQGDSSO\¿UP
pressure before pulling the trigger. Screws can be
removed by reversing the motor.
2YHUORDGLQJ
Continuous overloading may cause permanent
damage to tool or battery pack.
to low.
authorised
MILWAUKEE dealer.
 Loading...