EasyManua.ls Logo

Milwaukee M18 FUEL 2804-20 - User Manual

Milwaukee M18 FUEL 2804-20
6 pages
Print Icon
To Next Page IconTo Next Page
Loading...
Cat. No.
2803-20, 2804-20
M
18 FUEL 1/2" DRILL/DRIVER AND HAMMER DRILL/DRIVER
OPERATOR'S MANUAL
WARNING To reduce t
he risk of injury, user must read and understand operator's manual.

Other manuals for Milwaukee M18 FUEL 2804-20

Question and Answer IconNeed help?

Do you have a question about the Milwaukee M18 FUEL 2804-20 and is the answer not in the manual?

Summary

General Power Tool Safety Warnings

Work Area Safety

Guidelines for maintaining a clean, well-lit, and safe work environment to prevent accidents and injuries.

Electrical Safety

Precautions to prevent electric shock, including proper grounding, cord care, and avoiding wet conditions.

Personal Safety

Advice on staying alert, using personal protective equipment, and preventing unintentional starting of tools.

Battery Tool Use and Care

Service

Instructions for servicing tools and battery packs, emphasizing qualified repair and manufacturer use.

Specific Safety Rules for Drill; Drivers

Specifications

Details on tool voltage, battery type, charger, operating temperature, and model-specific performance data.

Functional Description

Symbology

Explanation of symbols used on the tool and in the manual, including Volts and Direct Current indicators.

Assembly

Installing the Side Handle

Step-by-step guide on how to attach and secure the side handle for improved tool control.

Removing;Inserting the Battery

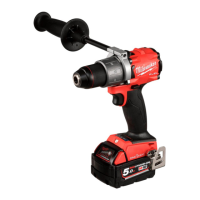
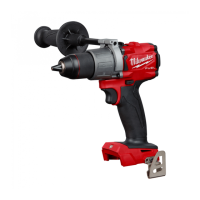
Instructions on how to safely remove and insert the battery pack into the tool.

Installing Bits

Procedure for inserting and securing drill or screwdriver bits into the keyless chuck.

Operation

Selecting Speed

Guidance on using the speed selector for low (1) and high (2) speed settings.

Using the Control Switch

Instructions for operating the forward, reverse, and lock functions of the control switch.

Starting, Stopping and Controlling Speed

How to start, stop, and adjust the speed of the tool using the trigger.

Applications

Drilling

Advice on drilling techniques, including pressure, bit binding, and tool stalling.

Drilling in Wood, Composition Materials and Plastic

Specific methods for drilling these materials, including speed and bit selection.

Drilling in Metal

Techniques for drilling metal, including bit types, lubrication, and material support.

Drilling in Masonry

Guidance for masonry drilling, focusing on hammer mode, bit types, and pressure.

Driving Screws and Nut Running

Instructions for driving screws, including pilot holes, torque settings, and bit selection.

Maintenance

Maintaining Tool

Recommendations for regular inspection and upkeep of the tool, battery pack, and charger.

Cleaning

Procedures for cleaning the tool using mild soap and a damp cloth, avoiding harsh solvents.

Repairs

Information on where to return the tool, battery pack, or charger for necessary repairs.

Overview

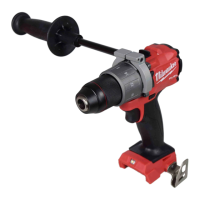
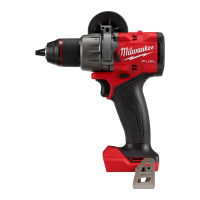
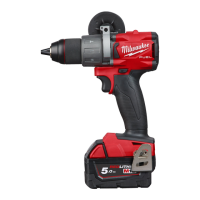
This document serves as an operator's manual for the Milwaukee M18 FUEL™ 1/2" Drill/Driver (Cat. No. 2803-20) and Hammer Drill/Driver (Cat. No. 2804-20). It provides essential safety warnings, functional descriptions, usage instructions, and maintenance guidelines for these cordless power tools.

Function Description

The Milwaukee M18 FUEL™ 1/2" Drill/Driver and Hammer Drill/Driver are versatile cordless power tools designed for drilling and driving applications. The drill/driver model (2803-20) is primarily used for drilling into various materials like wood, composition materials, plastic, and metal, as well as for driving screws. The hammer drill/driver model (2804-20) expands on these capabilities by adding a hammer-drilling mode, making it suitable for drilling into masonry materials in addition to all the functions of the drill/driver. Both tools are equipped with a keyless chuck for easy bit changes and a torque selector collar to adjust the clutch setting for driving screws or to select the drilling/hammer-drilling mode. A speed selector allows users to choose between low and high speeds, optimizing performance for different tasks. The control switch enables forward (clockwise) and reverse (counterclockwise) rotation, and also serves as a lock to prevent unintentional starting. An integrated LED light illuminates the work area, enhancing visibility. The tools are powered by M18™ battery packs, which are removable and rechargeable. A belt hook is included for convenient carrying.

Usage Features

Before operating, users are warned to read and understand the entire operator's manual to reduce the risk of injury. Personal protective equipment, especially eye protection, is always recommended. When working in dusty environments, appropriate respiratory protection or an OSHA-compliant dust extraction solution should be used.

  • Side Handle Installation: For enhanced control and safety, especially with the hammer drill/driver, a side handle is provided. To install, the side handle grip is loosened, the hooks are fitted into the slots on the gear case ring, and then tightened securely. The handle can be positioned to the left or right.
  • Bit Installation: Always remove the battery pack before inserting or removing bits. The keyless chuck allows for one-handed tightening, providing higher grip strength. To open the chuck jaws, turn the sleeve counterclockwise. For drill bits, allow the bit to strike the bottom of the chuck, center it, and then lift it slightly (about 1/16"). For screwdriver bits, insert the bit far enough for the chuck jaws to grip the hex. To close, turn the sleeve clockwise until a ratcheting sound is heard and the sleeve can no longer be rotated, indicating the bit is secure.
  • Mode Selection (2803-20 Drill/Driver):
    • Drilling Mode: Rotate the torque selector collar until the drill symbol aligns with the arrow.
    • Driving Mode: Rotate the torque selector collar until the desired clutch setting (numbered) aligns with the arrow. The adjustable clutch prevents overdriving screws and damaging the workpiece or tool by slipping at a preset torque.
  • Mode Selection (2804-20 Hammer Drill/Driver):
    • Hammer-Drilling Mode: Rotate the torque selector collar until the hammer symbol aligns with the arrow. Apply pressure to the bit to engage the hammering mechanism.
    • Drilling Only Mode: Rotate the torque selector collar until the drill symbol aligns with the arrow.
    • Driving Screws Mode: Rotate the torque selector collar until the desired clutch setting aligns with the arrow.
  • Speed Selection: The speed selector is located on top of the motor housing. Always allow the tool to come to a complete stop before changing speeds. Push the selector to "1" for low speed and "2" for high speed. Low speed is recommended for starting drilling and for driving screws, while high speed is suitable for faster drilling in softer materials.
  • Control Switch: The control switch has three positions: forward, reverse, and lock. It can only be adjusted when the ON/OFF switch is not pressed.
    • Forward (Clockwise) Rotation: Push the control switch from the right side of the tool.
    • Reverse (Counterclockwise) Rotation: Push the control switch from the left side of the tool.
    • Lock: Push the control switch to the center position to prevent the trigger from working. Always lock the trigger or remove the battery pack when performing maintenance, changing accessories, or storing the tool.
  • Starting, Stopping, and Speed Control: To start, grasp the handle(s) firmly and pull the trigger. An LED will turn on when the trigger is pulled and turn off shortly after release. Speed is varied by increasing or decreasing pressure on the trigger; the further the trigger is pulled, the greater the speed. To stop, release the trigger and ensure the tool comes to a complete stop before laying it down.
  • Drilling Techniques:
    • General: Place the bit on the work surface and apply firm pressure. Too much pressure reduces efficiency, while too little causes the bit to slide. If the tool stalls, reduce pressure slightly. If the bit binds, reverse the motor to free it.
    • Wood, Composition Materials, Plastic: Use the drill-only mode. Start slowly and gradually increase speed. Use wood augers or twist drill bits. Clear chips frequently. Back work with scrap wood to prevent splintering. Use low speeds for plastics.
    • Metal: Use the drill-only mode. Use high-speed steel twist drills or hole saws. Use a center punch to start holes. Lubricate drill bits with cutting oil for iron/steel and coolant for nonferrous metals. Back the material to prevent binding.
    • Masonry: Use the hammer drill operating mode with high-speed carbide-tipped bits. Apply little pressure for soft masonry and more pressure for hard materials. A smooth, even dust flow indicates proper drilling. Do not let the bit spin without cutting. Do not use water to settle dust or cool the bit.
  • Driving Screws and Nut Running: Drill a pilot hole for thick or hard materials. Set the torque selector collar to the proper position and speed to low. Use the correct screwdriver bit. Place the bit in the screw, apply firm pressure, and pull the trigger. Screws can be removed by reversing the motor.
  • Overloading: Continuous overloading can permanently damage the tool or battery pack.

Maintenance Features

Regular maintenance is crucial for ensuring the safety and longevity of the tool, battery pack, and charger. Always unplug the charger and remove the battery pack from the tool before performing any maintenance. Never disassemble the tool, battery pack, or charger; all repairs should be performed by a MILWAUKEE service facility.

  • Tool Inspection: Adopt a regular maintenance program. Inspect the tool for issues such as undue noise, misalignment or binding of moving parts, breakage, or any other condition that might affect operation. Return the tool, battery pack, and charger to a MILWAUKEE service facility for repair. An inspection is recommended after six months to one year of use.
  • Battery Contacts: If the tool does not start or operate at full power with a fully charged battery pack, clean the contacts on the battery pack. If the issue persists, return the tool, charger, and battery pack to a MILWAUKEE service facility for repairs.
  • Cleaning: Keep handles and grasping surfaces dry, clean, and free from oil and grease. Clean dust and debris from vents. Use only mild soap and a damp cloth for cleaning. Avoid using certain cleaning agents and solvents (e.g., gasoline, turpentine, lacquer thinner, paint thinner, chlorinated cleaning solvents, ammonia, and household detergents containing ammonia) as they can be harmful to plastics and other insulated parts. Never immerse the tool, battery pack, or charger in liquid or allow liquid to flow inside them.
  • Accessory Use: Only use accessories specifically recommended by MILWAUKEE. Using unapproved accessories can be hazardous.
  • Labels and Nameplates: Maintain labels and nameplates. If they are unreadable or missing, contact a MILWAUKEE service facility for a free replacement, as they contain important safety information.
  • Battery Charging: Follow all charging instructions provided with the charger. Do not charge the battery pack or tool outside the specified temperature range, as improper charging can damage the battery and increase the risk of fire.

The manual also includes a warning about dust created by power sanding, sawing, grinding, drilling, and other construction activities, which may contain chemicals known to cause cancer, birth defects, or other reproductive harm. Users are advised to work in well-ventilated areas and use approved safety equipment, such as dust masks, to reduce exposure to these chemicals.

Milwaukee M18 FUEL 2804-20 Specifications

General IconGeneral
Motor TypeBrushless
Voltage18V
Max Torque1, 200 in-lbs
Chuck Size1/2 inch
Power SourceBattery
Battery SystemM18
Battery TypeLithium-Ion
No Load Speed0-550 / 0-2, 000 RPM
Max RPM2000 RPM
Length6.9 in

Related product manuals